Edge model contest

Ask other modelers for a little help / knowledge ?

Re: Edge model contest

Postby Mitch » Sun Oct 27, 2013 11:59 am

The blast tube is clear plastic. I bought a few at the FAC contest in CA earlier this year. (After I blew a rubber motor in my Me 109!) I have a couple different sizes and cut it to length to extend just outside the model and it will be locked into place when winding. I was told you can buy this type of plastic at you local pet store in the fish tank accessories department.

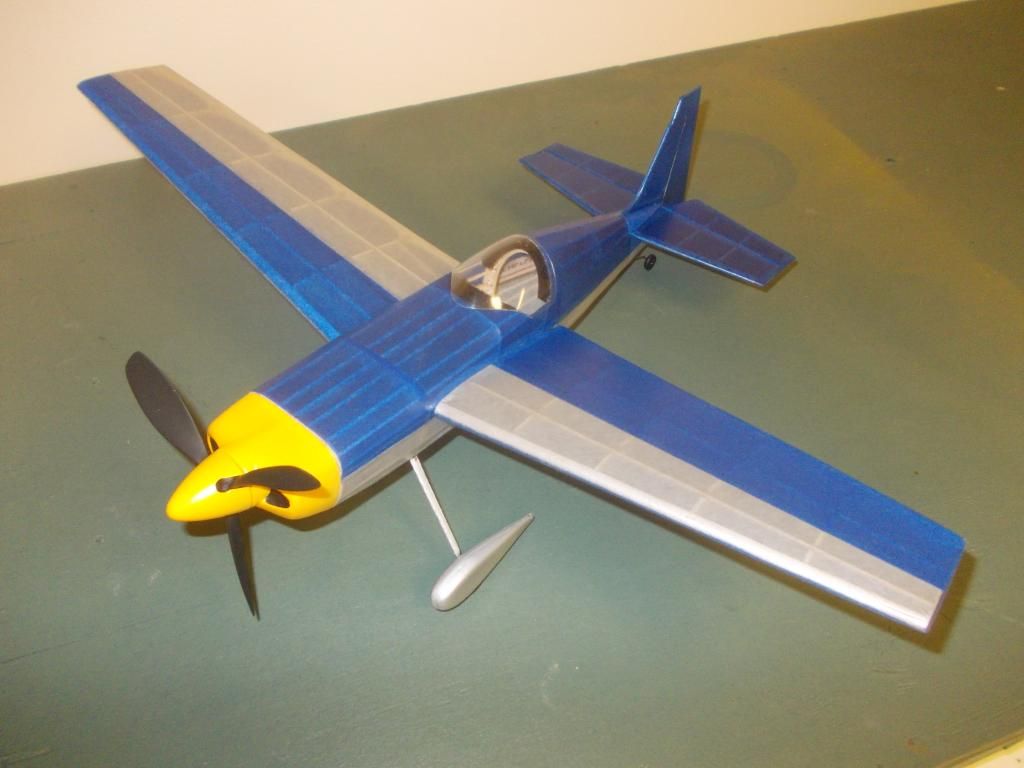
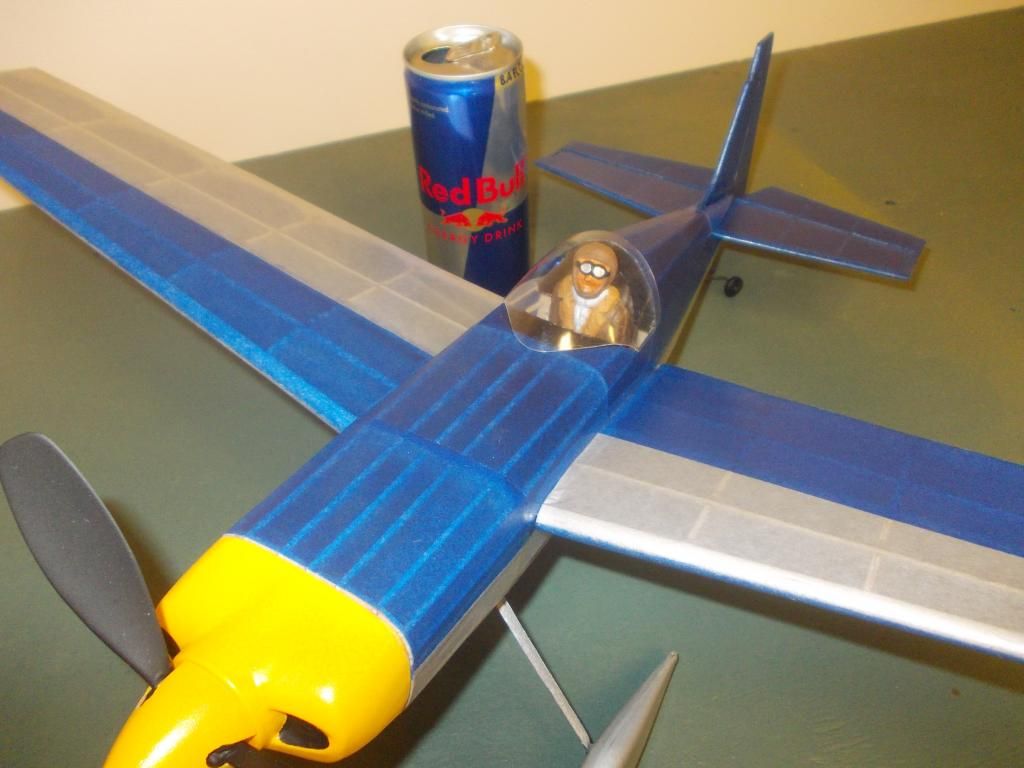
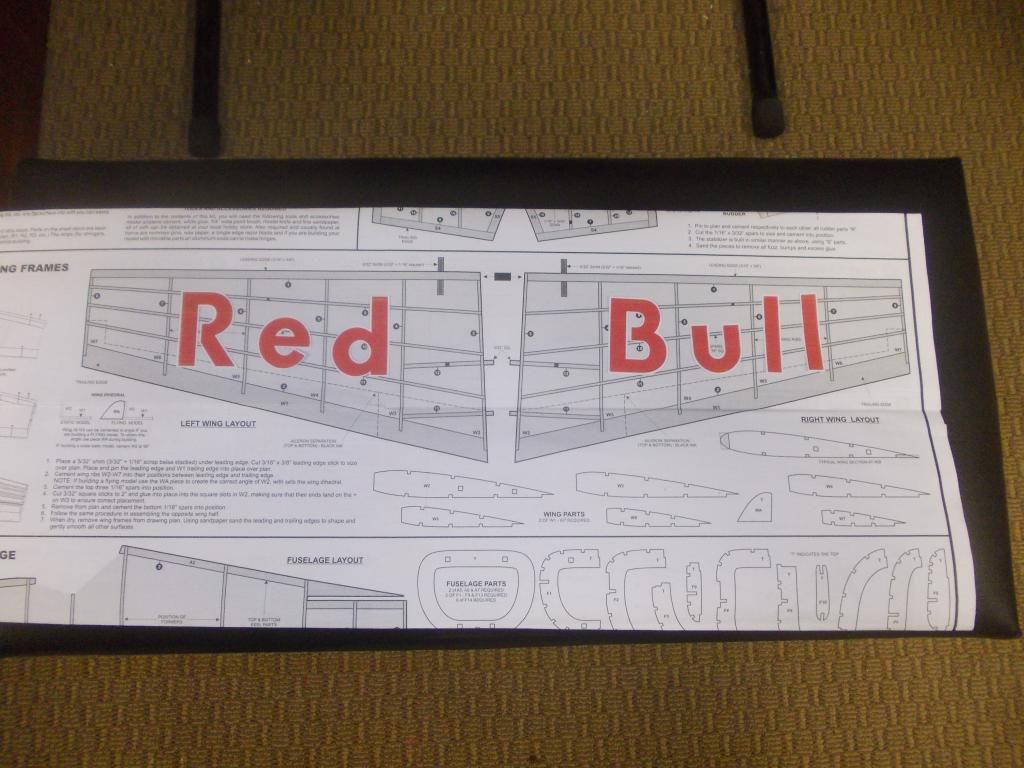
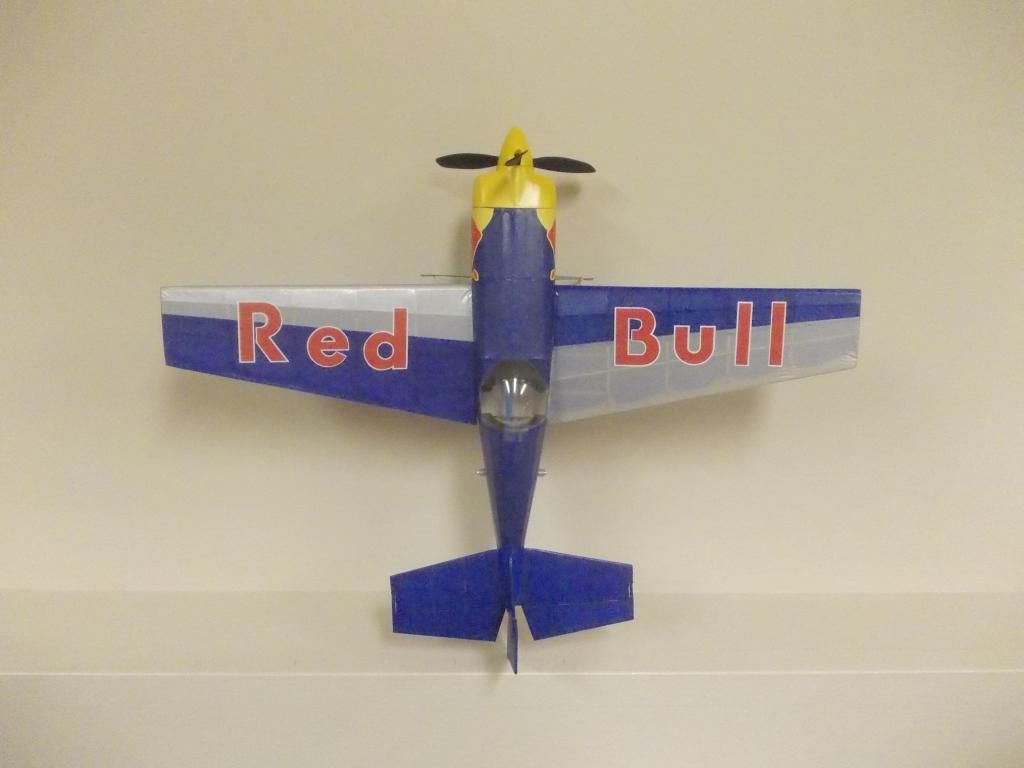
The paper is domestic tissue and I believe is the same type as Guillow's. No advantage there. I chose to go with different colors because I am copying the Red Bull Team Colors. I see they have different planes and I came up with something I like:
Image
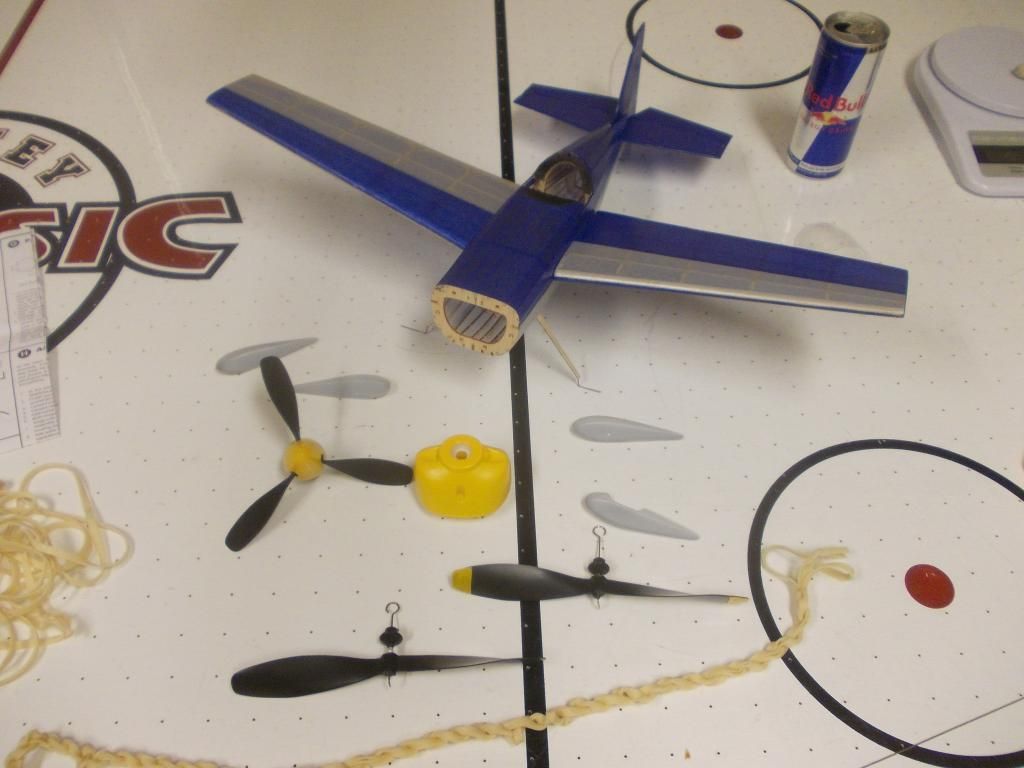
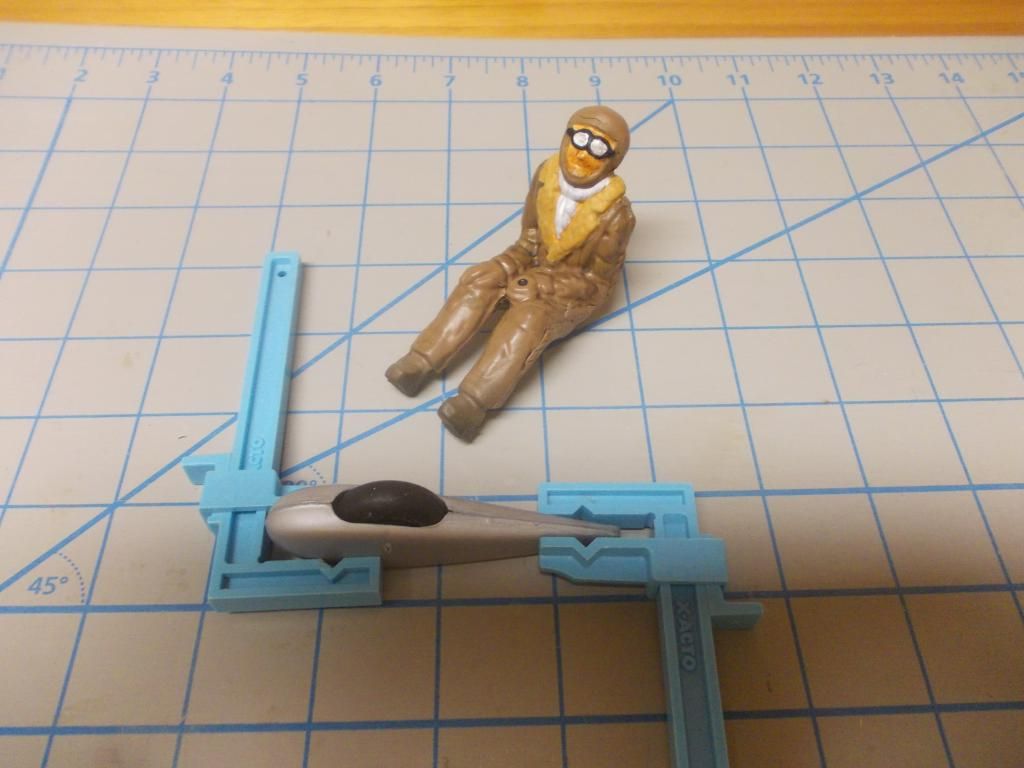
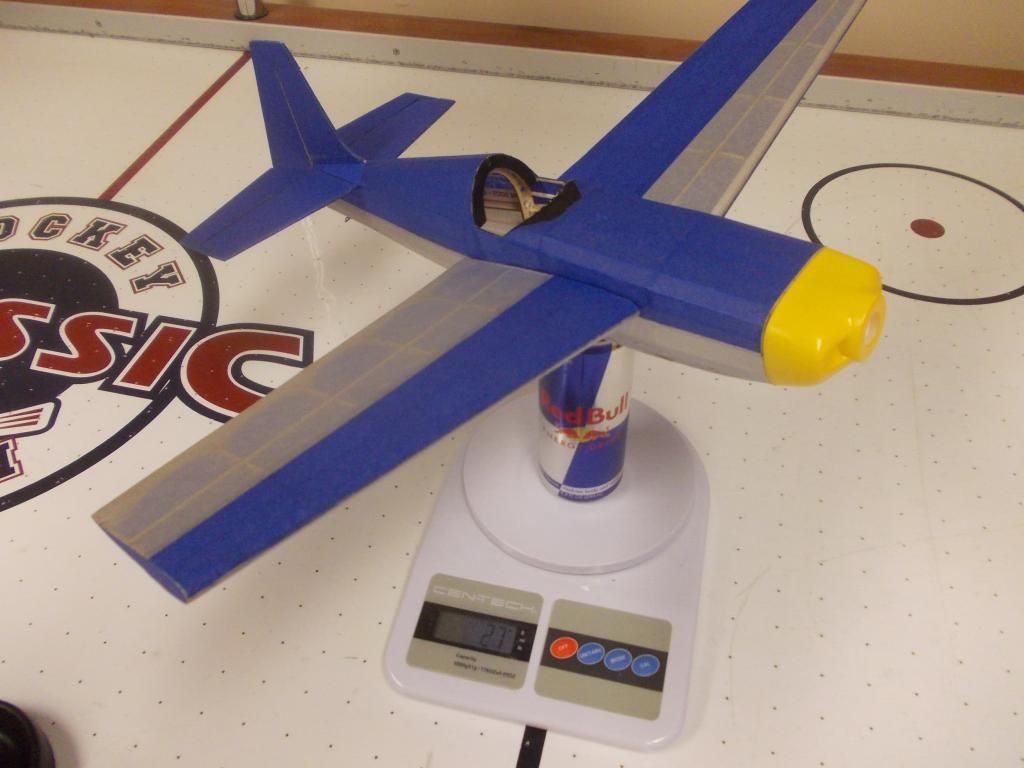
The model is now ready for doping and flight tests. The can was placed on the scale before I turned on the scale... The model as you see it weighs 27 grams, and feels balanced.

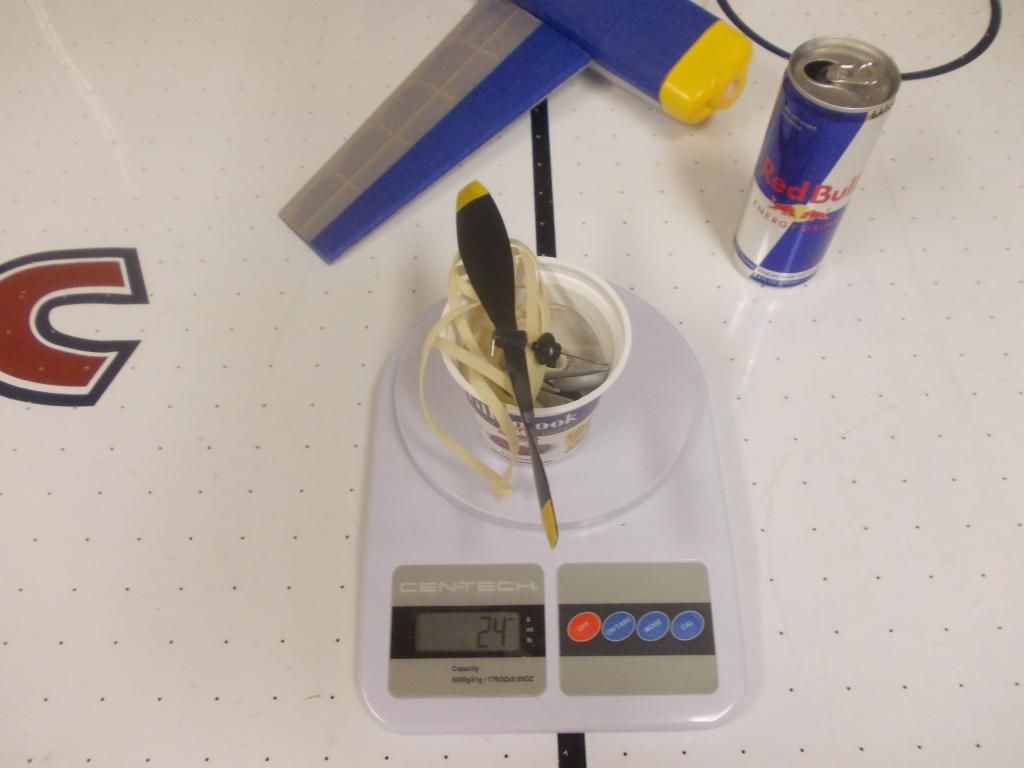
Unfortunately I will need to add all this other stuff to finish and fly the model:
Image
I forgot the landing gear wire and that is another 1 gram...
So lets see, 27+24+1 = 52 grams. And I still need to dope the model. At least I should be under 55 grams. (My calculated wing area) So this model will have a heavier wing loading than my 400 series WW2 birds! :( But we should ALL be flying the same model! :D

My daughter agreed to come with me to the school yard and be my assistant and timer! Mitch
Mitch
 
Posts: 1347
Joined: Mon Aug 22, 2011 9:16 pm
Location: Kent, WA

Re: Edge model contest

Postby Mitch » Sun Oct 27, 2013 9:51 pm

Hey Guys... only a few days to go and I just joined up in the yahoo group... and there are more entries than I expected... I will keep posting here for you folks that are not in the yahoo group...

Status report from my House...
Image
We had a party at our house last night and some old friends even came by...

Seriously, after a morning of rest... I spayed the model with 2 coats of Top Flite LusterKote (Crystal Clear). I used this on my Mustang and now really enjoy the ease of application. I got a few short glide tests in, added 4 grams of clay to the nose. That will need to be adjusted again as I am now adding the main landing gear. I am hoping the model will be finished tomorrow and start powered test flights:
Image
I would have liked to make the words "Red Bull" on the wings and the Bull on the side of the model, but now I just want to get the model flight ready and clock in some flights!

Mitch :D
I will give an update at the end of each day until October 31st! Mitch
Mitch
 
Posts: 1347
Joined: Mon Aug 22, 2011 9:16 pm
Location: Kent, WA

Re: Edge model contest

Postby davidchoate » Mon Oct 28, 2013 8:12 am

i think its cool they have a new model. that video was awesome Mitch, it's inspired me to wok on my model all Sunday.
You do not have the required permissions to view the files attached to this post.
davidchoate
 
Posts: 1263
Joined: Wed Aug 14, 2013 6:41 am
Location: PHiladelphia PA

Re: Edge model contest

Postby Mitch » Mon Oct 28, 2013 9:36 am
Hey Guys, I meant to put this post here... a few days ago I posted this over on Dave's Post... I brought it over here to show you my skeleton and how I ligthened it up a bit. Although the kit wood is very nice, I thought if I can I will remove some excess!

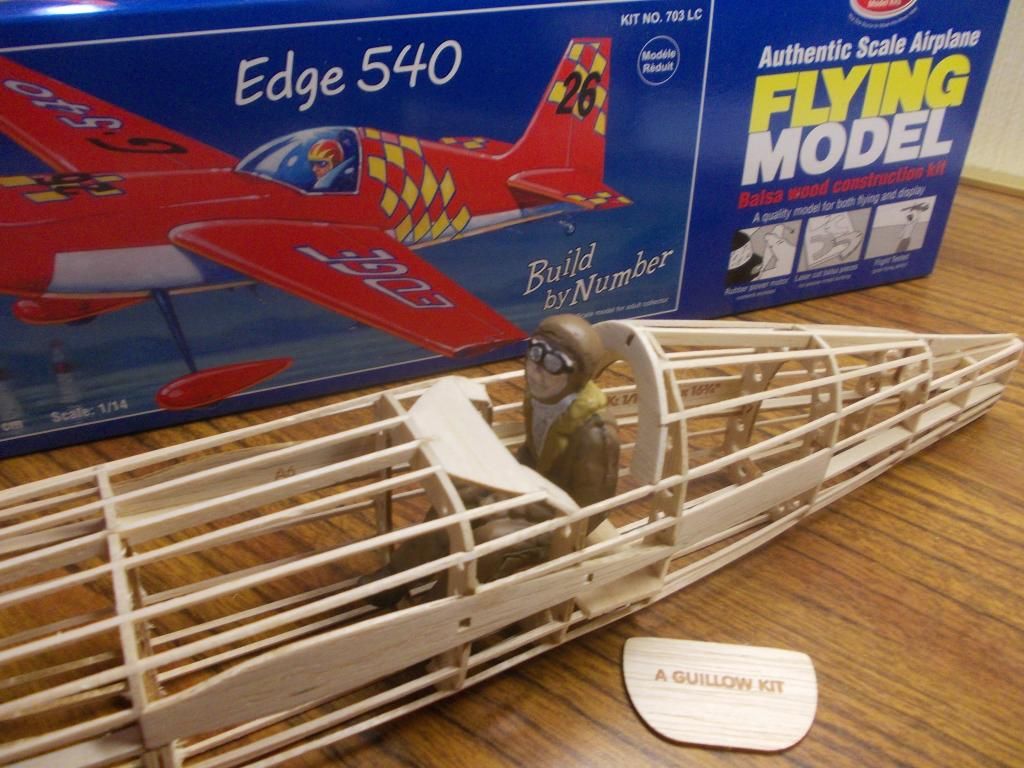
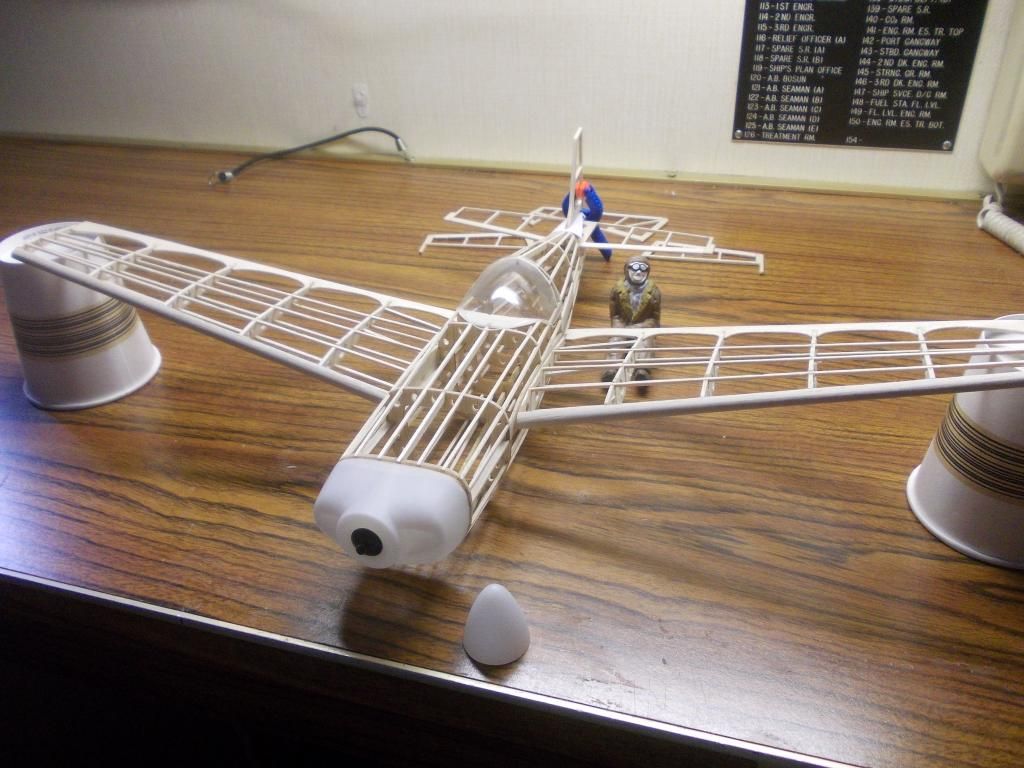
Just got home and here are a few pics of my skeleton:
Image
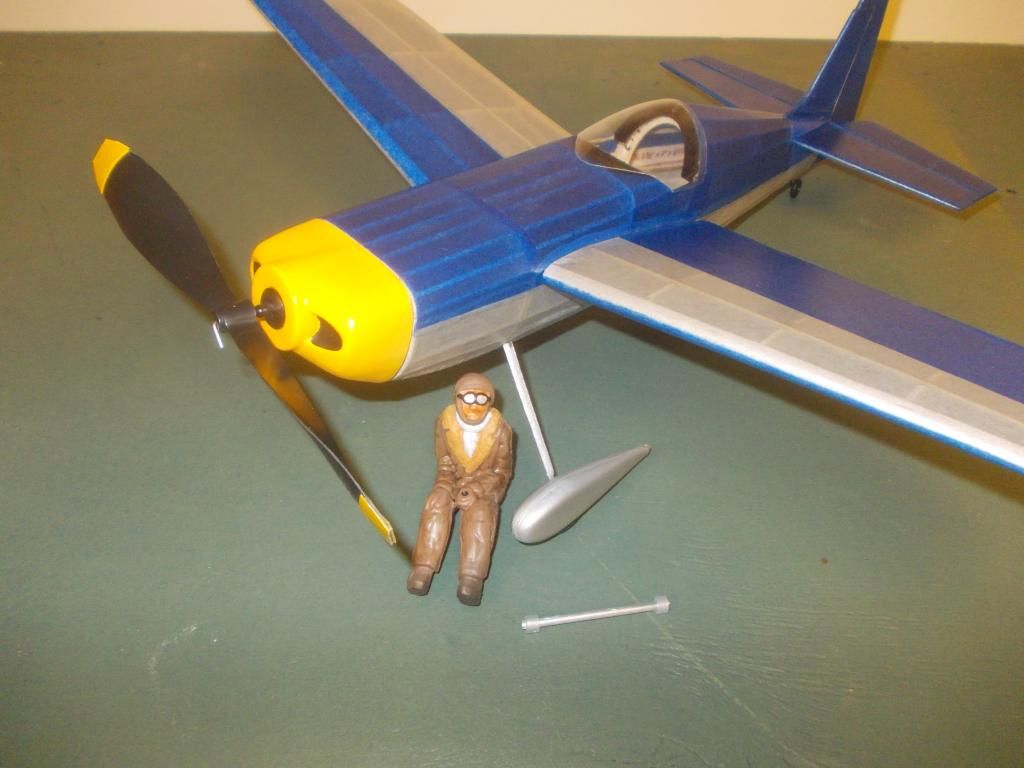
The Pilot is from the Stearman kit. I will purchase a few more pilots from the parts dept. Then make one for the Edge with a new helmet.
I lowered his seat down 1/8 inch so he does not bump his head.

Image
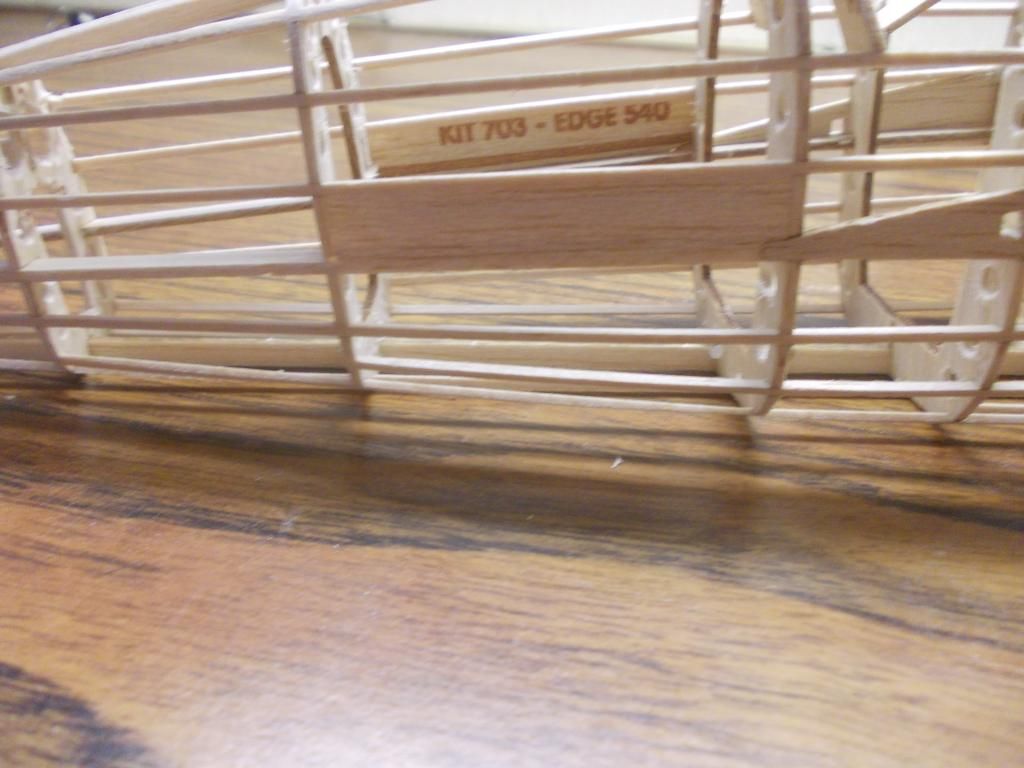
I built mine with ALL kit wood but made a few changes.

Image
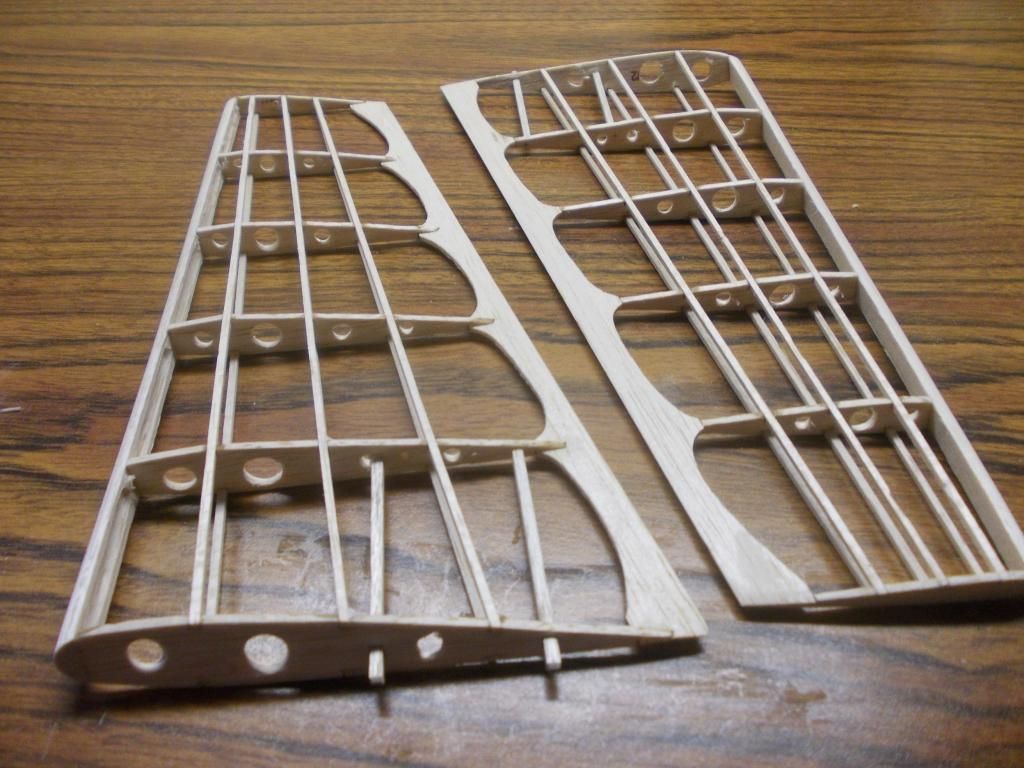
I. Remove Excess wood

Image
2. ADD MORE dihedral than they specify for a flying model

Image
3. Move the rear peg forward 1 bay. I did not drill the hole for the peg yet.

I have a few more pictures and plan to finish the model before the end of the month. I plan to make a 3 blade prop and spinner for display, and use the kit prop and remove the test pilot for FF!

Mitch :D

PS here is a pic of Maelstrom our Maine Coon Mix. My daughter found him and we searched for his owner but he is now part of our family for the past year.
Image

UPDATE: I was am not totally happy with the wheels, BUT... I am running out of time:
Image
I used the plastic wheels from a 500 kit. I glued them together last night, today is sanding and repaint and attach... Also did a touchup on my Test Pilot. He is 1/16 scale the plane is 1/14 scale so I think they are close enough! Mitch

TEST GLIDE UPDATE: the plane does NOT glide far, I believe it will need power to keep flying and have a quick fast fall out of the sky (glide). But it did show a tendency to go to the right which I desire. (I have just a little right rudder and up elevator). I hope to get in a few powered flights today!

Mitch
Mitch
 
Posts: 1347
Joined: Mon Aug 22, 2011 9:16 pm
Location: Kent, WA

Re: Edge model contest

Postby Mitch » Mon Oct 28, 2013 12:31 pm

Mid morning update:

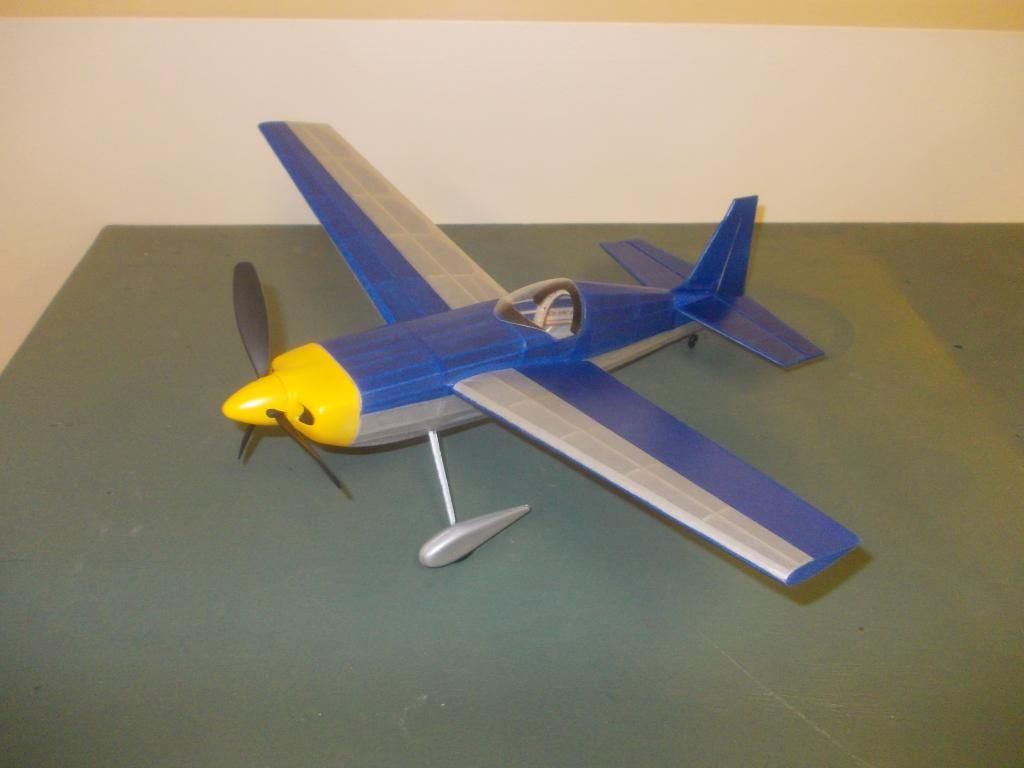
The model is finished...I am still waiting for acceptance into the G Challenge...3 more days to the deadline:
Image
I will take ALL of my entry photos before flight testing. Then I will install the peg and rubber and flying prop for flight tests and timing! A little touch up paint of Citadel Color, Regal Blue made easy work of fixing bare areas of balsa on tail edges! I am also planning on bringing the model to a show on Sunday at the Boeing Museum of Flight for the RC club. They invited ALL flying models and I got notice from the Eagle Squadron of the Flying Ace Club! :D

The model as you see her here weighs in at 45 grams! Except for the tissue paper and a few strips of bamboo, everything else on this model is 100% Guillow's. All the extra wood was from the kit scrap pile. The wheels and prop are from the 500 series. For flying, I will be using the kit's 7 inch prop with tan rubber, a crocket hook and a aluminum peg secured with 2 slices of medium fuel line hose.

Mitch

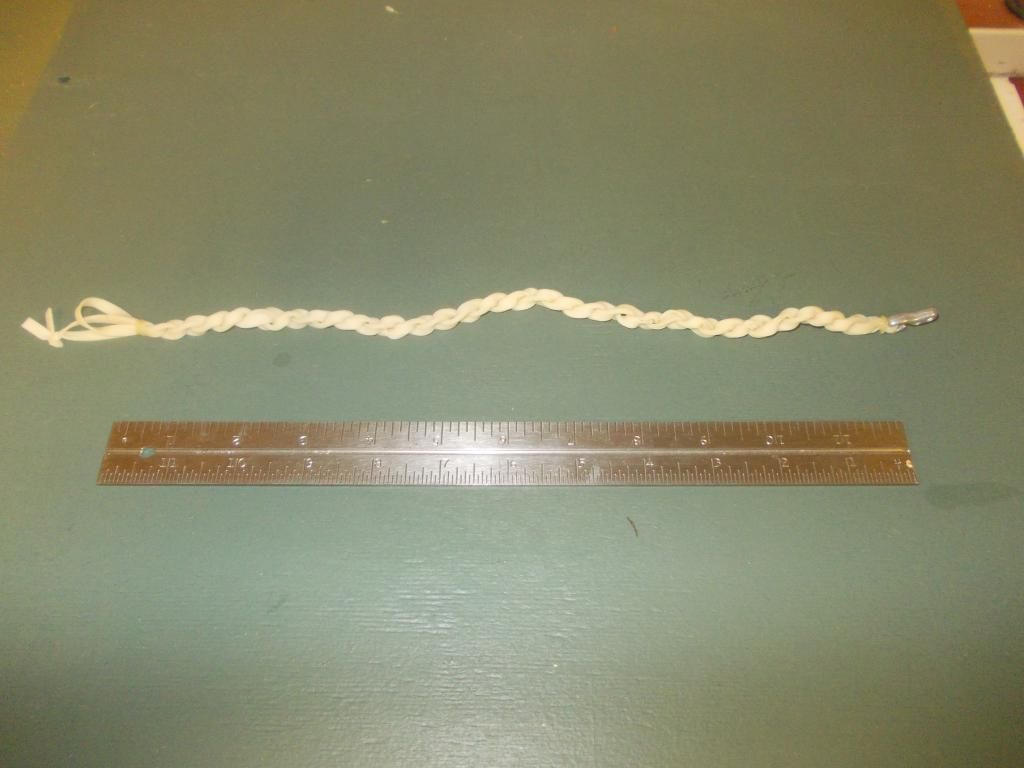
UPDATE: A decided to use white glue on the landing gear and just added a second coat. That will take some time to dry. Here is the motor I plan to use:
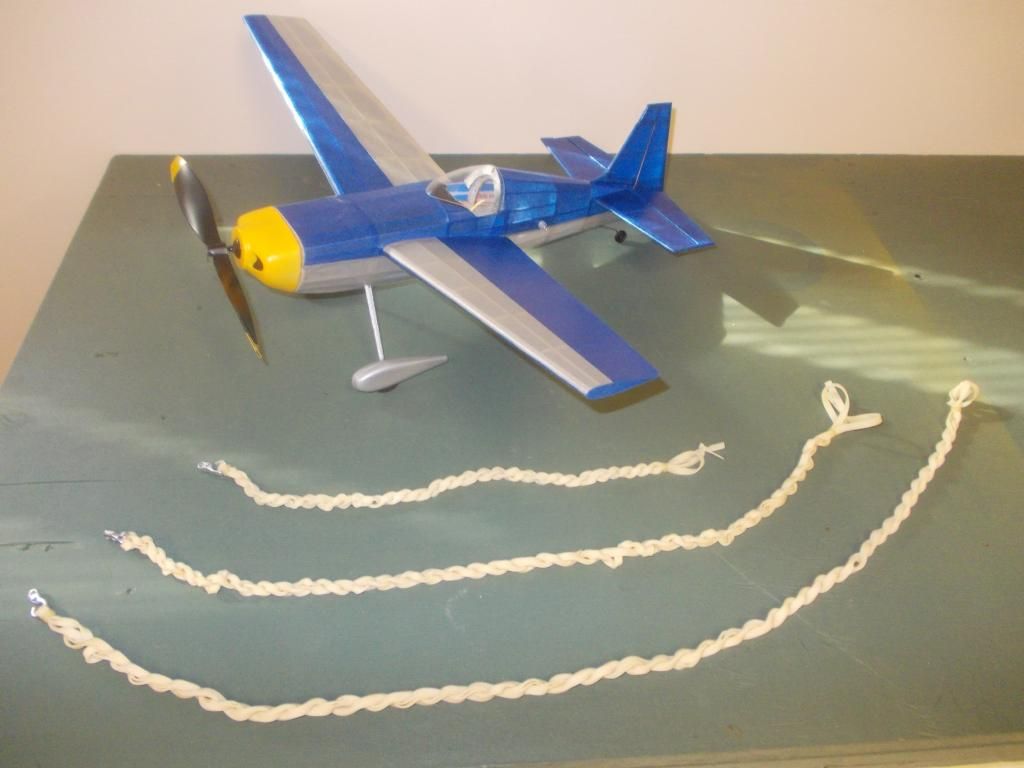
Image
This is 2 loops (4 Stands of 3/16) it was about 15 inches in length. After it was braided, it is about 13 inches. Braiding the rubber will make it a bit shorter and the knots form better and do not bunch up so much and change your cg. I think I can safely wind this motor to 870 winds. I will stretch wind the motor starting at 100 and increase up to 600. In competition flyers will approach the breaking point, that should be about 1080. (They also use torque meters). They will use there motors 3 times and throw them away.

I will fly latter today or early tomorrow morning!
Mitch
 
Posts: 1347
Joined: Mon Aug 22, 2011 9:16 pm
Location: Kent, WA

Re: Edge model contest

Postby kittyfritters » Mon Oct 28, 2013 11:38 pm

Mitch wrote:Mid morning update:

The model is finished...I am still waiting for acceptance into the G Challenge...3 more days to the deadline:...

....I will fly latter today or early tomorrow morning!


Mitch,

There are no memberships pending in the group. Are you sure that you registered? Or did I approve your membership and you missed it?

If not , try again. I look at the group twice a day.

Keep 'Em Flying!

Howard
kittyfritters
 
Posts: 700
Joined: Tue Jan 03, 2006 6:58 pm
Location: California

Re: Edge model contest

Postby kittyfritters » Mon Oct 28, 2013 11:42 pm

Mitch,

As a P.S. did you try cutting the ends of that Red Bull can, unrolling it , and scanning it to get the logo? Size it in your paint program,print it on white tissue, cut out and apply with glue stick.

Howard
kittyfritters
 
Posts: 700
Joined: Tue Jan 03, 2006 6:58 pm
Location: California

Re: Edge model contest

Postby Mitch » Tue Oct 29, 2013 12:50 am

Thanks for the idea, I though of buying a case of the stuff to get it on the cardboard case, but actually I do not like Red Bull that much! :oops:

I am posting my finished pictures here now... still waiting to be approved to the yahoo group. :?

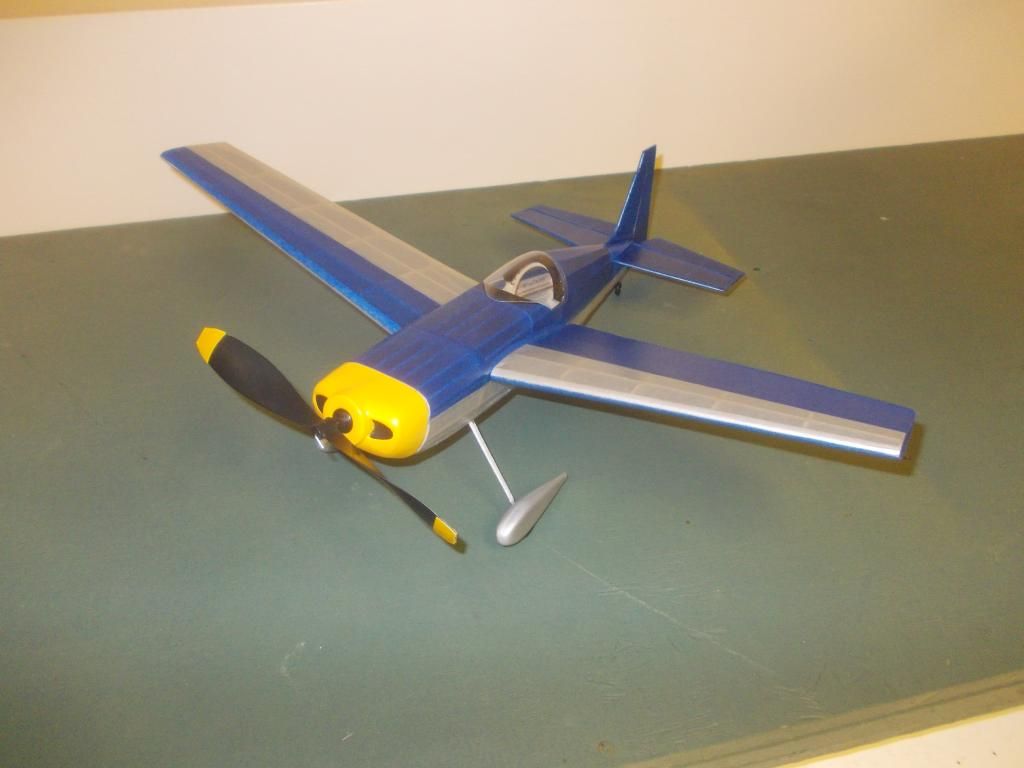
So here are my beauty photo shots... There is a reason why the beauty contest is BEFORE the flight competition!

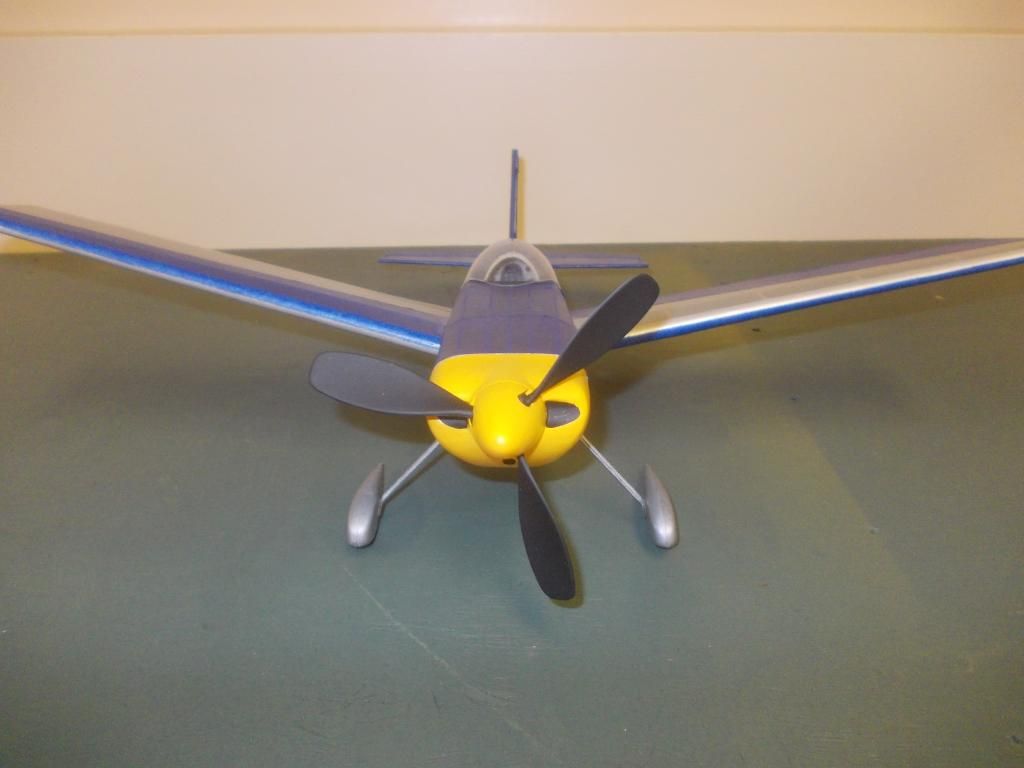
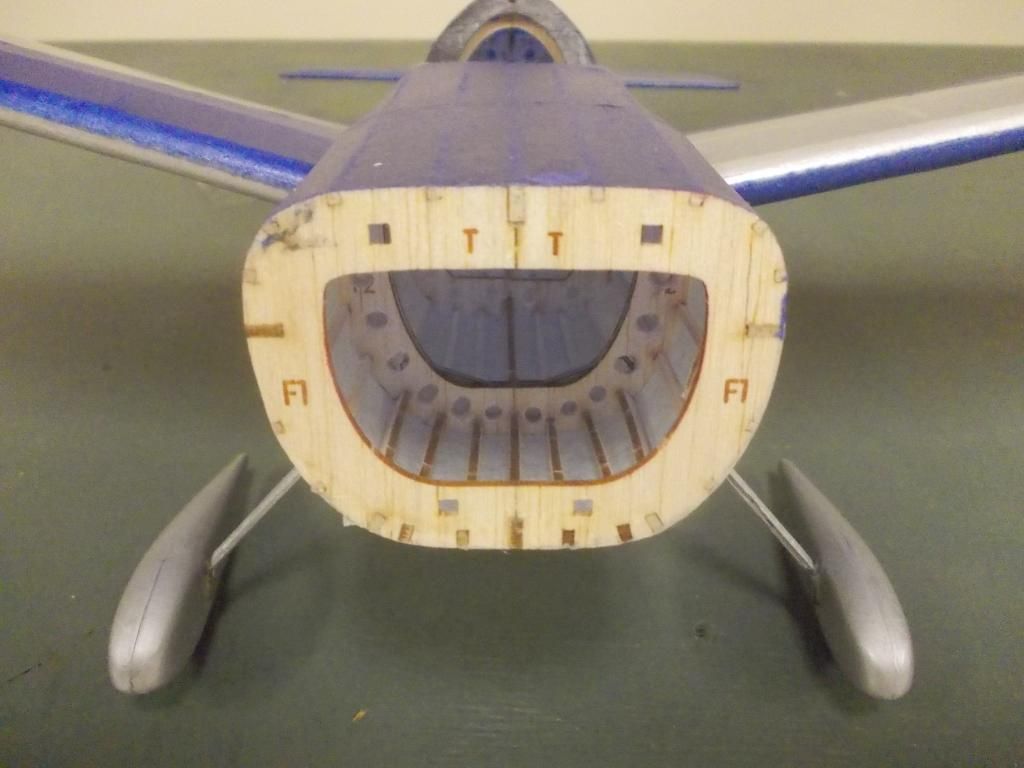
Head on:
Image

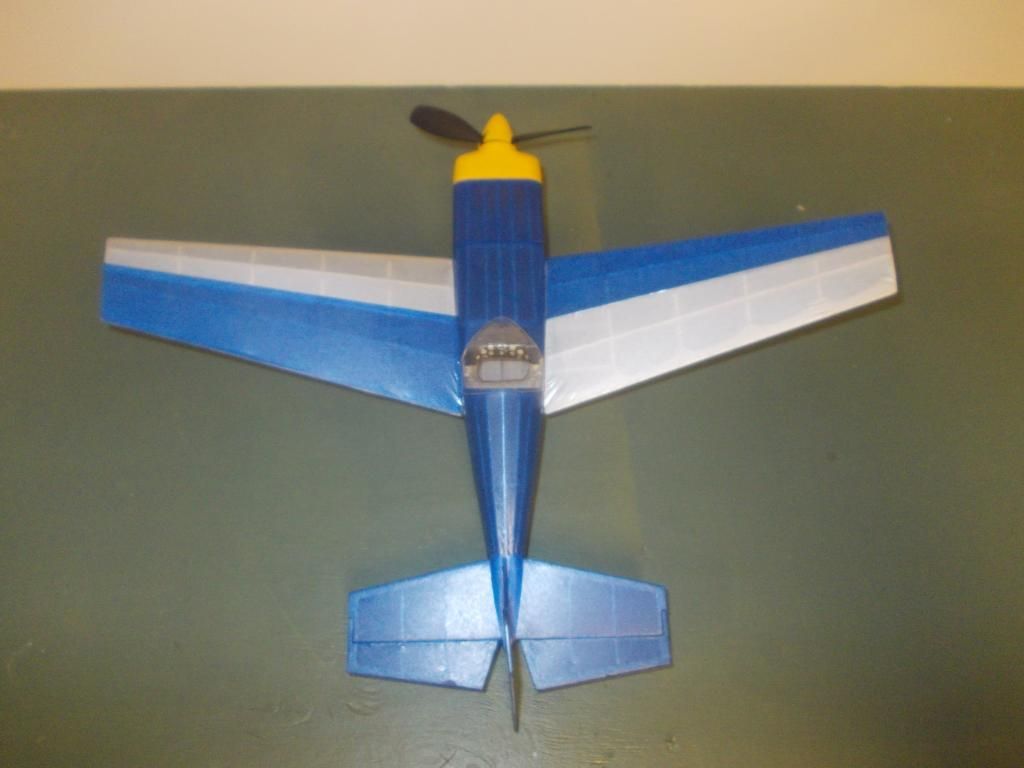
Top:
Image

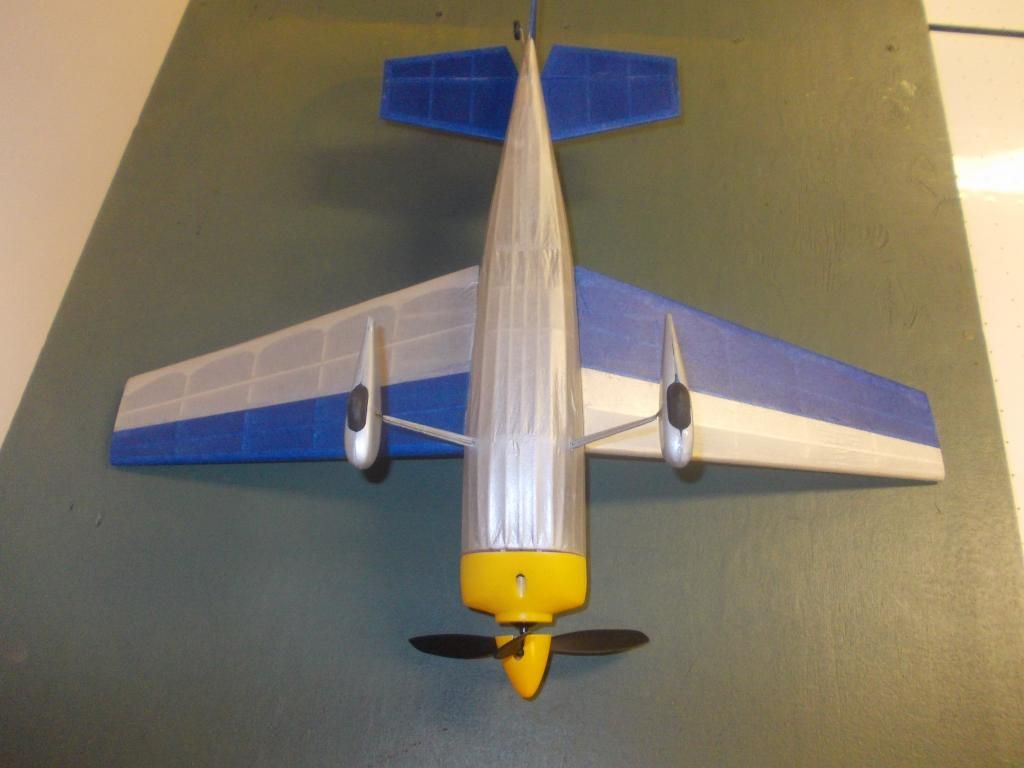
Bottom:
Image

3/4 view:
Image

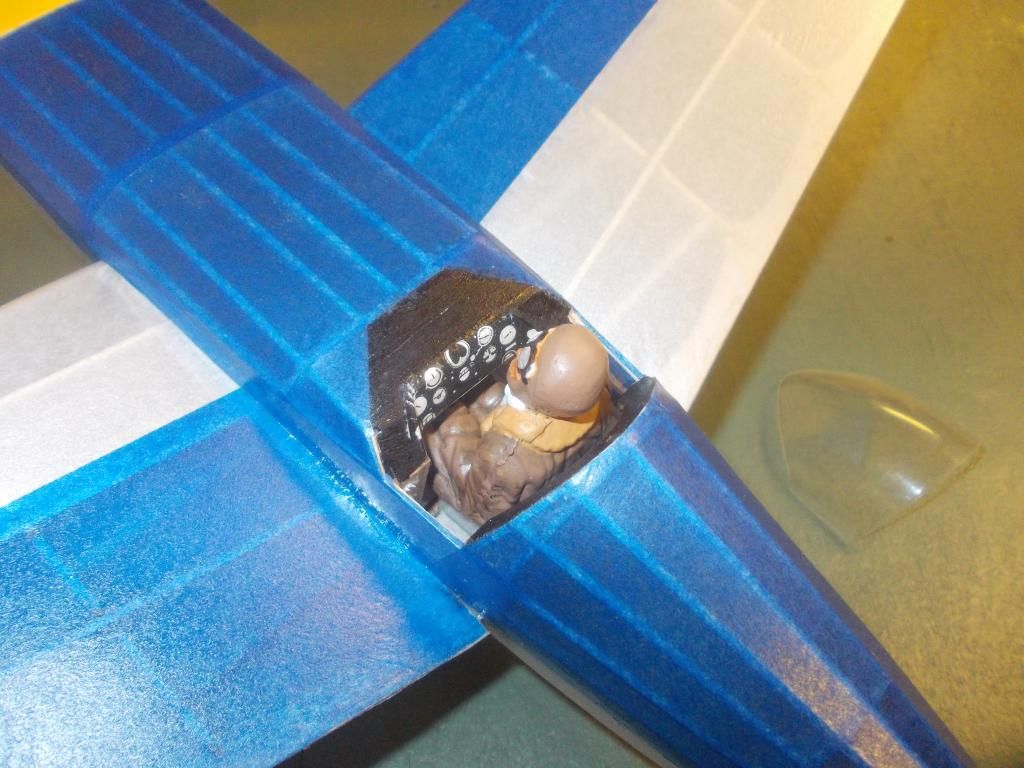
Pilot gets in the cockpit and checks instruments:
Image

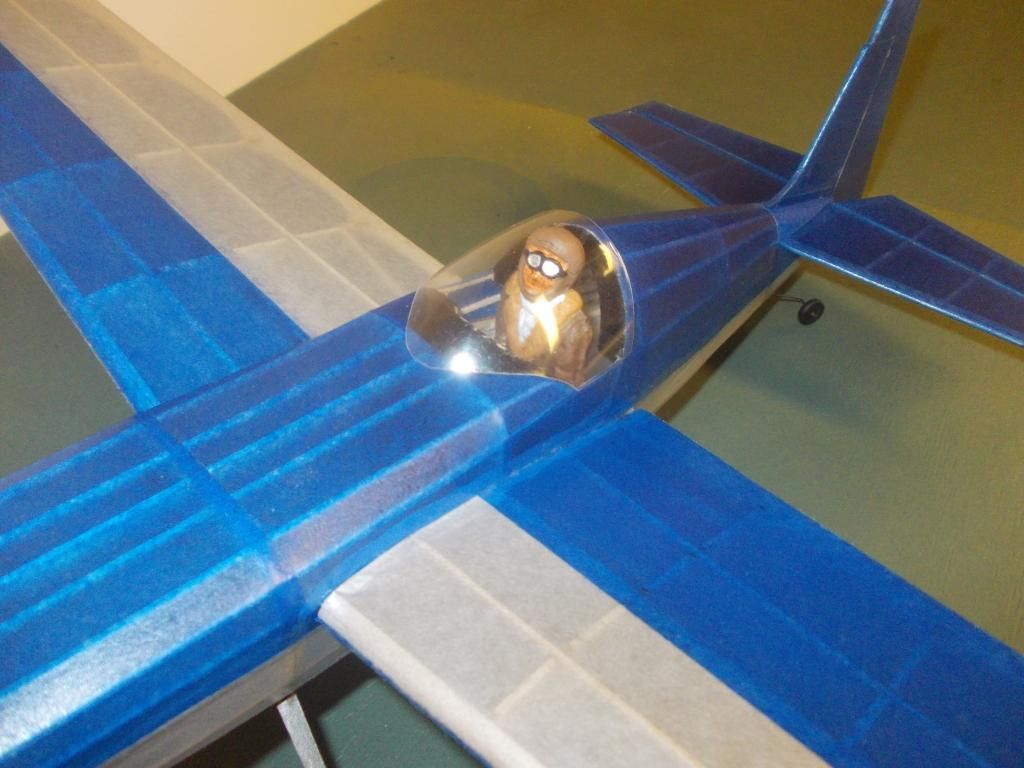
Close the canopy and get ready for take off:
Image

Wait... I need another Red Bull:
Image
The pilot will NOT be in the plane for flying... This will be a free flight test! 8)

I have a few more photos and hope not to destroy this little beauty, as she has another show to go to on Sunday... I will keep on my schedule and get 3 flights in on or before the deadline and keep checking with yahoo....

Plane stats as I read them:

Wing Span: 19-1/2 inches (That dramatic dihedral took it's toll)
Wing Area: 55 square inches
Weight (display): 45 grams
Weight (AUW): 52 grams
Engine: 4 stands tan rubber 15 inches, braided with crocket hook
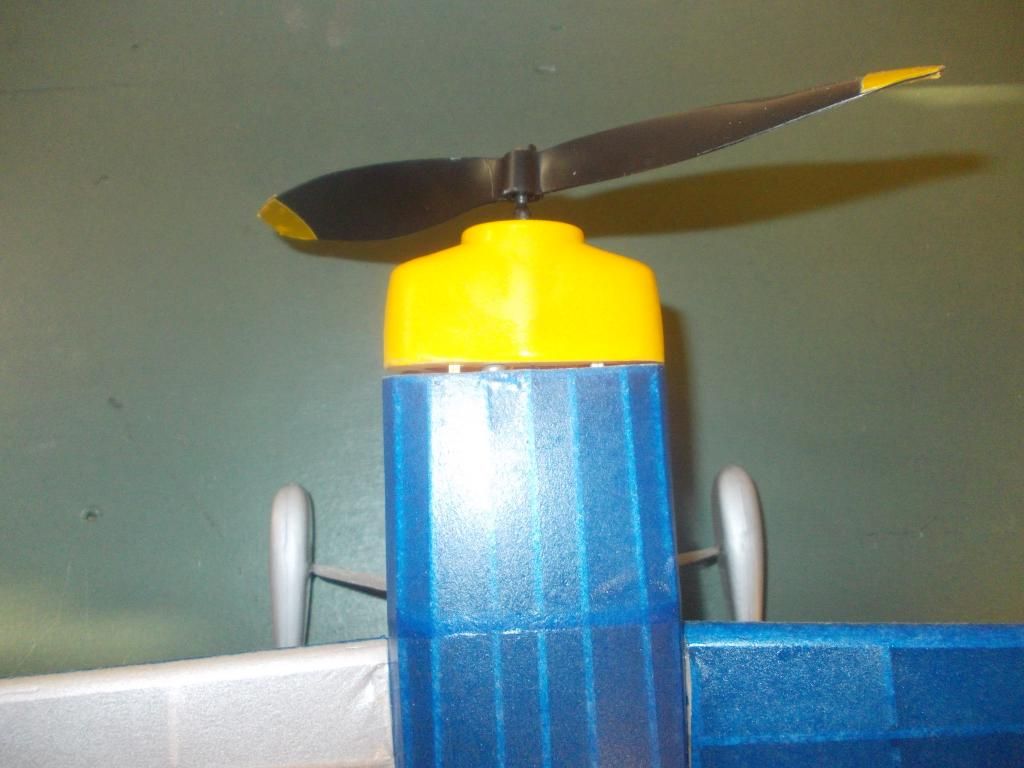
Prop (Display): 5 inch, 3 blade, Guillow customized with spinner
Prop (Flying): 7 inch, 2 bladed, Guillow without spinner
Skin: Domestic Colored Tissue, 2 coats of sprayed on LusterKote
Wing Load: .95 per square inch
(That is VERY high, this model will NOT glide far. I expect it will only fly under power. I hope I can trim her out so she will not spiral and crash!)

Mitch :D

PS Thought I should show at least 1 picture with the flying prop:
Image
I balanced the prop with the yellow electrical tape!

I will have my daughter help me with the yahoo thing in the morning :roll: ... Keep Building, Keep Flying, Keep Learning!
Mitch
 
Posts: 1347
Joined: Mon Aug 22, 2011 9:16 pm
Location: Kent, WA

Re: Edge model contest

Postby davidchoate » Tue Oct 29, 2013 3:20 am

thanks for posting some info about yor rubber motor with pictures. i never considered braiding it. what is the reason for moving the peg up ? also i was looking through the rc conversion threads to help me with my Edge project,and one person who finished his notod that the balance point had to be be shifted a considerable more distance rearward than stated on the plan to achieve stable flight. I dont know if this would be true for FF, but thought it was worth mentioning. thanks Mitch for posting; I have learned alot on this forum so far.
davidchoate
 
Posts: 1263
Joined: Wed Aug 14, 2013 6:41 am
Location: PHiladelphia PA

Re: Edge model contest

Postby Mitch » Tue Oct 29, 2013 9:31 am

Thanks for your input and questions.

I moved the rear peg for 2 reasons. 1. To have the center of weight of the rubber over the cg of the plane. If my model survives it's first few test flights I hope to pack in a lot more rubber and the weight of that does make a difference... and 2. I plan to use a blast tube to protect the model when winding and the rear of the plane after frame F7 gets narrow very fast and my blast tube would not fit down that far.

If you are serious about flying rubber power you should have Don Ross' book. Chapter 10 "RUBBER" he explains about rubber, winding stooges, torque meters, and shows how to braid rubber. Braiding rubber will shorten up the motor a bit, but more importantly the knots will form more evenly and they will unwind smoother and without bunching up in the back of the plane when unwinding.

This is a very small model and everything I believe that makes a FF rubber model hard to fly. The real plane is a sport aerobatic plane and we want it to fly by itself. That is why I added more dihedral than the plans... It came out more than I wanted but that's what I got. I really think I need to build the same model three times to get the construction perfected.

On a last note, take what I say with a grain of salt. I am still learning and learn something new everyday!

Enjoy! Mitch :D

Image
My Pilot is taking a rest while I prepare to install the rear peg. If flying weather is good today I hope to trim, then clock in some times.

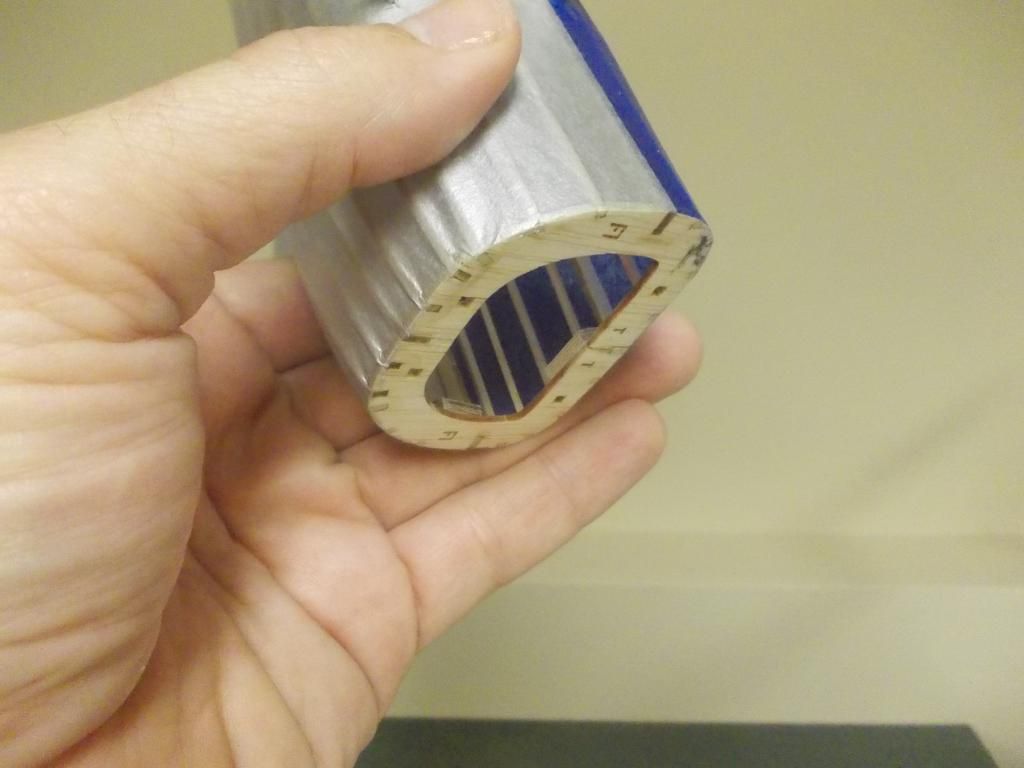
I just remembered I need to have a positive way to adjust thrust. Here is what I came up with:
Image
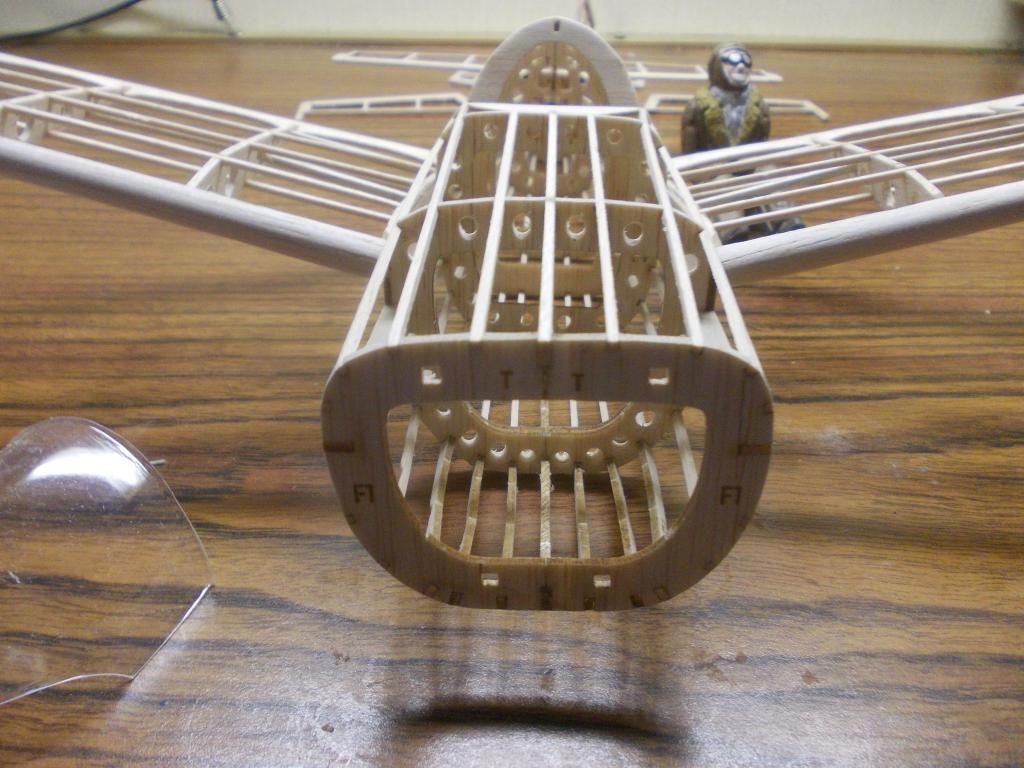
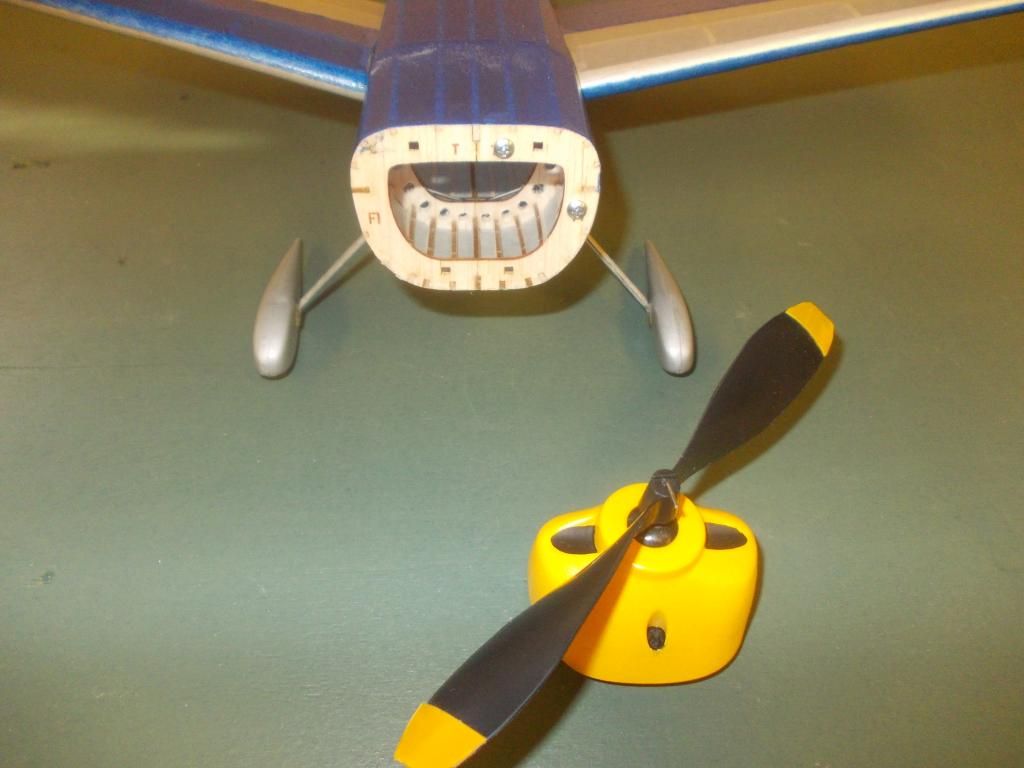
I glued 2 small pieces of plywood behind F1. I will need to let this dry. I will drill pilot holes and use 2 small screws for DOWN and RIGHT adjustments.
Image
The adjustment screws will be placed where the "T" and "F1" marks are. I will need to record what position works, then remove the screws for the Static Display Show on Sunday so the cowling fits tight to the fuselage. Mitch :D
Mitch
 
Posts: 1347
Joined: Mon Aug 22, 2011 9:16 pm
Location: Kent, WA

Re: Edge model contest

Postby Mitch » Tue Oct 29, 2013 3:38 pm

Okay... The plywood backup blocks are dry, so I carefully drilled 2 pilot holes, 3/32", opened them up just a bit more with a file and ran in 2 wood screws #4 screws, 3/8 inch:
Image

With the screws all the way in, I am starting with just the head giving me about 3/16 inch DOWN and 3/16 to the RIGHT:
Image
I think that is a good starting point. DOWN is to get the model in the correct angle of attack, to the RIGHT is to counter the torque of that spinning propeller.

When School is out I will go to the field... Mitch :D

Okay I poked the holes for my rear peg... It's FLY TIME! :D
Image
Whatever my results are, I will let you know. I plan to only use the short motor for now and slowly increase the turns and try to trim the model! :?

:D GOOD NEWS: Not spectacular but it FLIES! I had a few short flights increasing the turns to 300. The last flight the model climbed to the right stalled and nosed in. I forgot my clay so came back home for supplies and minor repairs to model. The rudder is only tacked on with 3 spots of glue and came loose. So that is glued again. When Dry I will go back to the school for more trim flights!

:D :D GREAT NEWS: I am in the Yahoo Group. Now I have to figure out how it works over there. I already posted one picture. I will get three timed flights before the deadline!

:D :D :D Keep Building, Keep Flying, Keep Having FUN! Mitch
Mitch
 
Posts: 1347
Joined: Mon Aug 22, 2011 9:16 pm
Location: Kent, WA

Re: Edge model contest

Postby Mitch » Wed Oct 30, 2013 6:06 pm

Guys,

With one day to go I am at the field for the second day, this time with my mechanic (daughter). She will hold the airplane so I can wind it and be my timer. I am still doing trim flights, but with every flight the planes possible last I decide to have her record every flight.

First Flight has 400 winds... The model flies nicely with a slow turn to the right. 5.89 seconds... she says "6 seconds!" I say "No, that's 5 seconds."

Second Flight has 450 winds... The model turns harder to the right and crashes... 2 seconds.

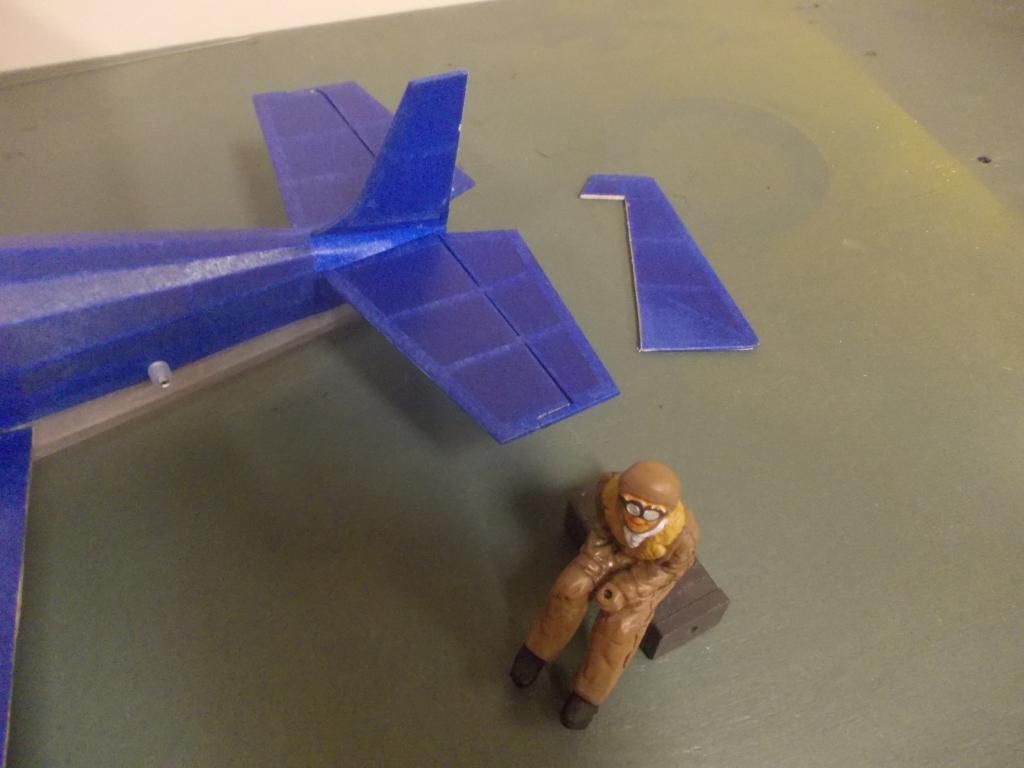
That's all for today as the rudder breaks off, and the elevators are loose. Back to the repair shop. I plan to glue the Rudder and Elevators more securely and straight, NO RIGHT RUDDER.

Image

Tomorrow is the last day!!! Mitch :shock:
Mitch
 
Posts: 1347
Joined: Mon Aug 22, 2011 9:16 pm
Location: Kent, WA

Re: Edge model contest

Postby Mitch » Thu Oct 31, 2013 7:45 am

Good Morning...
A few shots of Team Red Bull. Although my plane is not an exact copy, I used the idea for my colors...
Image
Image
Image
I posted these pictures and more in Yahoo also, hoping to get 2 extra points . I will plan to add my logos today and hope for 3 endurance flights this afternoon before the deadline! Mitch :D

UPDATE: I printed some logos from the internet... Planning the placement of the Red Bull:
Image

I already have the bulls on the model. I will post final 3 entry photos today (front, top, 3/4 view required). I will be going to another flying field today as I want to get these flights in and school is in secession now...

Mitch

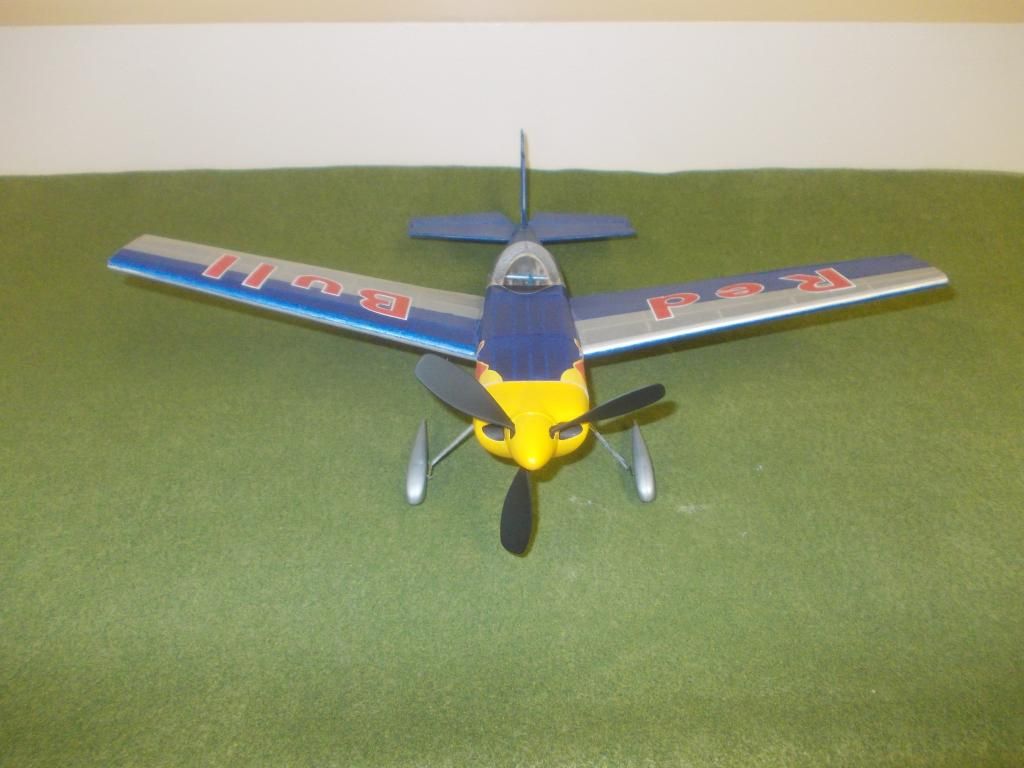
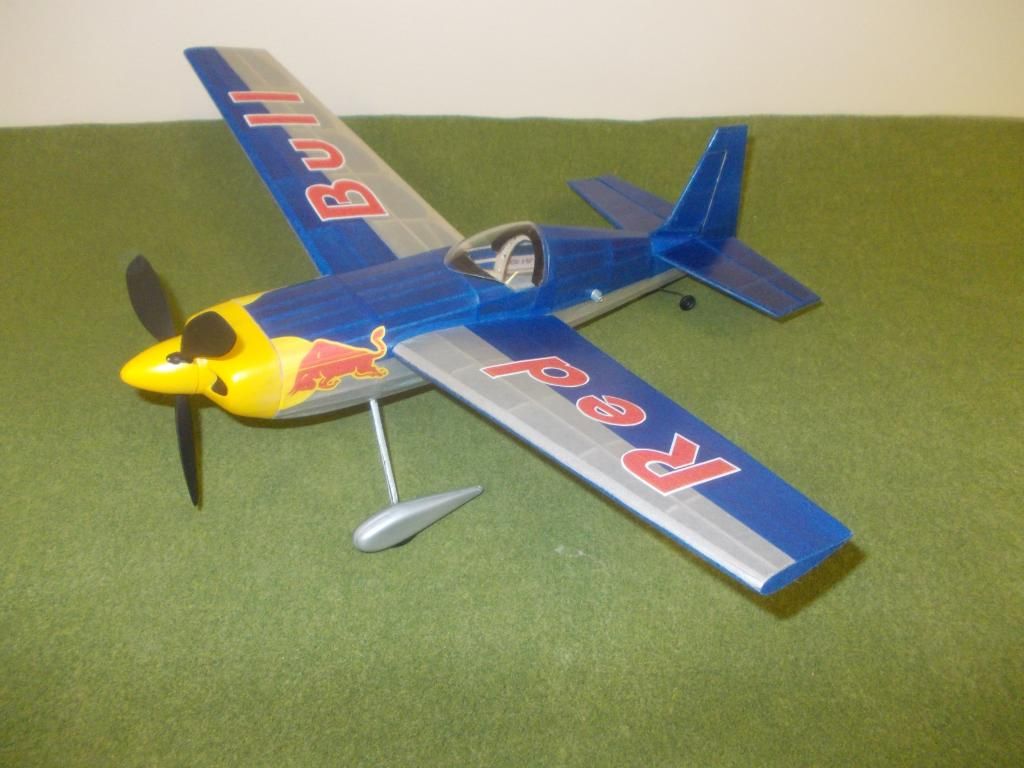
UPDATE: I have enough "decals" on and am going to the flying field. Here are my entry photos:

Top View:
Image

Front View:
Image

3/4 View:
Image

I am going to be very conservative on my power settings as I have a static display show on Sunday and I want to bring this model. To me winning this contest is not important. I am just happy to have my model completed and flying by the deadline. I hope to contine to trim and improve flight times with this model at the next FAC event! Mitch... Keep Building, Keep Flying, Keep Improving! :D
Mitch
 
Posts: 1347
Joined: Mon Aug 22, 2011 9:16 pm
Location: Kent, WA

Re: Edge model contest

Postby Mitch » Thu Oct 31, 2013 12:25 pm

Guys,

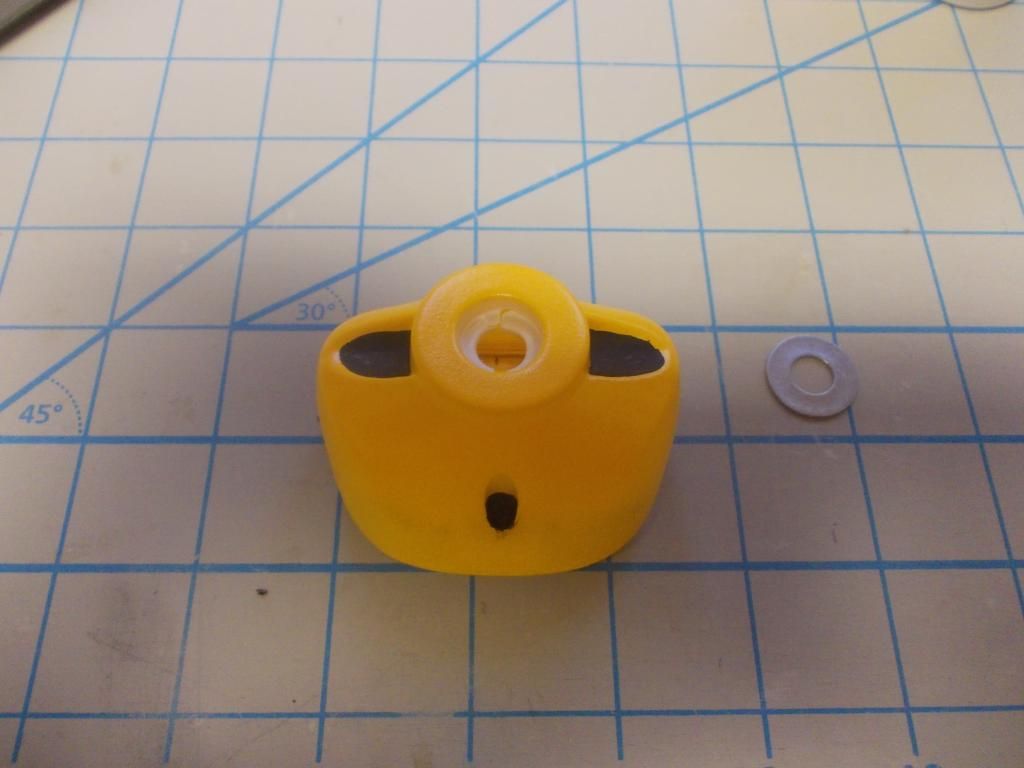
Getting ready to go to the field and preparing my plane, switching back to the 2 blade prop I noticed my front end is developing a crack! Very BAD!
Image

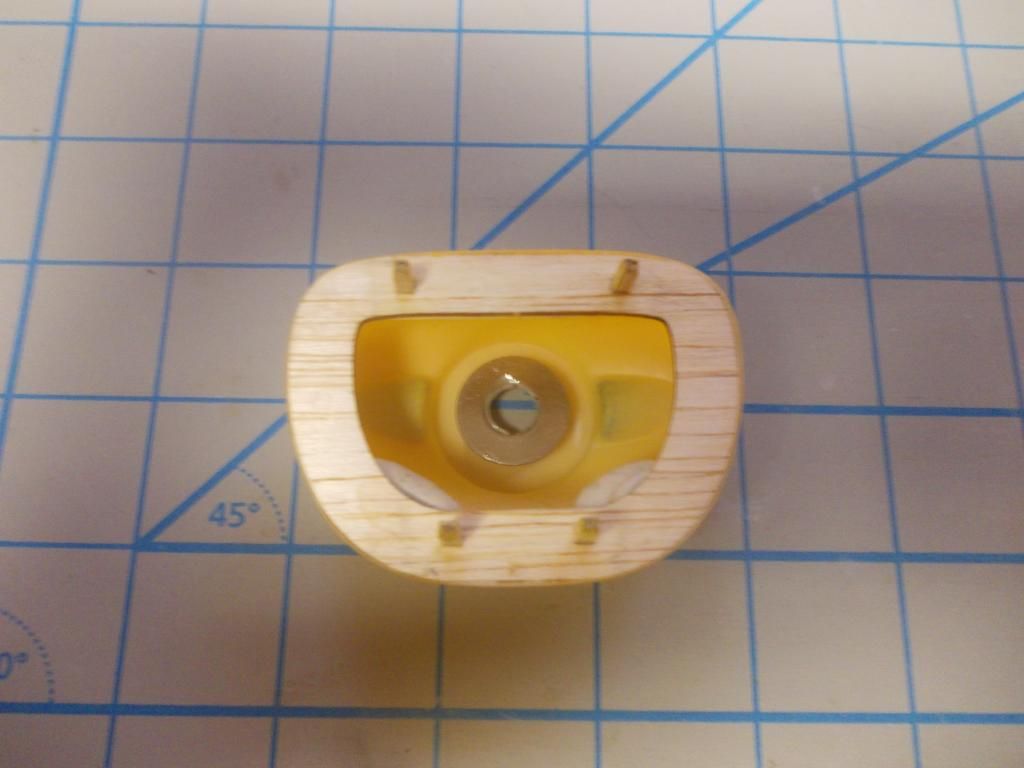
So I found a washer that will fit and 5 minute epoxy and I think I am good to go!
Image
This added another 2 grams to the nose of the plane. I was going to add more anyway because I think she is stalling then, then dives in and hits her nose. I will be going for my final flights now...

Mitch
Mitch
 
Posts: 1347
Joined: Mon Aug 22, 2011 9:16 pm
Location: Kent, WA

Re: Edge model contest

Postby kittyfritters » Thu Oct 31, 2013 1:18 pm

Mitch,
\
Very Nice!

Howard

(In the interest of full disclosure I do not have anything to do with the appearance judging. The staff at Guillow does it as a courtesy.)
kittyfritters
 
Posts: 700
Joined: Tue Jan 03, 2006 6:58 pm
Location: California

PreviousNext

Return to General Building Questions

Who is online

Users browsing this forum: No registered users and 34 guests