Build a 400 series WW2 Fighter for less than $20

Ask other modelers for a little help / knowledge ?

Build a 400 series WW2 Fighter for less than $20

Postby Mitch » Tue Aug 07, 2012 3:53 pm

Since I seem to have as many non-fly days as fly days here in Seattle... I thought I would start a build post...

Is it just me or do you thow away and not use many of the parts in the Guillows kit. Now that I am learning to build differently... I wonder "Why should I buy the entire kit?" I don't want to spend 40 or 60 dollars or more to fly a kit that I may destroy...

So for a second or third model of the same aircraft... I will show you how to build it for less than 20 bucks! First save EVERYTHING from the first kit.
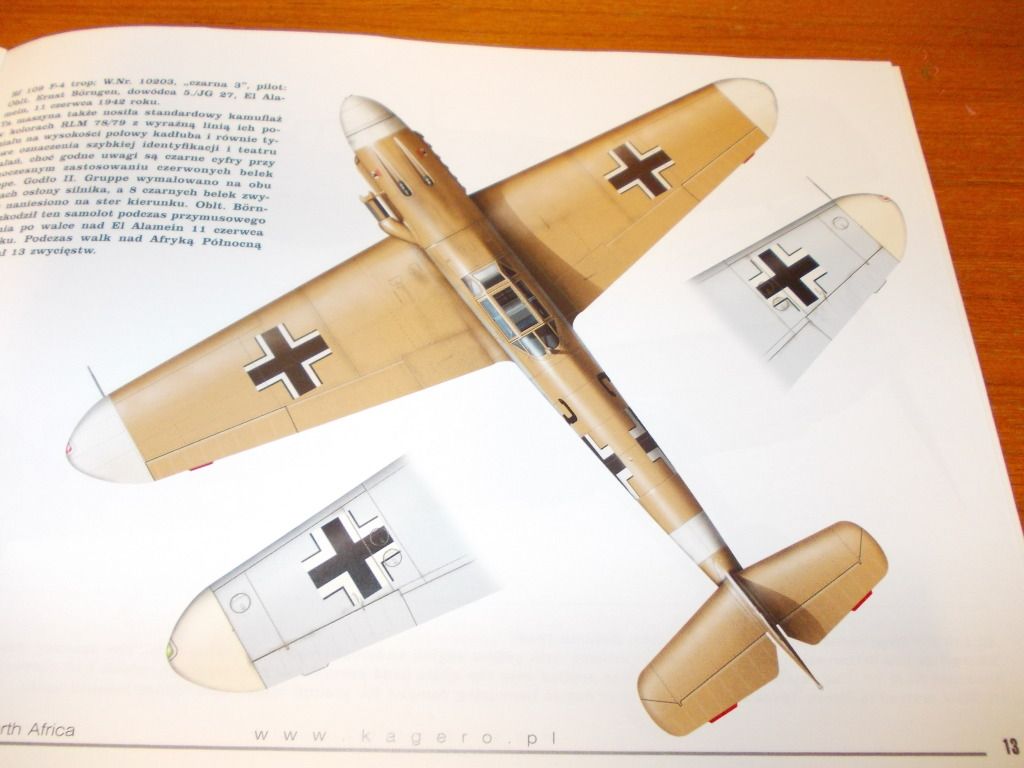
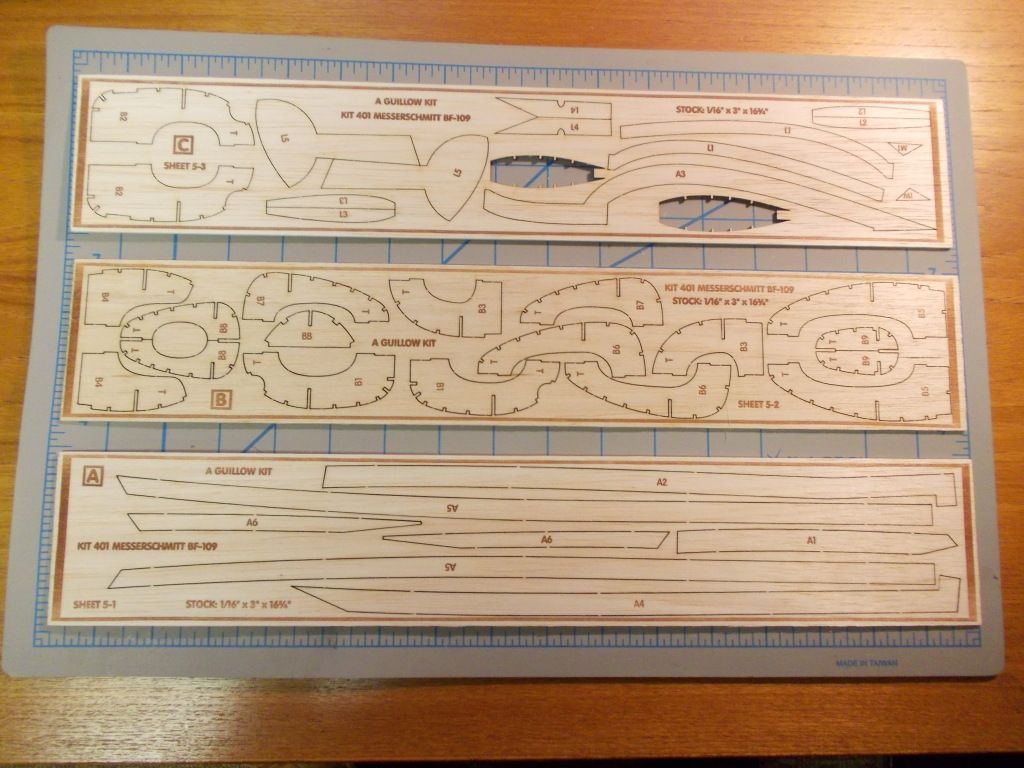
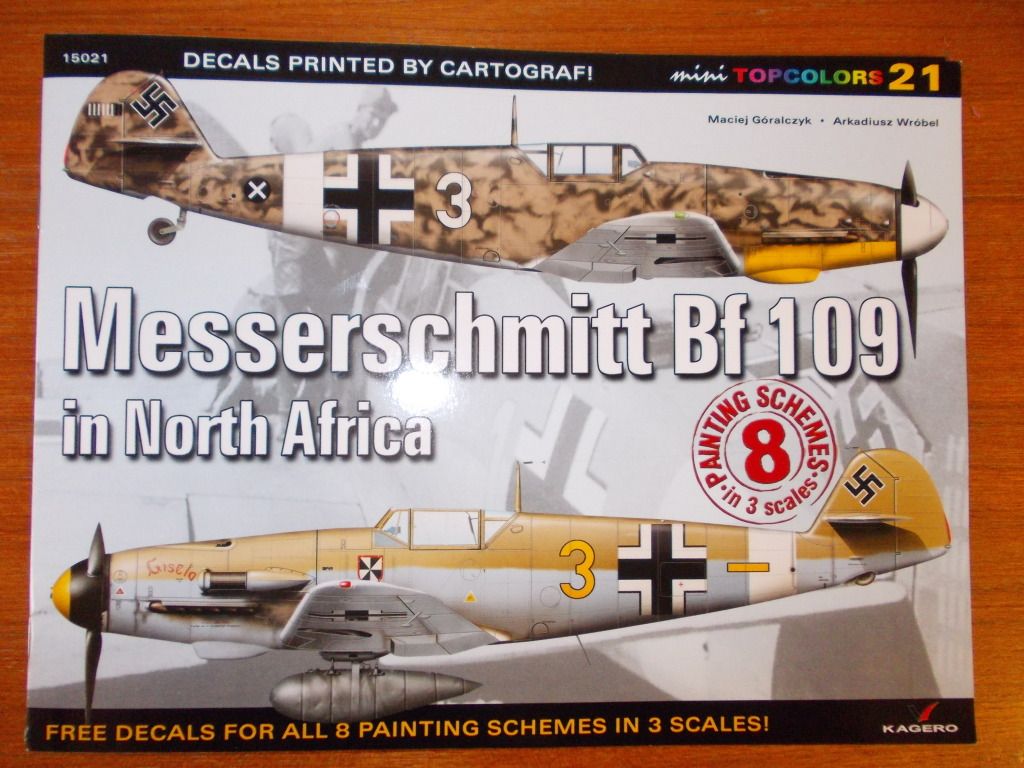
My next build, Bf109 in North Africa, I will only need the following...
Image

Parts Required:
1/32 sheet of balsa (Purchace from Local Hobby Shop, for Ribs) 1.50
Sheet A 3.50
Sheet B 3.50
Sheet C 3.50
Cowl 3.00
Canopy 3.00
2 Sheets of Lite Tissue 1.00

Let's see... that adds up to... $19.00, I think that's pretty good.

Since I have had to make some repairs recently, I have my work area ready... If there is an interest, I will post my progress... I expect I can build the model in under 20 hours.

Mitch

PS. I will still be flying my models during good weather, but I am getting anxious for the next generation of the 109 :D
Mitch
 
Posts: 1347
Joined: Mon Aug 22, 2011 9:16 pm
Location: Kent, WA

Re: Build a 400 series WW2 Fighter for less than $20

Postby Charles_c » Tue Aug 07, 2012 4:54 pm

Waiting on some progress reports, Mitch.... and don't forget the pic's...

Charles
Real Airplanes Have Round Engines and Two Wings !
Charles_c
 
Posts: 59
Joined: Sat Jul 28, 2012 2:05 pm
Location: Virginia Beach, Va.

Re: Build a 400 series WW2 Fighter for less than $20

Postby Mitch » Tue Aug 07, 2012 7:05 pm

Okay, I'll take that as "Let's get started" We are going to build a FLYING MODEL!

One more thing we need I forgot is 1/4" balsa for the Wing LE, buy 36" piece at your LHS for 0.98 and you are at $19.98. We are going to make our own markings so no need for the Decal Sheet. I came up with this idea since I bought another kit... got it for 35.00 but still think I could do better. I will use the old plans and keep these new ones pristine. I will use the Lazer Cut Wing Ribs as templetes and cut new ones on my 1/32" sheet from LHS. Sheet cost 4.50, but I think I have enough for 3 models, hence 1.50.

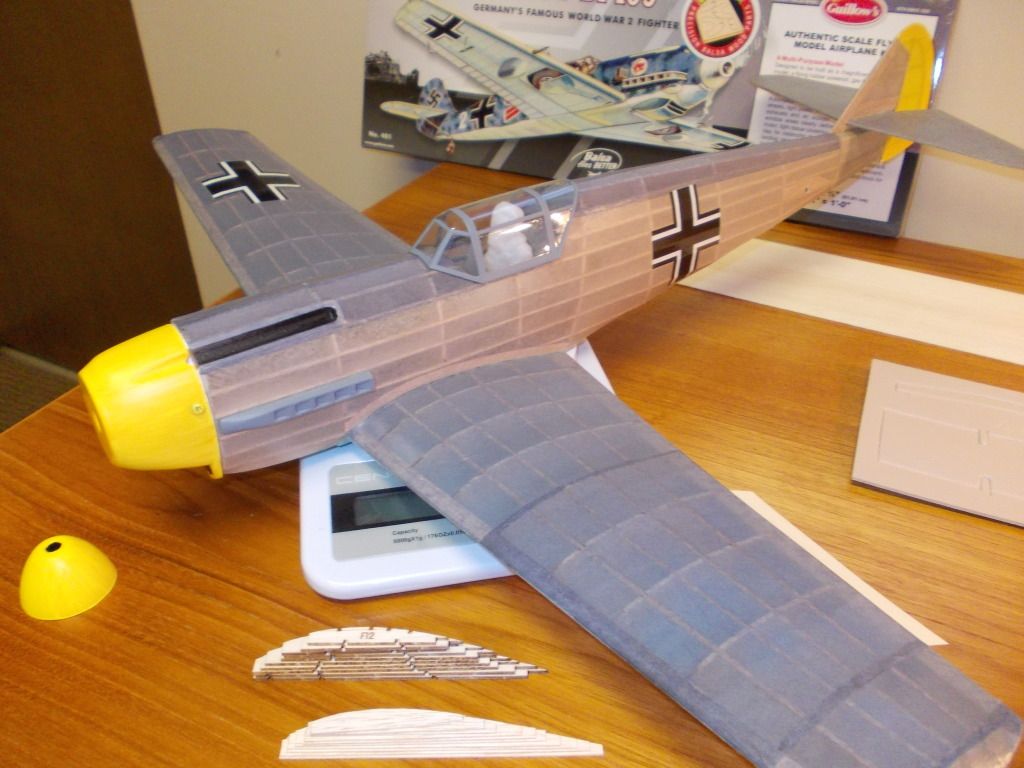
My model will look something like this...

Image

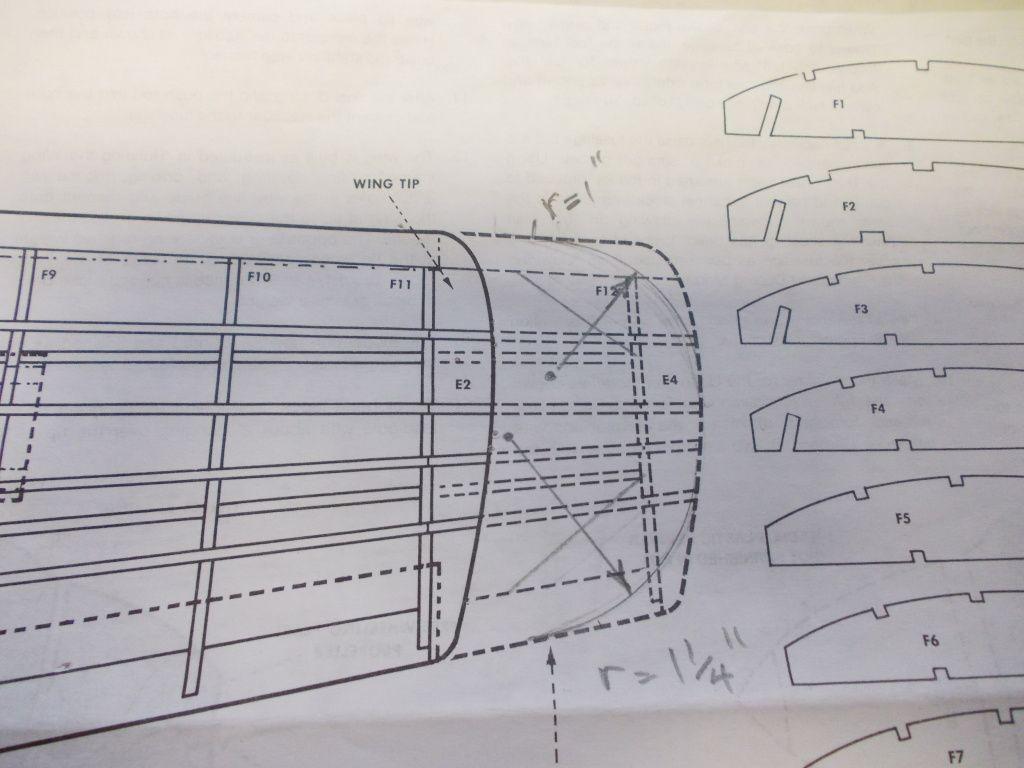
So first I use my High School Drafting Skill and change the plan...

Image

I just drew what looked good... and took my thoughts from "Pilot Feedback". That's what my Dad the retired TWA FE said they did in the "Good 'ol Days"

First I need to cut out the Wing Ribs... I plan to have the wing tip as solid balsa as sometimes the plane comes in at a steep back and touches her wing tip first...More Pilot Feedback.

:roll: We have a Block Watch Party in our Nieghborhood :roll: So I have to get some Food and I will cut out the Ribs tonight. :roll:

Mitch

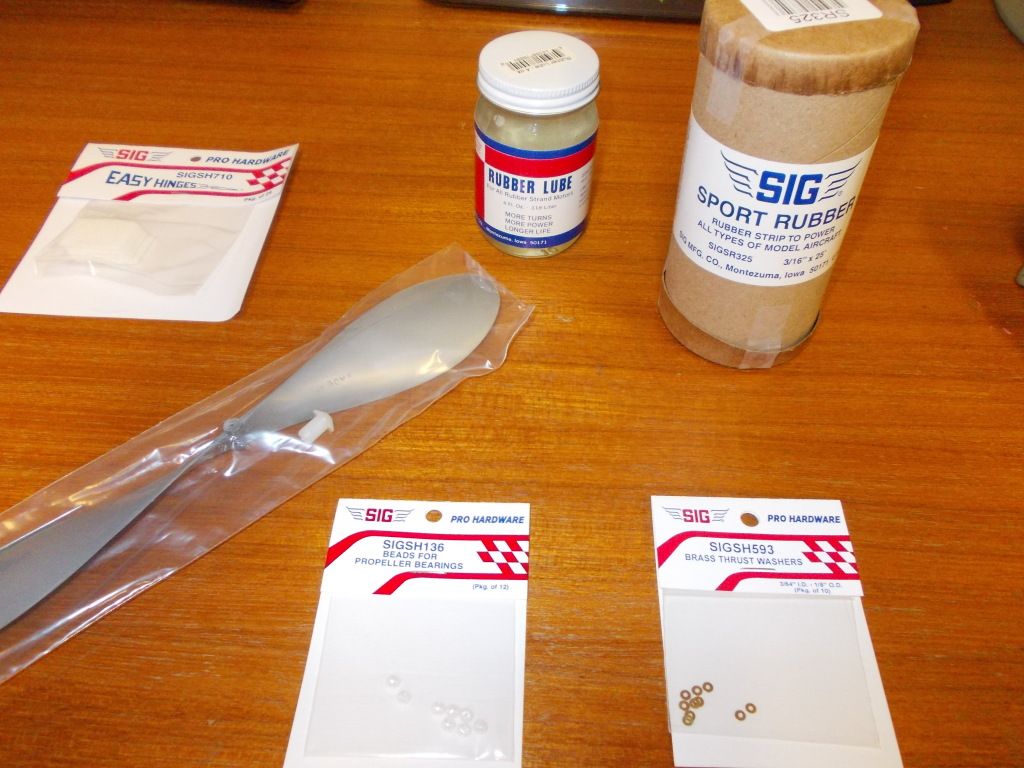
PS. Look want Santa just brought me...

Image
Mitch
 
Posts: 1347
Joined: Mon Aug 22, 2011 9:16 pm
Location: Kent, WA

Re: Build a 400 series WW2 Fighter for less than $20

Postby Wildpig » Tue Aug 07, 2012 7:59 pm

This looks like a very interesting build. With the better grade balsa and 1/32" thick. I think this model will perform very well.

Oh, boy, you got some nice stuff. Good looking prop, nylon thrust bearing, and genuine rubber lube. 8) You are set for flight :!:

Come on, you got me all curious, your dad was an FE for TWA, o.k. ... that's possible 727,747, Convair 880, and a bunch of others. Which one?
Wildpig
 
Posts: 529
Joined: Thu Jan 26, 2012 9:41 am

Re: Build a 400 series WW2 Fighter for less than $20

Postby Bill Gaylord » Tue Aug 07, 2012 10:54 pm

You can even do it cheaper, if you build it using my methods:
Save scrap balsa from parts sheets, and glue together scrap balsa. :D I only throw out pieces smaller than a dime, and have a very small scrap box after years of building. You don't see the wood after covering anyway, although the model won't win any trophies for it's bare bones photos. :shock: Your use of 1/32" wood for ribs will really reduce the weight. There's a lot of wing ribs in these models. I'm sold on cutting new wing ribs, after building a sheeted wing with contest wood for a Guillows P51, that was as light as any covered wing I've built in the past, using stock ribs.

I guess you do have to do a bit of reworking for a late model 190, as Guillows only has the E model. I have a North Africa version scratch built from a MAN combat plan. Cheated the wingtips, as it's no fair that a P51 of the same scale has a larger span.
You do not have the required permissions to view the files attached to this post.
Bill Gaylord
 
Posts: 904
Joined: Sun Nov 09, 2008 1:29 pm
Location: Grove City PA

Re: Build a 400 series WW2 Fighter for less than $20

Postby Mitch » Tue Aug 07, 2012 11:43 pm

Yes I agree, one can scratch build for next to nothing... But I want to help new builders that might have built a model that did not come out well. I am saying you don't have to buy the entire kit again. Use the plans over again. I prefer to use some parts, as the Lazer cut is perfect and easy... But when the plans say sand the ribs to half thickness, I think it would be easier to cut out new ones. I personally do not use some of the parts in the kit, and after anyone has built a kit or two, they should have a stock pile of balsa, and extra clay and such. I want to build this model quickly, and build it light and strong, and have it fly well...

I was at our Block Watch Party tonight and will start on cutting the ribs tomorrow...

Image

Hope All had a Safe Night... Mitch

PS. That's a very nice looking model
Mitch
 
Posts: 1347
Joined: Mon Aug 22, 2011 9:16 pm
Location: Kent, WA

Re: Build a 400 series WW2 Fighter for less than $20

Postby Bill Gaylord » Wed Aug 08, 2012 2:28 am

Mitch wrote:Yes I agree, one can scratch build for next to nothing... But I want to help new builders that might have built a model that did not come out well. I am saying you don't have to buy the entire kit again. Use the plans over again. I prefer to use some parts, as the Lazer cut is perfect and easy... But when the plans say sand the ribs to half thickness, I think it would be easier to cut out new ones. I personally do not use some of the parts in the kit, and after anyone has built a kit or two, they should have a stock pile of balsa, and extra clay and such. I want to build this model quickly, and build it light and strong, and have it fly well...
I think you took my comments the wrong way. It appeared that you were using some sheet wood for the build. I fully agree with what you were saying. I was kidding about the use of glued together scrap to make sheet wood, although I do that, hence the :D emicon.
Bill Gaylord
 
Posts: 904
Joined: Sun Nov 09, 2008 1:29 pm
Location: Grove City PA

Re: Build a 400 series WW2 Fighter for less than $20

Postby Mitch » Wed Aug 08, 2012 9:26 am

Bill, Thanks for the clarification... since I do not know all the personalities here I will take people at there word, until I learn your sence of humor.

All, So here is my mission: Rebuild the 109E, with improvements... I bought another kit and will use those decals to repair my current model...let's call him "Emil"... I want to build the 109F, let's call him "Fredrich" So after some Intial flights with Emil, and "Pilot Feedback" I want:

1. More Wing Area
2. More Power
3. Lighter Airframe

All this and no loss in construction strength... That is my challange... Can I do it?

Emil is at a flying weight on 70g. His "Engine" has been removed and he is back at the repair shop. He will recieve:

1. Repair "Flack Damage"
2. A touch of Dope
3. New Decals
4. New Engine

Image

Forward with "Fred"

New lighter ribs have been cut out with already a savings of over 2g

The only parts I will use from the kit are Sheets A,B,and C

So I will continue to build the wing... The E parts are on 3/32, I will recut on 1/16...

Image

Mitch

PS. I will post as I build and if anyone has questions I will answer and take pictures. If you have a better way to do something I may include that in this build also, I am always open to try something new, and better... I have some experience but to not consider myself an expert... I only just got these planes flying in this past week.
Mitch
 
Posts: 1347
Joined: Mon Aug 22, 2011 9:16 pm
Location: Kent, WA

Re: Build a 400 series WW2 Fighter for less than $20

Postby Mitch » Wed Aug 08, 2012 1:18 pm

Update:

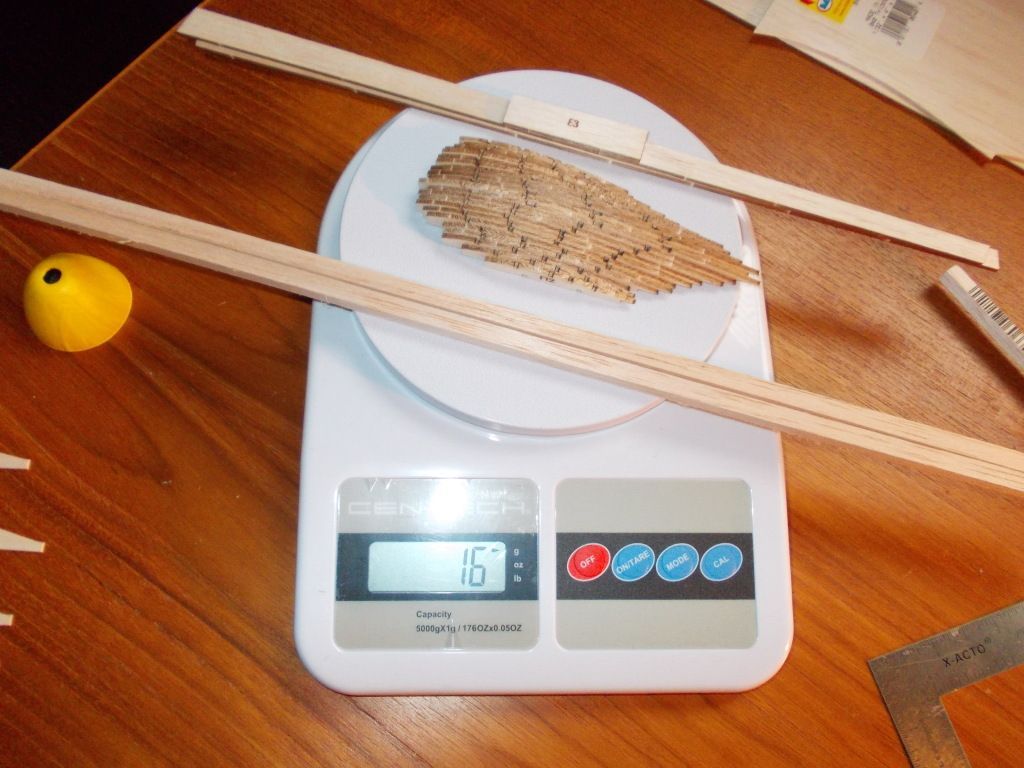
Had all the Wing Rib Blanks cut out before the coffee was done...Weight the guillow Lazer Wing Parts...

Image

Then weighed my "NEW" Parts...

Image

Guillow Parts 16g, vs. NEW parts 10g... Still need to shave the ribs and notch...

Image

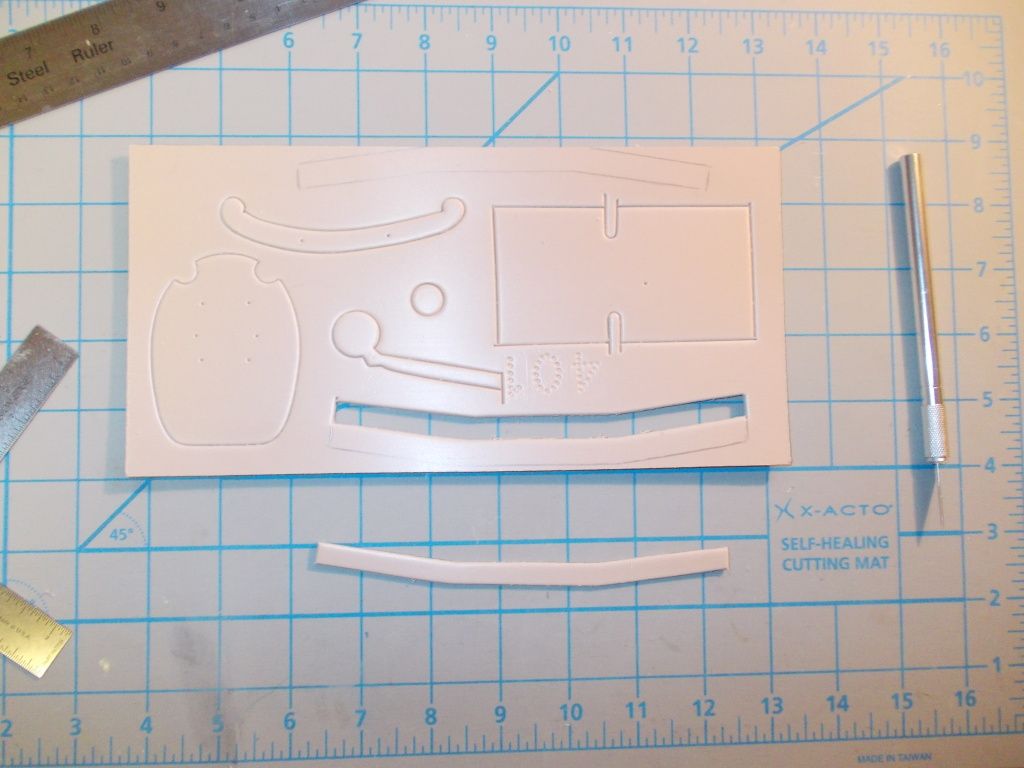
Plan to cut 2 more Wing Braces from the Plastic Sheet...

Image

My daughter just woke up, so I will take a break and work on this latter... Hope to have the wing layed out on the Build Board tonight.

Mitch
Mitch
 
Posts: 1347
Joined: Mon Aug 22, 2011 9:16 pm
Location: Kent, WA

Re: Build a 400 series WW2 Fighter for less than $20

Postby Steve Blanchard » Wed Aug 08, 2012 3:25 pm

Hey Mitch,

Great job with the improvements. Could I make a further weight savings suggestion? When I built the laser cut Spitfire in all black I dropped out every other wing rib. There are far more than necessary for good flight. Also be sure that you use 1/16" ribs at the dihedral points so they are plenty solid enough. There is a lot of load being carried at those joints. You don't want a failure there. One more. I know you haven't gotten to the fuselage yet but what I didn't do that I wish I had on my build is to make all of the formers thinner closer to the back. This will save on nose weight. I think it works out to every gram you save in the tail saves you approximately 4 grams up front for balancing. Also move the rubber peg further forward in the fuse than the plan shows. This is a huge weight savings and you can still run just as long of a rubber motor. Keep going. Your builds are clean and well done.

Steve
Steve Blanchard
 
Posts: 343
Joined: Tue Jun 14, 2011 10:08 am

Re: Build a 400 series WW2 Fighter for less than $20

Postby Mitch » Wed Aug 08, 2012 7:53 pm

Steve, thanks a bunch... it is very apprieciated for your comments, but I hope you are not displeased I will not take all of your advice.

1. I like the idea of the number of ribs in the model for the "scale" look
2. I will not use 1/16 at diehedral, I understand, but I am flying my 109E with 4 cracked spars (Remember Trouble). You can see the damage in above post. It is between the 2nd and 3rd rib. All 4 top spars are cracked! I believe with the plastic brace it will be strong enough.
3. I will move the peg hole. On my 109E I moved the peg hole back over 1 inch. On this model I will move it forward about 1/4 inch from plan.

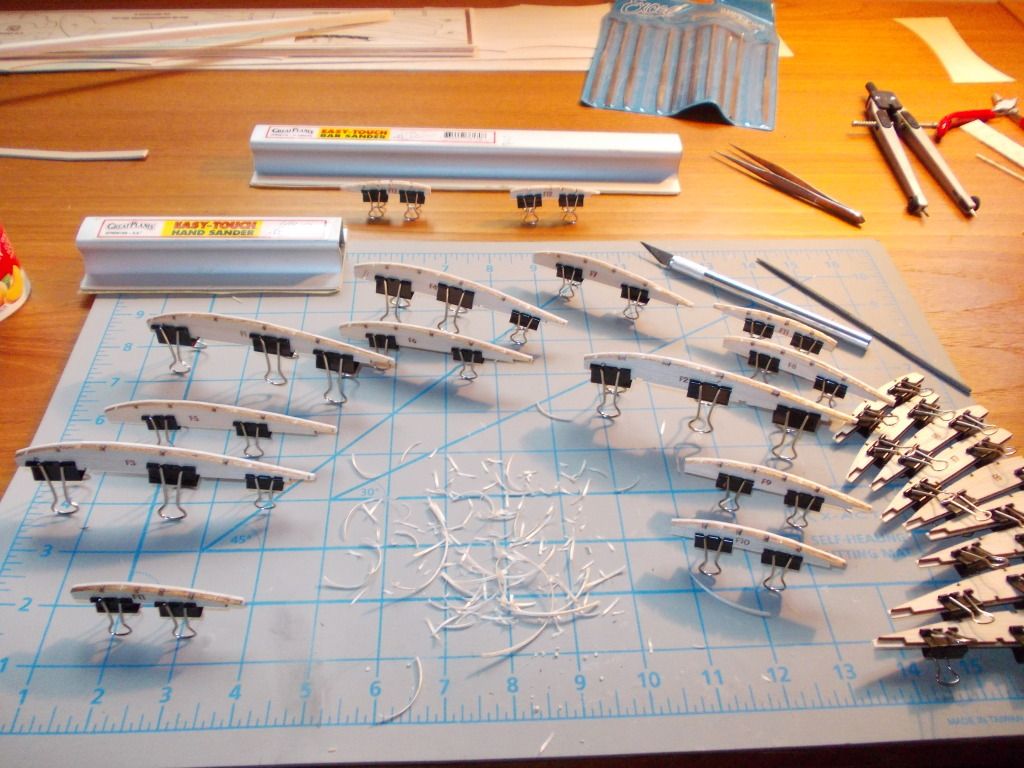
All Notches are removed and I am keeping ribs with templates until used...

Image

Notice the slight scallop in the top of the brace. The recieving rib slot is getting very close to the top of the rib so this will help fitment.

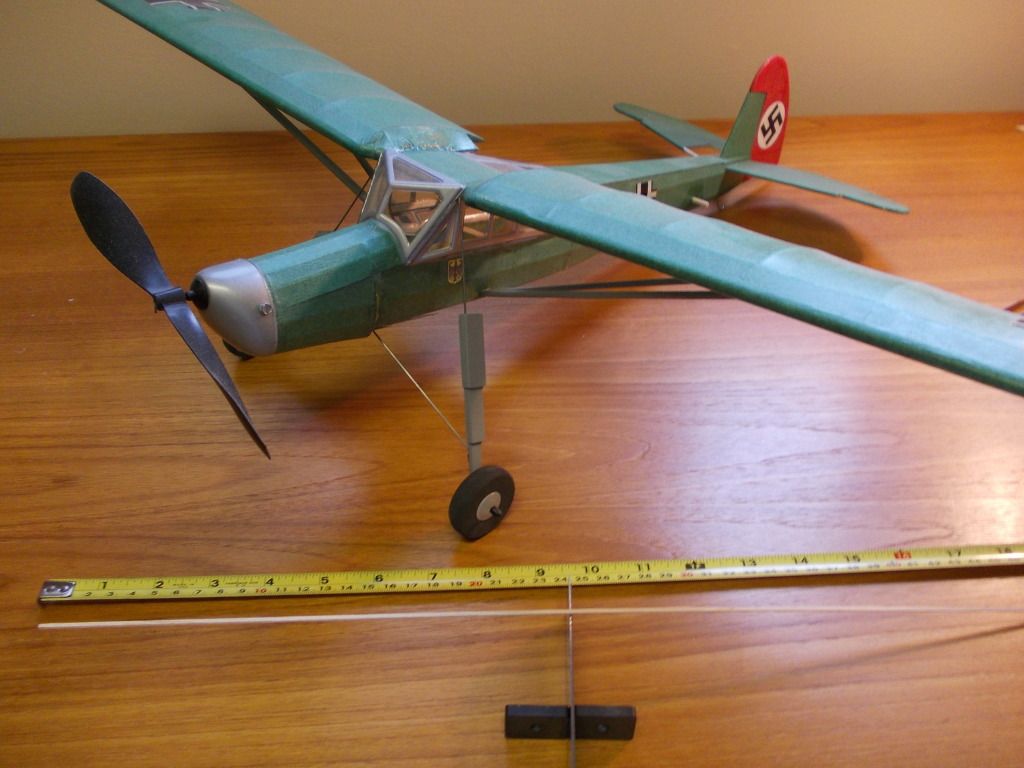
The Inspector General of the Luftwaffe landed in his Storch for an unannouced inspection...

Image

The 1/16 spars are being balanced and I needed to move about 1 inch to balance... Heavy side toward CL of plane. I tried to balance the spar for pic, but it kept moving as I have a window open... I now use my x-acto knife round handle for balancing... very easy to find "Heavy" side of spar.

The port wing is getting dry fitted... I have some Guillow boards, but also started to use the Magnet-Board. I will glue in these odd ribs, let dry, then place in the even ribs. I can not do all ribs at once as the magnets will interfer with each other!

Image

Mitch

:?: I expect to add washout after wing is built, during the covering stage :?:
Mitch
 
Posts: 1347
Joined: Mon Aug 22, 2011 9:16 pm
Location: Kent, WA

Re: Build a 400 series WW2 Fighter for less than $20

Postby Wildpig » Wed Aug 08, 2012 9:33 pm

Mitch, I applaud your careful and methodical approach to this whole process. I am really enjoying your build and flying threads.
You keep pulling a rabbit out of the hat and surprise us with a Storch. She's a beaut. Didn't Guillow's have a Storch kit some years back?

You said you would move the motor peg forward 1/4" from the plan location. I think SB was thinking of moving it to the next former forward. I think you can be more aggressive(?) with the relocation.

Your 109 is really shaping up to be a nice flier. 6grams less weight in just the ribs. That's significant.

Balancing the wood is something I need to incorporate in my building process. I like the attention to such details.
Wildpig
 
Posts: 529
Joined: Thu Jan 26, 2012 9:41 am

Re: Build a 400 series WW2 Fighter for less than $20

Postby Mitch » Wed Aug 08, 2012 11:19 pm

Thank you...

Here's the Bf109 doing a low fly over my work table...I need to finish the Pilot and paint him...Up close you can see how basic my model is... It was just built to be a flyer... All the pieces are sanded, so no numbers remain on the wood... I didn't even put in the wing fairing, because I am not good at that... I just make sure I get a tight fit!

Image

You can see I moved the peg back to the next bay from where the plan shows it to be. My thought was longer is better. It was difficult to do that. I am a bit concerned to move it to the next bay forward (Where the cross is) that would be a jump of two bays in my Bf109 evolutiuon... Maybe I will take your'e combined input... I could really make the back 1/3 of the Aircraft VERY light!

I am trying new things in this new build, but according to Don Ross, one must do these things to have a sucessful flyer. Balancing the 1/16 stringers is a new idea I found in his book. I have come a long way since my first Guillow kit that I built when I was 10 years old. But I am still learning...

I also read in Don Ross' book "RC guys can build their planes with a Chain Saw, but it takes a Scapel to build a Rubber Powered Plane" or something like that... I just want to let these new guys know what it takes... I give them credit for wanting to build there own RC flyer, but I really believe they should build it as Rubber Powered Plane First.

I will continue the build in the morning... signing off for tonight... All the Best to you All... Mitch
Mitch
 
Posts: 1347
Joined: Mon Aug 22, 2011 9:16 pm
Location: Kent, WA

Re: Build a 400 series WW2 Fighter for less than $20

Postby Steve Blanchard » Thu Aug 09, 2012 8:33 am

Mitch,

Please feel free to use whatever suggestions you like and discard the rest. That's why they are suggestions not demands (not that I could demand you do anything). I think you are doing a great job. I agree with Wildpig that I was saying to move the peg up another whole bay. This is a significant weight savings move and causes no issue with rubber length. If done right you can put up to 5 times the hook to motor peg length of rubber in any model. If you are interested, let me know and I will post some info on how to do it.

Steve
Steve Blanchard
 
Posts: 343
Joined: Tue Jun 14, 2011 10:08 am

Re: Build a 400 series WW2 Fighter for less than $20

Postby Mitch » Thu Aug 09, 2012 9:20 am

Steve, et al...

I am sitting here this AM with my morning coffee, deciding how to proceed... I think I will take your advice and move the peg forward. I just read somewhere, maybe for contests, you are allowed to move the peg hole from plan. I assumed rearward would be better. Moving it forward I believe will make a HUGE difference in the CG. This isn't ROCKET SCIENCE, but it's close... AIRFRAME and ENGINE, design... I enjoy this almost as much as seeing this planes fly. I will keep spacing of ribs as per plan because I am more concerned with wing warpage when I put on, and shrink the paper.

I think I heard the whistle blow... need to get to work at the Aircraft Factory...

Mitch

PS. My Dad was in the Submarine Forces during WW2, after the war, he used the GI Bill to get his A&E license. The then got a job for TWA as a Mechanic, then worked up to Flight Engineer. Those were the days when Pilots were Pilots and the FE had the Engine skills and Knowledge and was part of the Flight Crew. I believe his favorite Airplane was the Lookheed Constillation. When TWA went to all Jets, he went to the 727. He did not like the 707. When the 747 was introduced he went to that. During the end of his Career, he was trained and worked as IRO (International Relief Offier) on Very Long Flights, so even with his beginnigs in A&E he finnally ended his Career in the Captain's Chair!
Mitch
 
Posts: 1347
Joined: Mon Aug 22, 2011 9:16 pm
Location: Kent, WA

Next

Return to General Building Questions

Who is online

Users browsing this forum: No registered users and 19 guests