Focke-Wulf FW-190 build (406)

Ask other modelers for a little help / knowledge ?

Focke-Wulf FW-190 build (406)

Postby bluecolt » Sun Jul 10, 2016 1:36 pm

Image

Image

Image

Image

Image

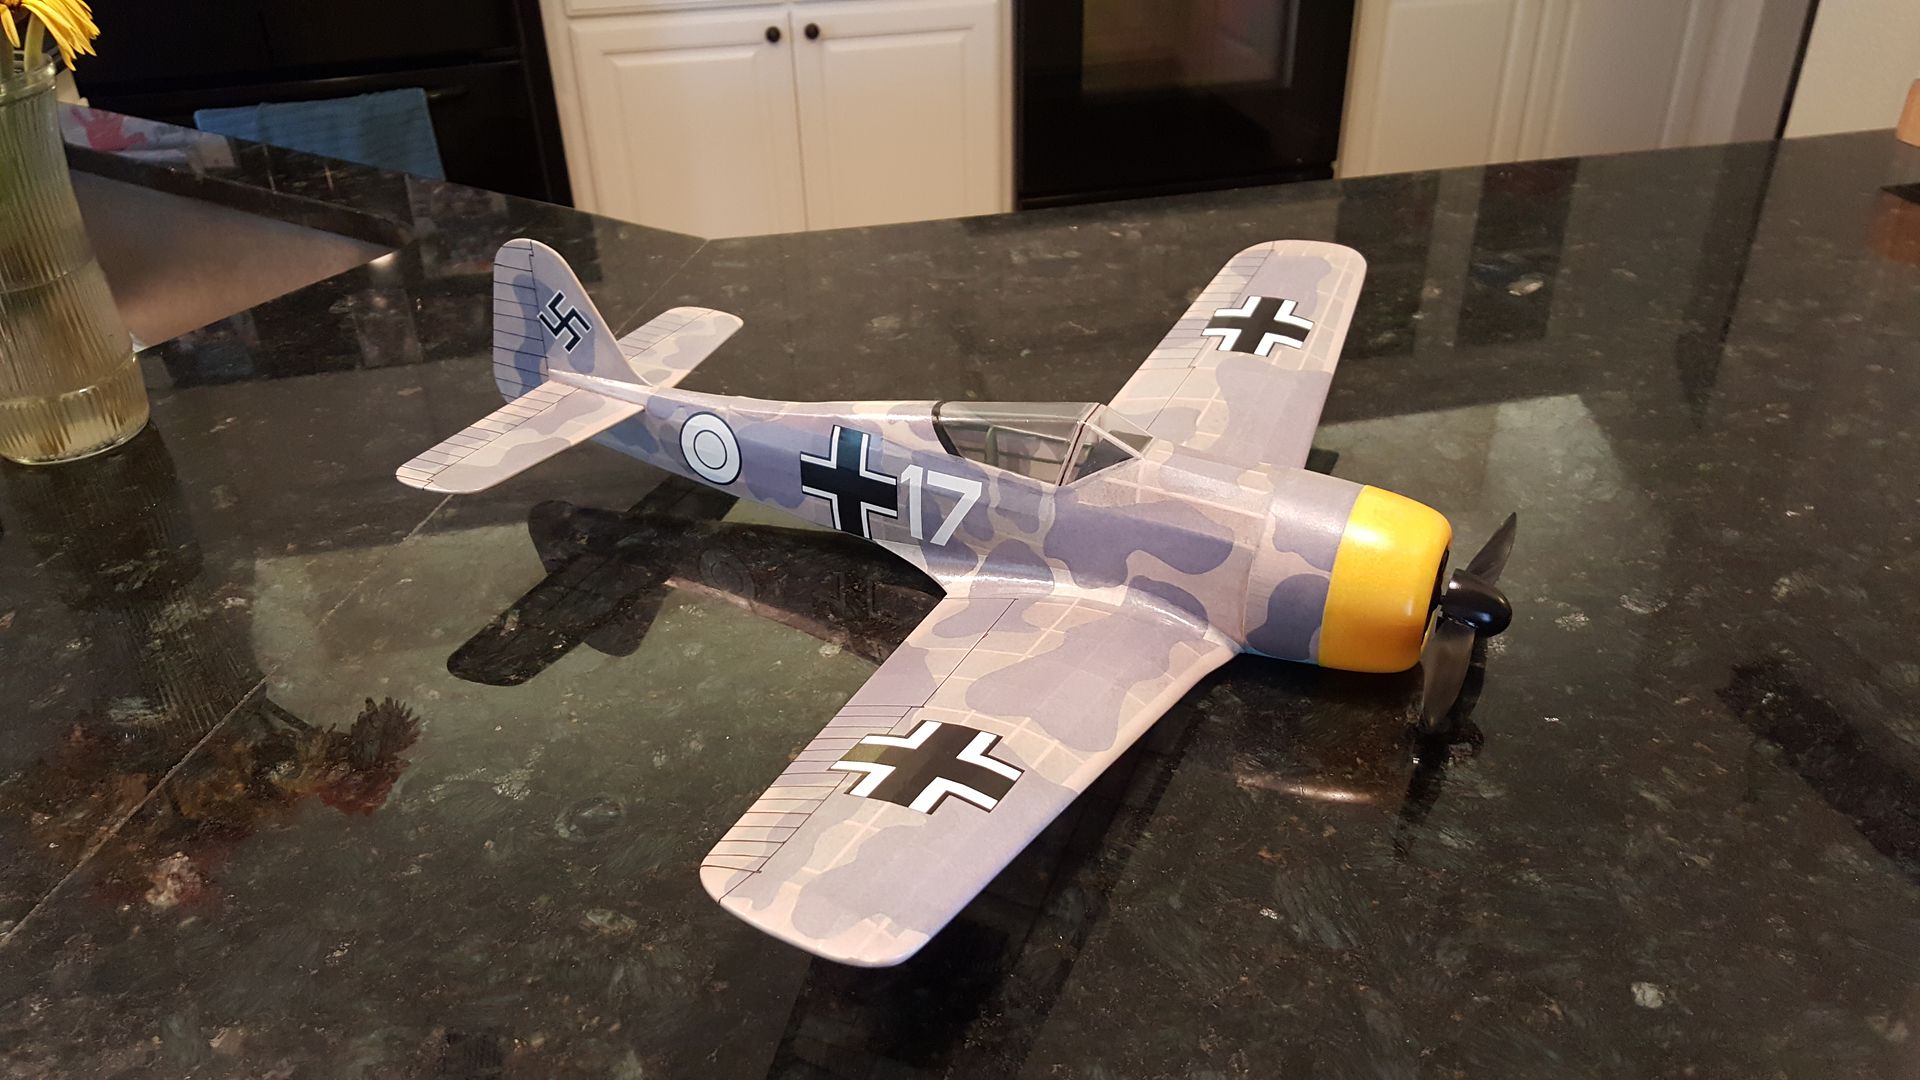
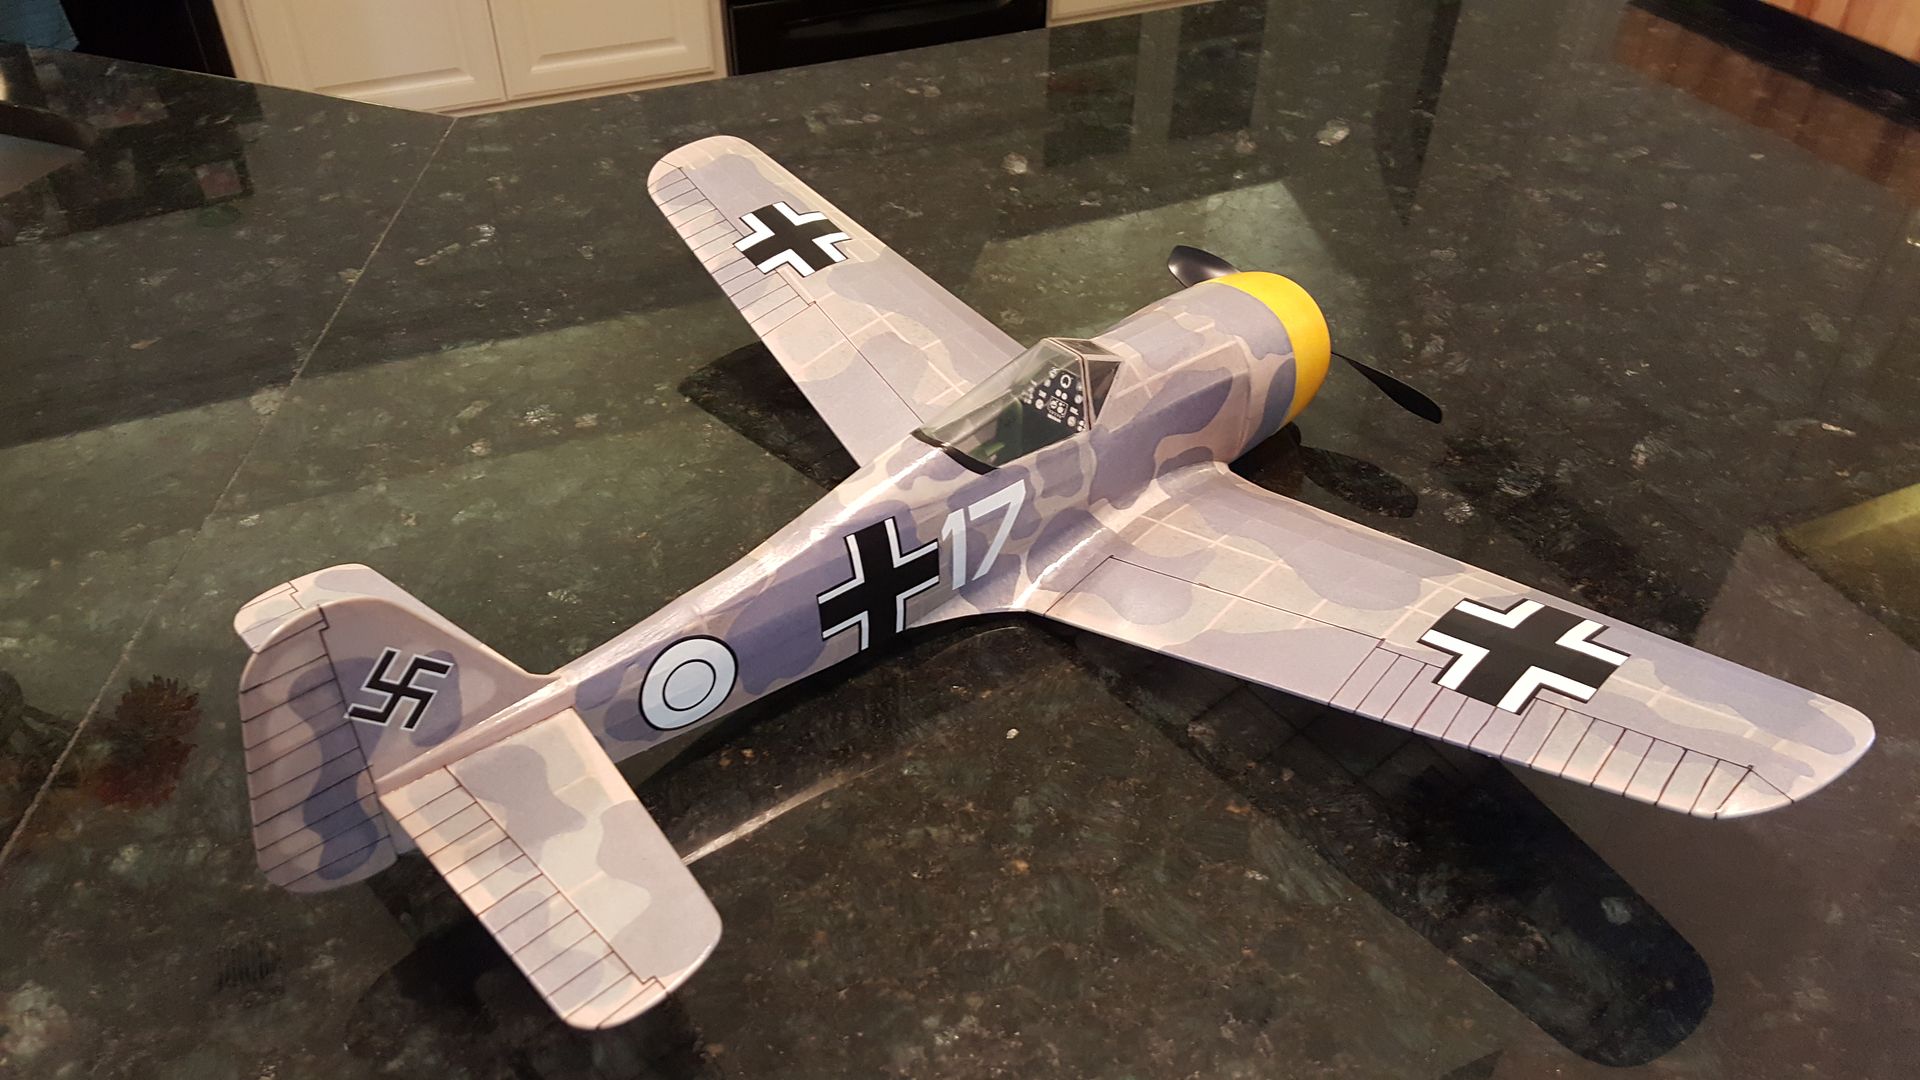
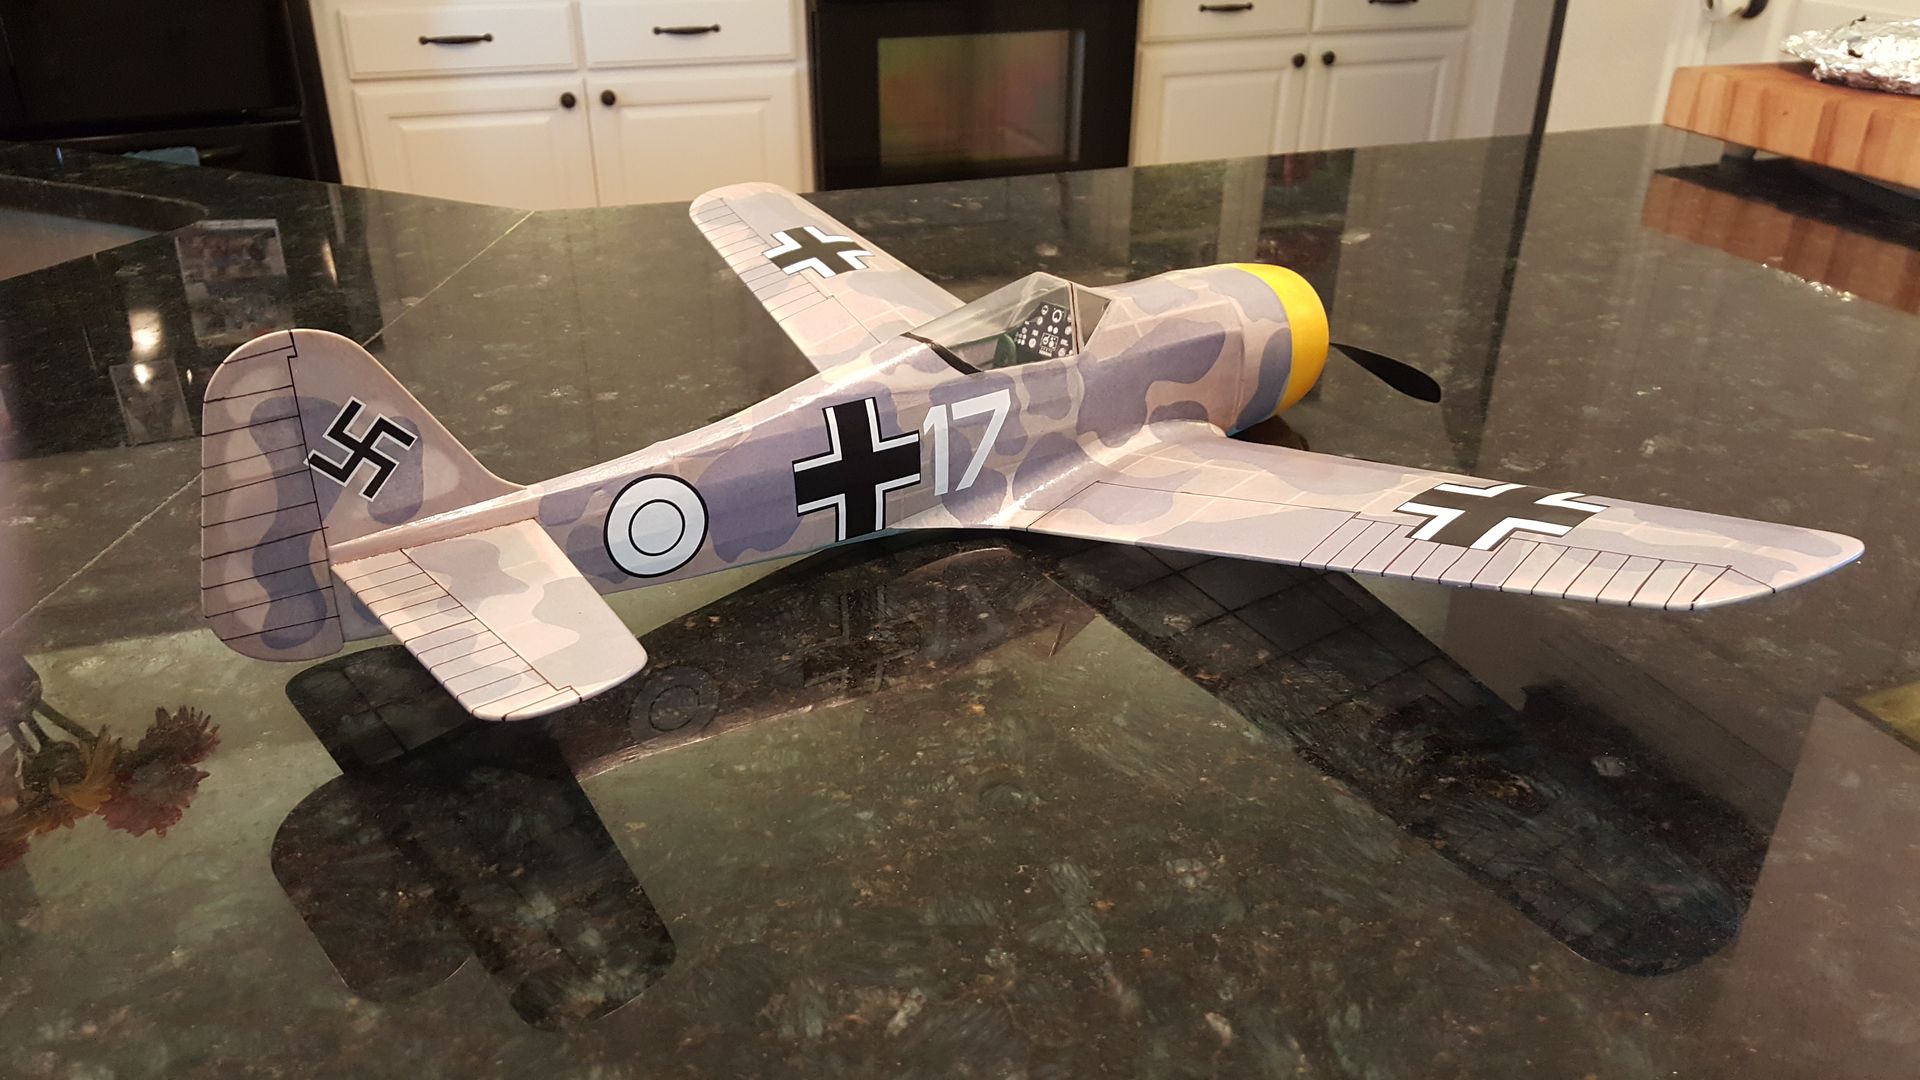
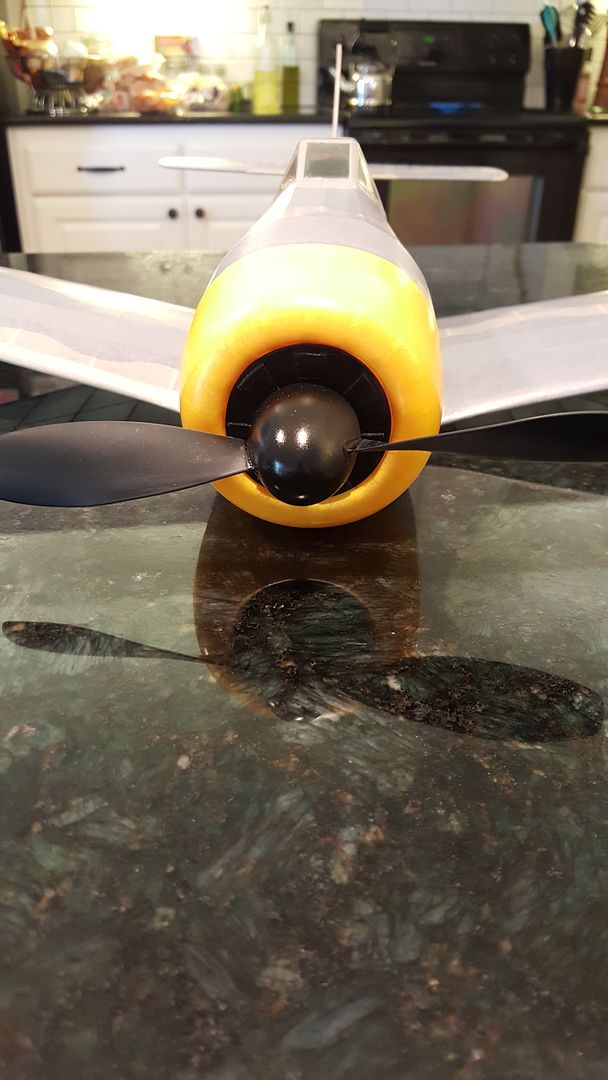
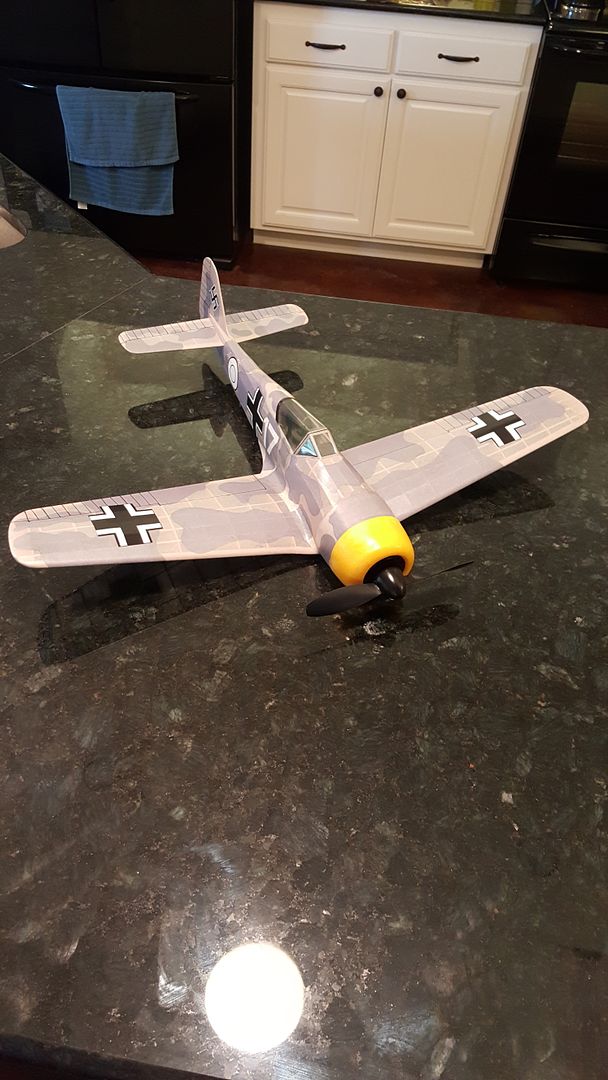
This is an FW-190 (kit 406) that I built in June. The laser cut wood was fairly light and on top of that I cut out a lot of excess wood, scalloped the formers, etc. it comes very close to being balanced without any additional nose weight. I built a functioning nose block that's held in by magnets and plan on flying this one. The camouflage was all done with tissue along with the cowling, which is covered in yellow tissue. The only paint used was green chromate for the cockpit and flat black on the nose block/dummy engine and spinner. The dummy engine is made out of balsa, and it's hard to tell in the photo, but there are 7 balsa 'cylinders' to represent the front-row of the 14-cylinder BMW 801 motor that powered this plane. I finished the tissue with nitrate dope and sprayed it with clear acrylic after applying the decals.

I had a lot of fun with this project and have also built the 500 Series FW-190. There is something about the Focke-Wulf that has always appealed to me, they are beautiful warbirds.
bluecolt
 
Posts: 25
Joined: Wed Sep 18, 2013 12:11 pm

Re: Focke-Wulf FW-190 build (406)

Postby strongeagle » Tue Jul 12, 2016 7:41 am

I built this kit many years ago and it fell far short of the FW-190 in my imagination. Yours is perfect! I salute you on a job well-done, it is an inspiration for me and I just might dig those old plans out and give it another try.

Thanks for posting this model.

Tom S.
strongeagle
 
Posts: 12
Joined: Fri Mar 14, 2008 10:20 pm
Location: Appomattox Virginia

Re: Focke-Wulf FW-190 build (406)

Postby bluecolt » Tue Jul 12, 2016 9:45 pm

strongeagle wrote:I built this kit many years ago and it fell far short of the FW-190 in my imagination. Yours is perfect! I salute you on a job well-done, it is an inspiration for me and I just might dig those old plans out and give it another try.

Thanks for posting this model.

Tom S.


Thank you for the kind words, I hope your FW-190 build goes well. I left off a lot of details to keep this one light, but I like the model so much that I picked up another kit to build for display only. I'm going to include guns, wheels, wheel wells, separated control surfaces and a detailed cockpit. Besides, my flying models don't usually last long so it'll be nice to have one that won't get destroyed.
bluecolt
 
Posts: 25
Joined: Wed Sep 18, 2013 12:11 pm

Re: Focke-Wulf FW-190 build (406)

Postby Mitch » Wed Jul 20, 2016 10:54 am

Hi

First off, your model LOOK GREAT!

Now for some comments.

On the FW the front is not cylinders. They were covered with a cooling fan, so those are blades of the cooling fan and the cylinders are behind that. I though the same thing at first and was disappointed with the lack of detail of the 'cylinders' until I did research and see how the BMW engine worked.

Looks like you added extra diehedral and that is good. For FAC rules maximum allowed is to the bottom of the canopy. I try to get it just below that to make sure my model is 'legal'

Also nice job on lines, FAC rules also require all mg's and any cowling bumps and things like that. Nice job on wing faring. I still have a hard time with those.

Looks like you do not have the peg in for the photos. I think I see the spot and looks like you followed the plan. That is fine. Now I bring mine forward one bay.

Do you plan to fly with supplied prop? that will work and have less torque effect. I use 9 inch props now. I would like to see a picture of how the nose block is secured. What rubber are you using? I have successfully flown models in a school yard or park with Guillow's rubber. Breaking point on tan is about 6 or 7 inch ounces, Guillow's rubber will break at about 18 inch ounces so you will get a short powerful burst!

again GREAT model, keep up the EXCELLENT work... only take my points as comments, your model looks like it should be in the photo of the month!

Mitch

PS what is the AUW of the model? AUW = All Up Weight (Ready to fly with rubber motor) Also important to know weight of model without rubber motor.
Mitch
 
Posts: 1347
Joined: Mon Aug 22, 2011 9:16 pm
Location: Kent, WA

Re: Focke-Wulf FW-190 build (406)

Postby bluecolt » Tue Jul 26, 2016 9:42 pm

Mitch wrote:Hi

First off, your model LOOK GREAT!

Now for some comments.

On the FW the front is not cylinders. They were covered with a cooling fan, so those are blades of the cooling fan and the cylinders are behind that. I though the same thing at first and was disappointed with the lack of detail of the 'cylinders' until I did research and see how the BMW engine worked.

Looks like you added extra diehedral and that is good. For FAC rules maximum allowed is to the bottom of the canopy. I try to get it just below that to make sure my model is 'legal'

Also nice job on lines, FAC rules also require all mg's and any cowling bumps and things like that. Nice job on wing faring. I still have a hard time with those.

Looks like you do not have the peg in for the photos. I think I see the spot and looks like you followed the plan. That is fine. Now I bring mine forward one bay.

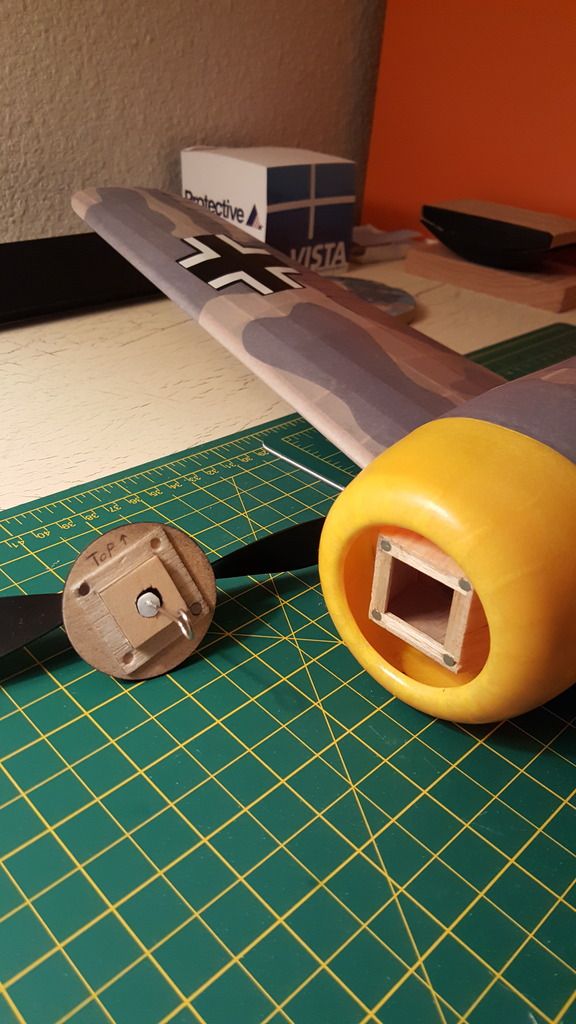
Do you plan to fly with supplied prop? that will work and have less torque effect. I use 9 inch props now. I would like to see a picture of how the nose block is secured. What rubber are you using? I have successfully flown models in a school yard or park with Guillow's rubber. Breaking point on tan is about 6 or 7 inch ounces, Guillow's rubber will break at about 18 inch ounces so you will get a short powerful burst!

again GREAT model, keep up the EXCELLENT work... only take my points as comments, your model looks like it should be in the photo of the month!

Mitch

PS what is the AUW of the model? AUW = All Up Weight (Ready to fly with rubber motor) Also important to know weight of model without rubber motor.


I did some more reading on the BMW radials, along with the Double Wasp and other WWII radial poweplants; really interesting stuff. Sure enough, you're absolutely correct about the fan, and I also found it interesting that BMW provided the cowling for all the engines too. I have a second kit that I'm going to make some corrections on, maybe even try making fan blades with soda can aluminum or something.

I did add extra dihedral, I think it was one inch extra on top of the plan diehedral. I had to make a new support spar out of thin hobby plywood because the kit plastic one wouldn't fit the new angle. I hadn't considered FAC rules, but you got me thinking that I should read up on them and incorporate them into my flying builds.

I was planning on using the supplied prop, and just got some tan rubber to try out. Good catch on the motor peg, the brace is in the plan position, I just hadn't cut out the paper for it yet.
Image

Here is the nose block. I left space for more magnets, and will try stacking them to trim the thrust.

I'm looking forward to flying this model, but I don't have a lot of experience with that part of the hobby yet. I enjoy the building part more than anything, but for some reason I usually try to build them 'flyable' even if it's just going to hang somewhere (as opposed to building them for display only). Therefore, I have almost a dozen builds under my belt, but pretty much no flying experience, but I plan on changing that.

Thanks for the kind words, and I absolutely embrace the constructive comments; I still have a lot to learn so I'm definitely open to all suggestions. I like making the wing fairings, I think they really add to the model's look. I use a manila colored resume paper that blends in with the balsa colorwise, and is thick enough to curve nicely without being so stiff (like manila folder material) that it creases. When I get my digital scale back from a friend I'll post the weight.
bluecolt
 
Posts: 25
Joined: Wed Sep 18, 2013 12:11 pm

Re: Focke-Wulf FW-190 build (406)

Postby scigs30 » Tue Jul 26, 2016 11:10 pm

Great job. Did you have to glue the decals on?
scigs30
 
Posts: 844
Joined: Mon Nov 06, 2006 11:31 am

Re: Focke-Wulf FW-190 build (406)

Postby bluecolt » Tue Jul 26, 2016 11:36 pm

scigs30 wrote:Great job. Did you have to glue the decals on?


Yeah, I soaked them until they released from their backing then used glue stick and decal set solution to apply them. I had brushed an extra coat of nitrate dope in the areas under where decals went which helps them set without the tissue sagging. When everything is complete I like to coat the entire model in Kyrlon acrylic spray to seal the decals down.

I've taken a lot of inspiration from your build posts btw, and use your models as a reference while building. Thanks for all of your contributions to the forums.
bluecolt
 
Posts: 25
Joined: Wed Sep 18, 2013 12:11 pm

Re: Focke-Wulf FW-190 build (406)

Postby Chris A. » Wed Jul 27, 2016 10:33 am

Very nicely done! I like the colors and the panel markings. One of the details I tried on my 190 was 5lb. silver monofilament fish line that I glued onto the top front of the vertical stabilizer and also glued into a small hole in the canopy top. On the real 190, the aerial wire was on a spring and pulley that rode backward with the canopy when it was opened. The pulley was attached to the top of the canopy with the lead running down into the radio set behind the armored seat. A nice detail add with really no weight.
Chris A.
 
Posts: 92
Joined: Tue Apr 01, 2014 10:50 am

Re: Focke-Wulf FW-190 build (406)

Postby davidchoate » Mon Aug 01, 2016 6:12 pm

Nice work. I like the Cowl Block adjuster
davidchoate
 
Posts: 1263
Joined: Wed Aug 14, 2013 6:41 am
Location: PHiladelphia PA

Re: Focke-Wulf FW-190 build (406)

Postby Mitch » Tue Aug 02, 2016 1:32 pm

Once again nice work...

What I know about flying.
1. A little more dihedral is good, but if you cross a line with too much dihedral, that will not be so good as your plane will be doing a 'Dutch Roll'. I would stick with the FAC rules as it will allow more but not too much and your model will still look okay.

2. I have built to Guillow plans and used the 7 inch prop and grey rubber and get nice 'schoolyard' flights. When you go with a bigger prop you will introduce more torque to the model and you will need to adjust the thrust angle. Simple adjustment to the rudder in the Guillow instructions is not enough. So I like your nose block the way it locks in but you might find when you start flying models that you will need to adjust the angle. That will be down and to the right. I have found that it is usually more than I expect at first. I see you plan to 'add' magnets to change trim. I like adding small screws and then back them out as necessary. One on top and one to move the prop to the right.

3. I have seen guys puts a chunk of clay on the nose and sometimes on the left wingtip also as they are making flight adjustments.

Just some thoughts when you are ready to start flying. When you do start flying a good stooge and winder will make you life a lot easier and more pleasant.

Good Luck... Mitch
Mitch
 
Posts: 1347
Joined: Mon Aug 22, 2011 9:16 pm
Location: Kent, WA


Return to General Building Questions

Who is online

Users browsing this forum: No registered users and 5 guests