Build a 400 series WW2 Fighter for less than $20

Ask other modelers for a little help / knowledge ?

Re: Build a 400 series WW2 Fighter for less than $20

Postby Mitch » Sun Aug 12, 2012 12:37 am

End of Day 4 Report...

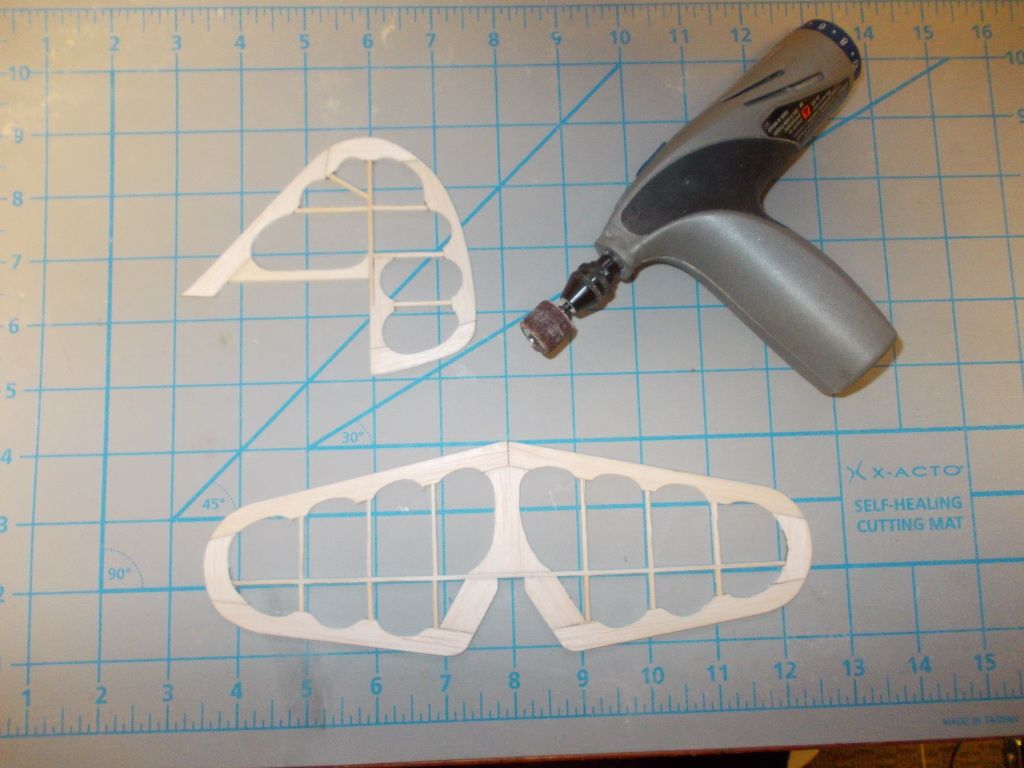
I did not work much on the model today, but am pleased to report, all goals where met. After AM coffee sanded and lightened the tail...

Image
Tail weighed 4g before sanding, now weighs 2g... I did a bit more work on it after this picture to get it to 2g.

During the day worked on the Fuselage a few minutes here and a few minutes there... I am using white glue in this construction and I put a pair of stringers in, clamp and wait...

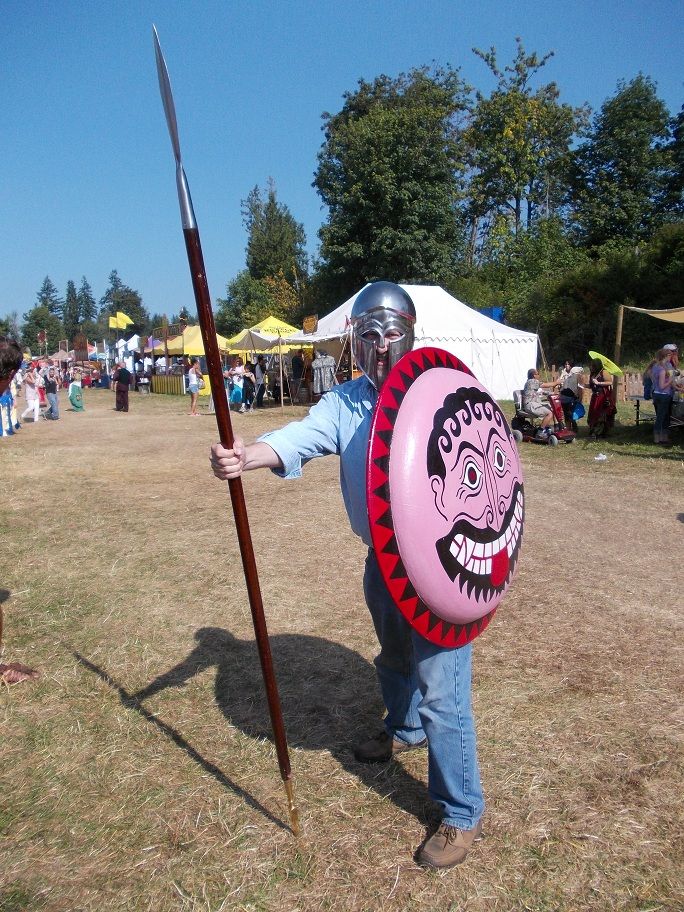
:roll: After my Daughter's 4 hour shift today we went to the Washington Midsummer Renaissance Faire...and there were Ancients... :?: At the Renaissance :?: Go Figure... anyway another hobby of mine is Military Histoy... :idea: I joined the Legion VI Cohort II, I did not suit up in Roman Armor, but as a Greek Hopolite....These Sheids are REALLY COOL :!: We also saw the Knights on there BEAUTIFUL horses!

Image

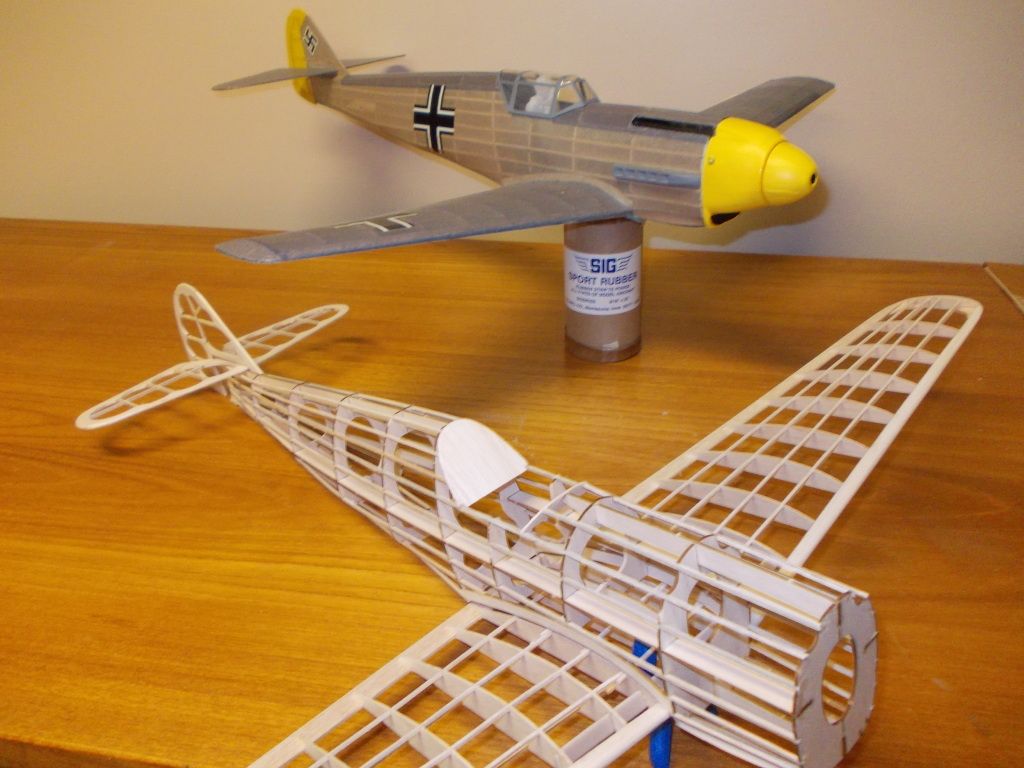
When we got home I have been working on the Fuselage a few minutes at a time... Here is how Fredrich looks now as Emil does a flyover...

Image

I am pleased to report that progress is moving along at the timeline I have laid out. I plan to do a little sanding tonight and shut down the shop at Midnight... If there are any questions or replys I will check before lights out and post reply.

Fuselage weighs 12g. Entire Skeleton Areoplane weighs 26g... I think I am on track for an EXCELLENT FLYER!!! :D

I plan to NOT work on the model tomorrow, so day 5 will be on Monday... Still planning to finish the model in 6 days and Flight test on the 7th day...

Mitch
Mitch
 
Posts: 1347
Joined: Mon Aug 22, 2011 9:16 pm
Location: Kent, WA

Re: Build a 400 series WW2 Fighter for less than $20

Postby Wildpig » Sun Aug 12, 2012 9:29 pm

I like what you did with the tail feathers. 2grams off the tail is :shock:

I sometimes notch the "D" pieces to give the 1/16"sq. pieces a little something to bite into.
Wildpig
 
Posts: 529
Joined: Thu Jan 26, 2012 9:41 am

Re: Build a 400 series WW2 Fighter for less than $20

Postby Mitch » Sun Aug 12, 2012 9:32 pm

Sunday Report... Well I said I was not going to work on the model today... I lied...

I realized I intend to install Landing Gear and that took some thought, and construction... so I worked on some detailing that needs to be built into the model and this stage of constuction... Emil was suppose to have landing Gear also but that design failed...

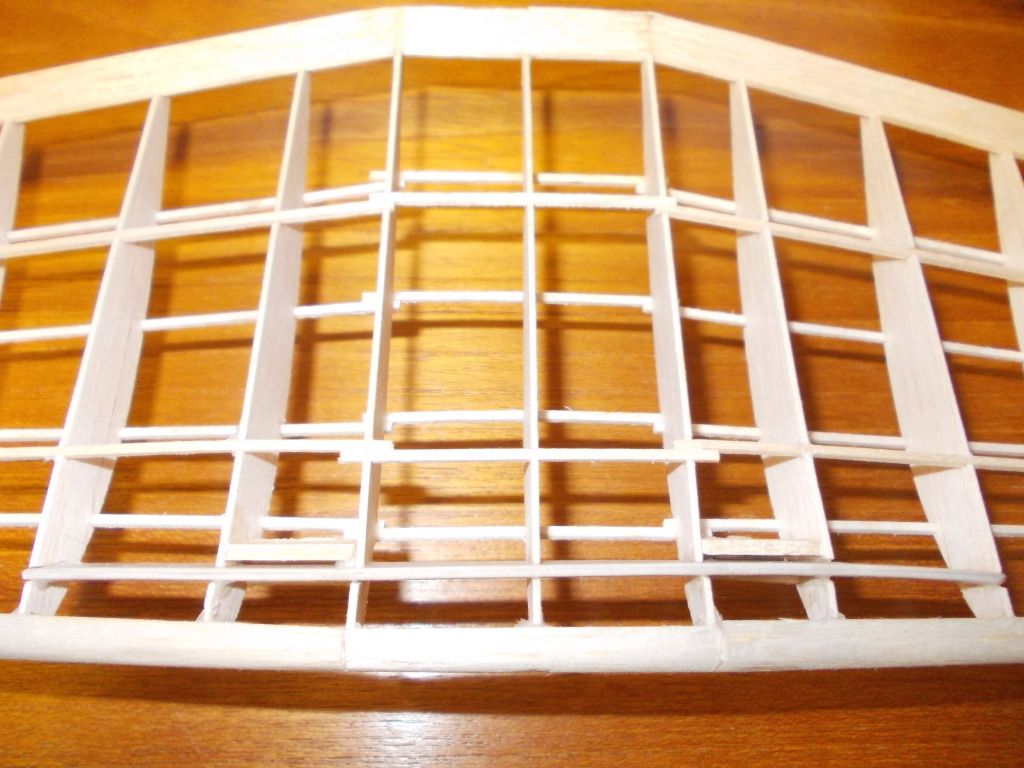
So here is the underside of the wing with pockets to acept the landing gear...
Image
The pockets are framed in with hard wood (popsicle stick) and topped off with hard wood. The reason for this is so the gear will stay snug, I thought basla would open up over time and the landing gear would fall out.

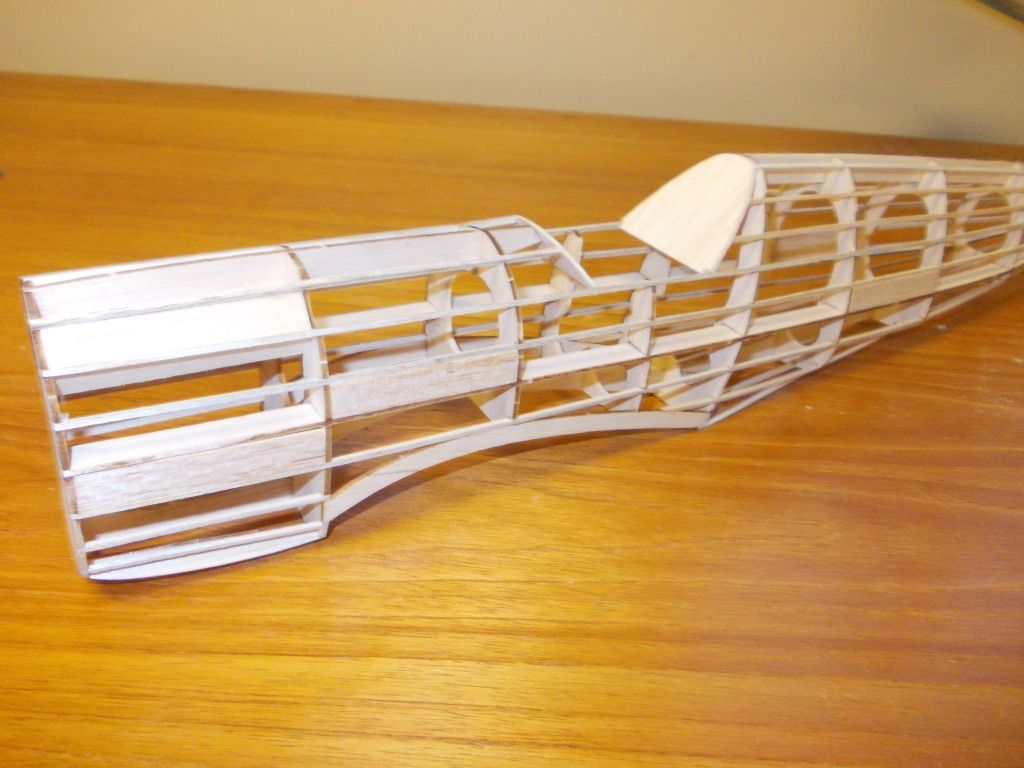
Here is the Fuselage with Balsa inserts added at stategic places for reinforcement and details to come...
Image
There are balsa inserts as I plan to make my own exhaust pipes, air scoop with dust filter, and gun ports. Rember I said we can build this for under 20 dollars so I will not always be getting all the plastic pieces...The gun ports are filled in with 1/2 inch square stock. I will carve out the ports tomorrow, and make the mg's. :!: That's not in the Guillow kit. All this adds weight but I don't mind any weight forward of the CG. Also the 1/2 stock will really reinforce the nose in a roll over dive into the ground impact. I have seen this happen on Emil...always making improvements from Pilot Feedback. :!:

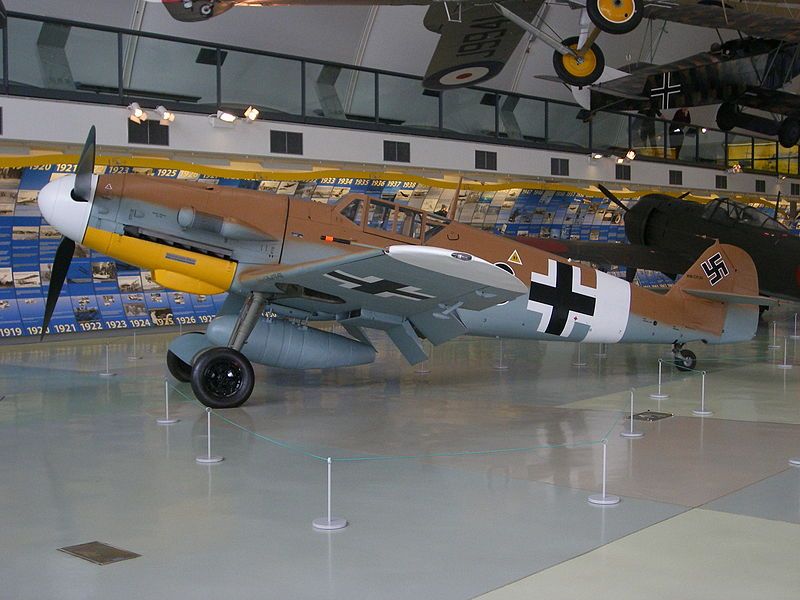
Here is a good photo of an actual 109 that is the basis of my prototype for Fredrich...
Image

Well that's it. The model gained 4g, but most of that is forward of the CG, so not a big deal. Since he is starting to gain weight I made the final decision for construction to have only ONE peg hole and that will be FORWARD... I am going with the knowlege of WILDPIG here... I figure if I don't like it I can cut Fred open and install another brace. But from the Factory Fred will have only ONE engine mount :!: I really do not want to add unnecessary weight AFT!

So that's all for today, tomorrow is Fitting, Final Sanding, Plastic parts, and COVERING!!!

Mitch

PS Update... The tail has be cleaned up a little more, I was suppose to not use the C and D parts. I was planning on laminating, cutting my own balsa stips. Waiting on my LHS to have Balsa Stripper is on Order... So for the next generation Gernot I will cut my own stringers and tail...CONTINUE WITH IMPROVEMENTS in the evolution of this 109 Aircralt model!
Mitch
 
Posts: 1347
Joined: Mon Aug 22, 2011 9:16 pm
Location: Kent, WA

Re: Build a 400 series WW2 Fighter for less than $20

Postby Mitch » Mon Aug 13, 2012 10:26 am

Monday Morning Engineers Report...

Okay I worked a little on Sunday, because I am planning on including some details. That was not in my original build schdule. So I still believe I can build the model and have it ready in 7 days, Flight Trim on the 8th.

So todays job is for finish sanding, fitting, cutting out cowl, spinner, and canopy (The only plastic parts from kit). I plan to Cover the model today.

A few note on colors. The way I build I need to plan where my color lines are going to be. With Emil I added a couple extra stringers in the fuselage so my paper could grab on for my desired color line seperation. With Fred's color line, there is no need for extra stringers.

For sanding I lightly sand with Great Planes 5.5 inch Easy Touch, for the wing I use the 11 inch. This helps me span a large enough area for a smooth and even finish. I sand until I remove the burn mark from the lazer cut.

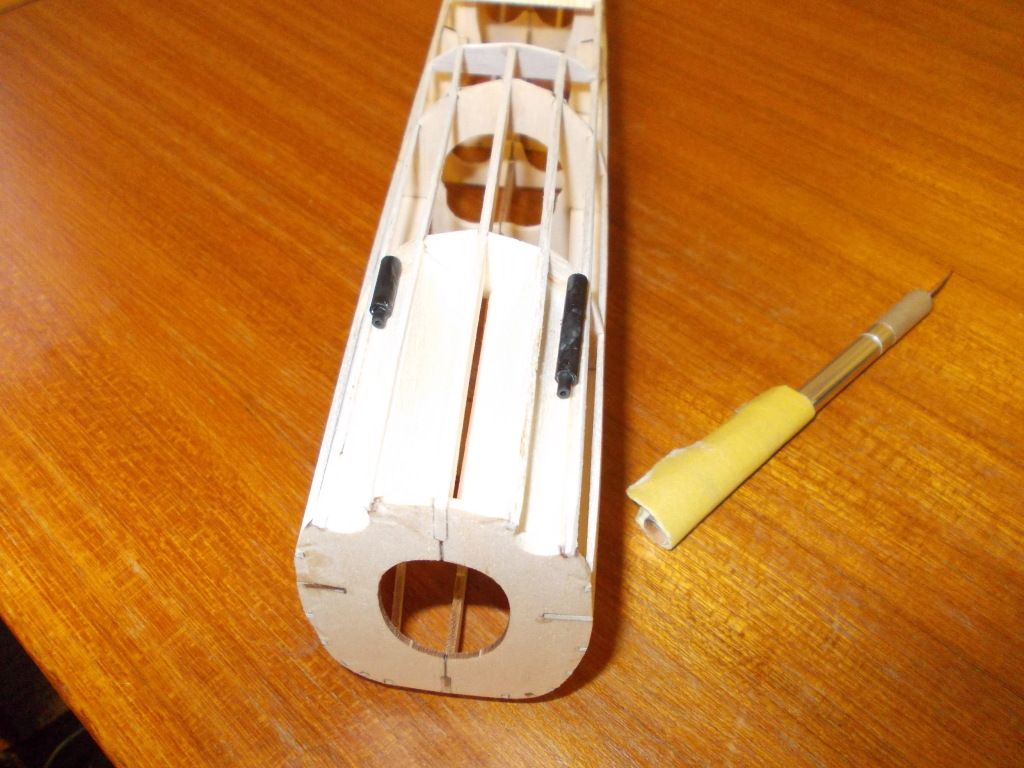
I also come up with unique idea for special applications. For example I wrapped a small piece of sandpaper around the handle of the x-acto knike and it was a perfect sanding tool for the gun ports made out of balsa... Here is a pic of my sanded fuselage with the finihed balsa gun ports and the mg's in place...

Image

I have just done a quick time check and think I spent 15 hours on the model thus far, and plan another 3 or 4. So my idea is to build this quick and cheap, because this model will take to the skies.

I might leave off the yellow as I don't like to have too many different colors... My finish colors will be similar to prototype, but not an exact copy... I hope to show you a few more tricks I came up with, so check back for the end of the day report.

Mitch

PS I see at least 3 mistakes I made in the build thus far. I believe the test of a good modeler is how well you overcome these mistakes we all make.
Mitch
 
Posts: 1347
Joined: Mon Aug 22, 2011 9:16 pm
Location: Kent, WA

Re: Build a 400 series WW2 Fighter for less than $20

Postby Mitch » Mon Aug 13, 2012 2:35 pm

Monday Midday Report...

:!: BEFORE WE BEGIN... START WITH NEW X-ACTO BLADE :!:

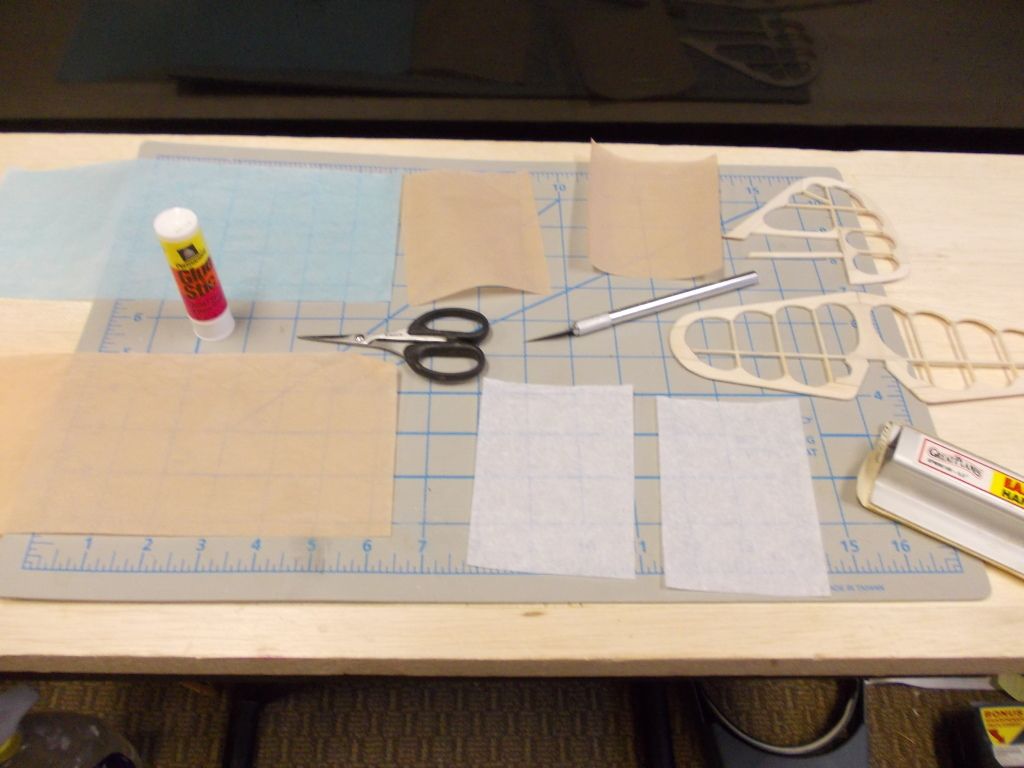
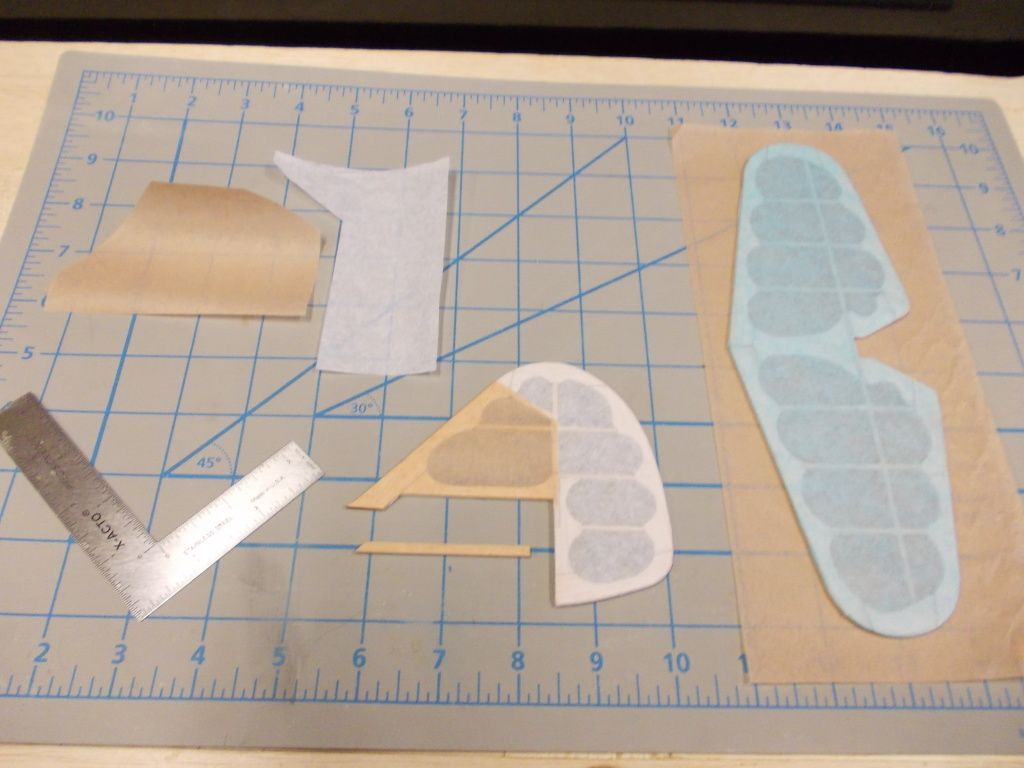
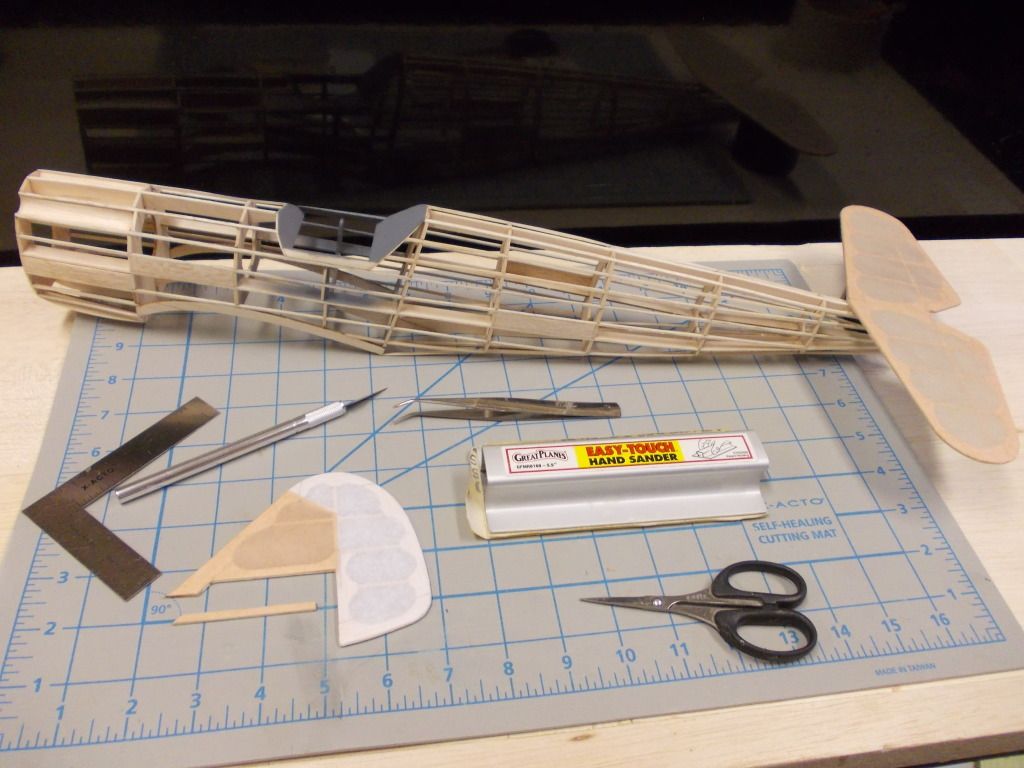
Covering has begun...Tail First (Easiest), then Wing (More Difficult), then Fuselage (Most Challanging)
Step 1. Cut out paper...
Image

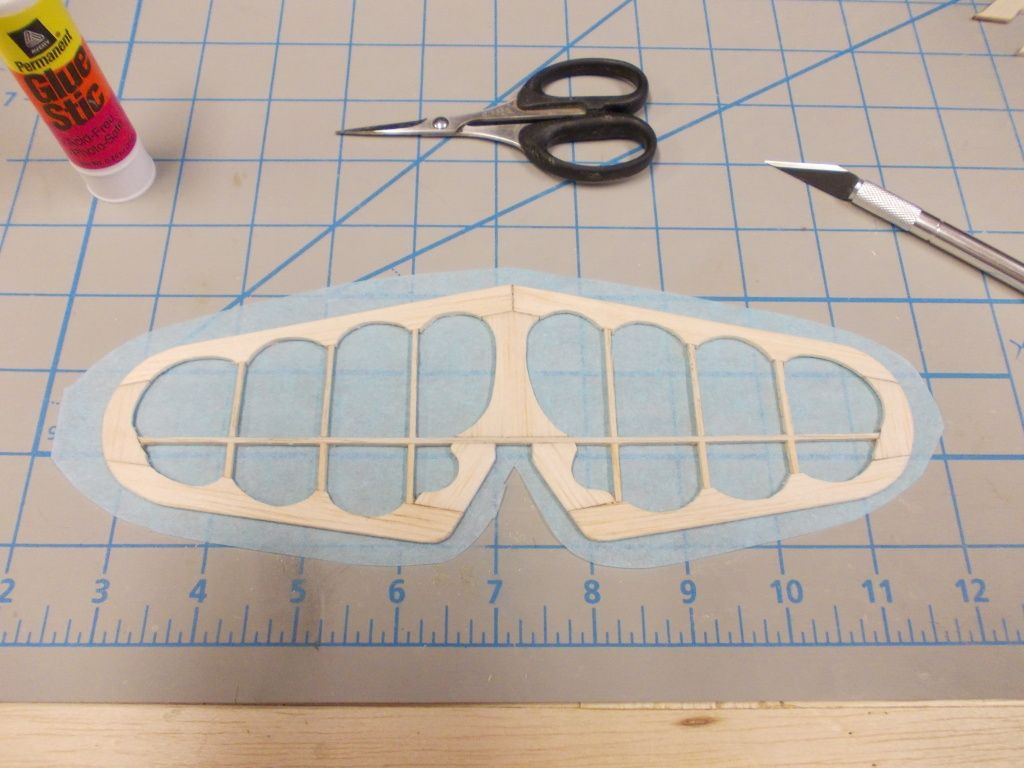
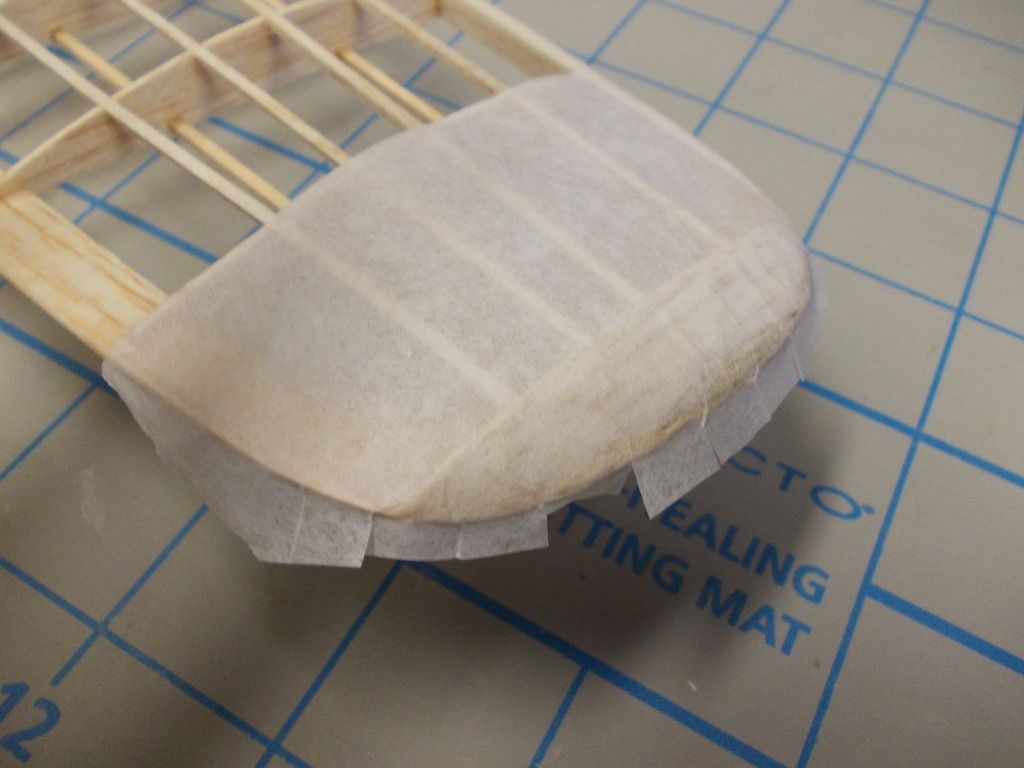
Step 2. Cover, bottom first, top paper/color will cover edge...
Image

Step 3. Moving along... Darker Colors over lighter Colors. Rudder/Wing Tips and Cowling will be White on this Aircraft.
Image

Step 4. All Tail is covered. I will let glue dry a bit more before I wet. I want the glue to be set as the wet paper will soften the glue and shrinking paper may pull away from glued areas. We don't want that to happen!
Image

Fuselage was masked and a light coat of German Grey was applied. Also painted inside of landing gear doors at that time!

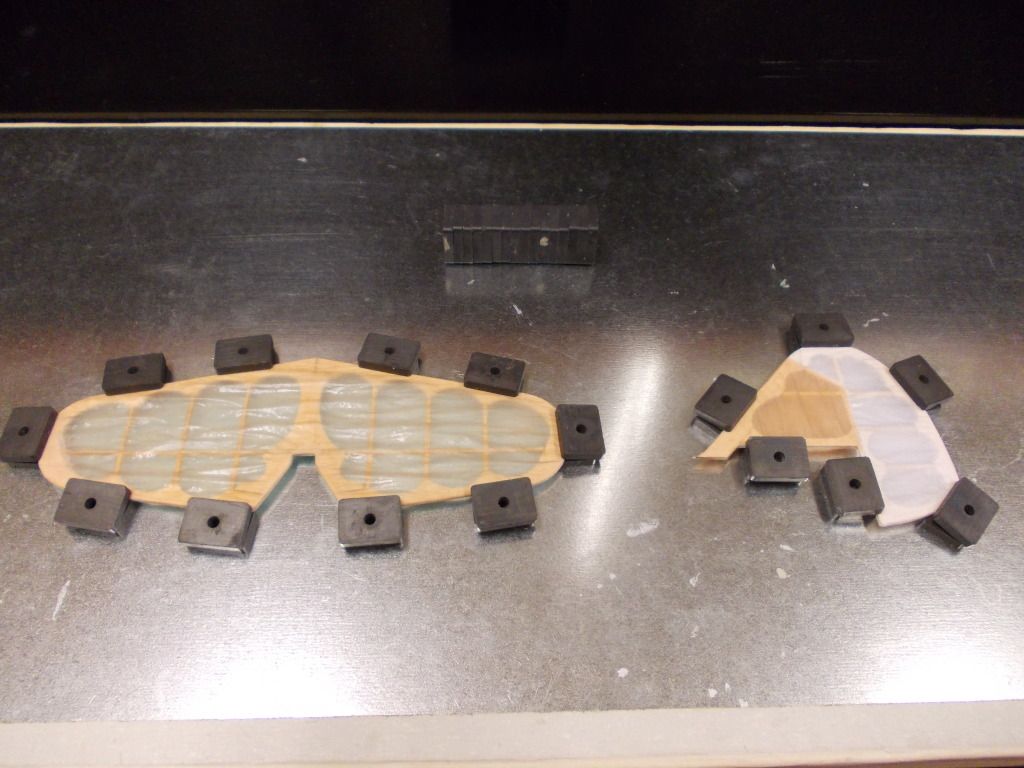
When Tail is dry I will secure with magnets to keep straight and a light mist of water!

Mitch
Mitch
 
Posts: 1347
Joined: Mon Aug 22, 2011 9:16 pm
Location: Kent, WA

Re: Build a 400 series WW2 Fighter for less than $20

Postby Mitch » Mon Aug 13, 2012 6:16 pm

Okay... Home at 4pm and will continue with covering the wing. I will keep this website open and edit this post as I go... This is as "LIVE" as I can get...

I am trying several new techniques for me, and hope the will work, or I will overcome. I have never had 1/32 ribs before and now I am going multiple colors. Not much wood for the paper to "grab to" so I will wait until I feel the glue is completely dry before water mist.

I apply dry paper. I tried wet and this lite tissue just pulls apart. It will shrink and be very nice when done.

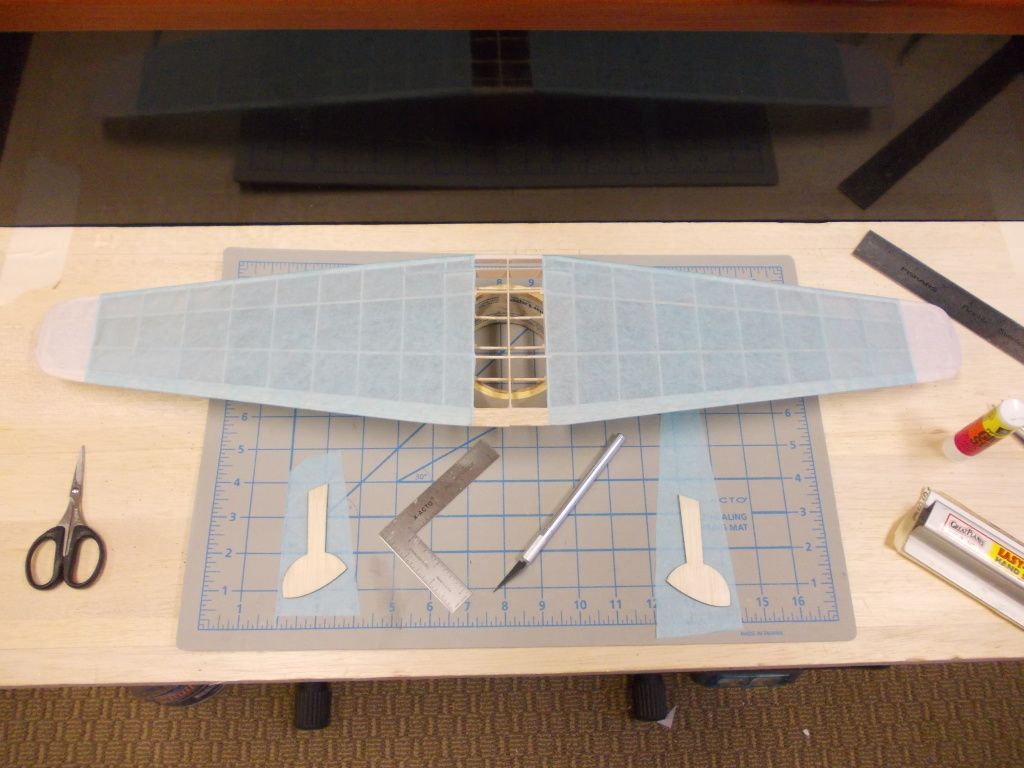
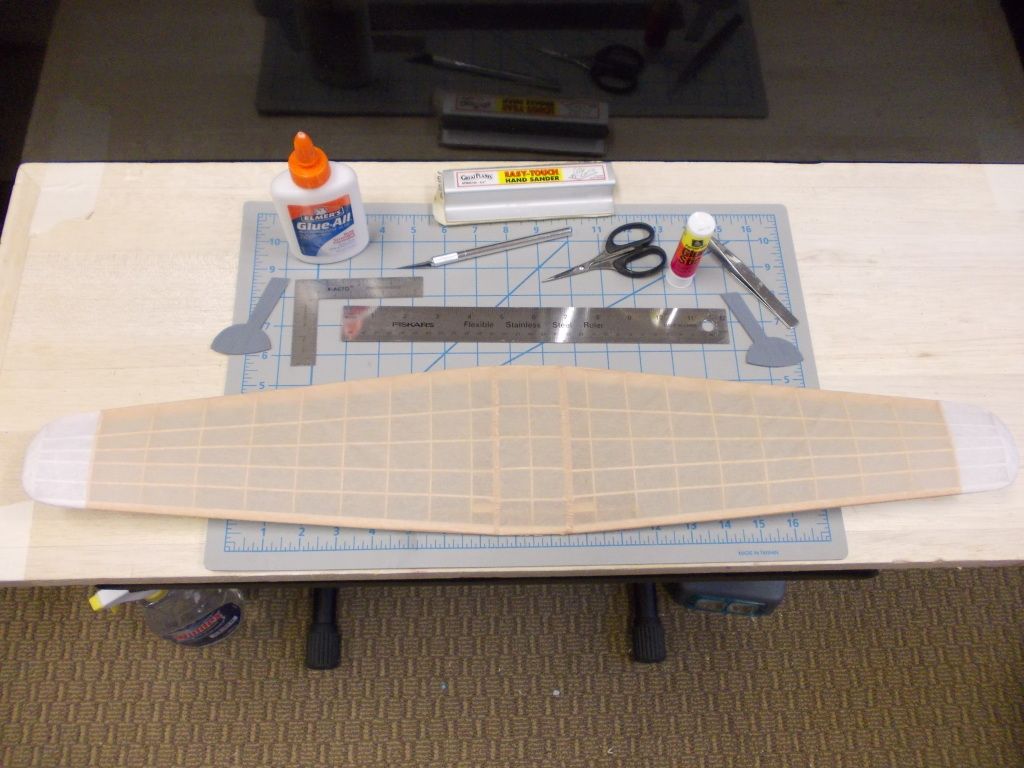
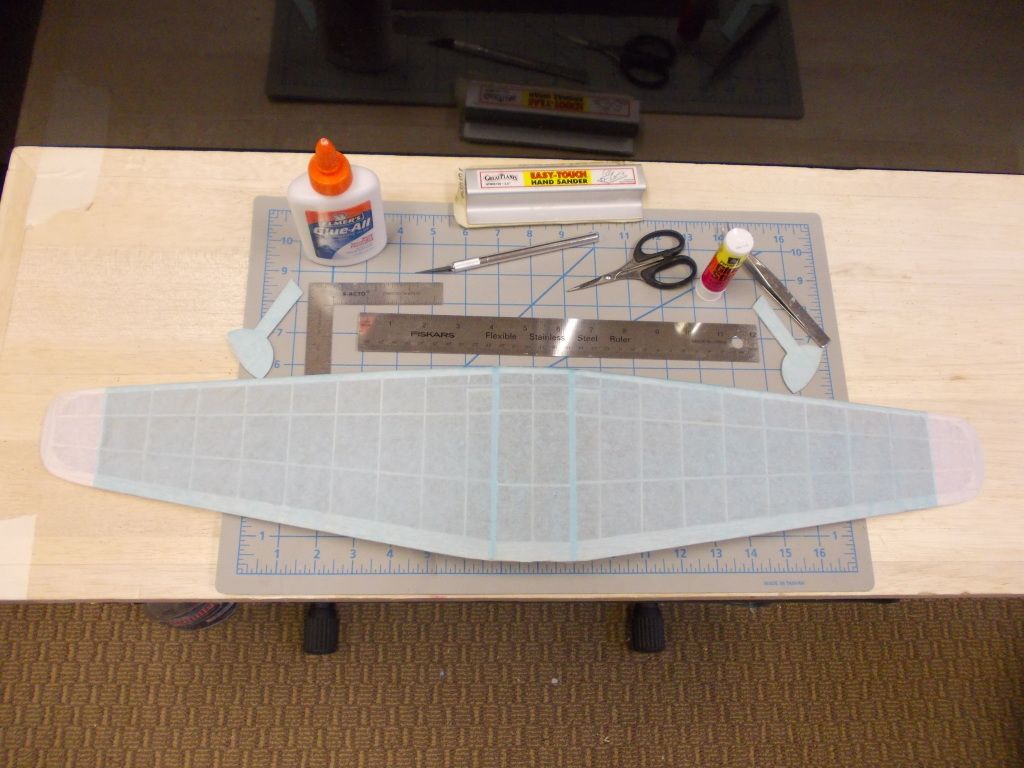
Her we go... I cover BOTTOM First in one piece if I can. Since we will have white wing tips, I will cover those First. Next when I go to the next color I cut a sharp line and start with that. So after wingtips I will go Blue. port and Stbd, to center. Then one more piece. So 5 pieces of tissue instead of one!

Image

Mitch

Now back to work I will edit this post when I have the 3 pieces of Blue on the bottom... its 1615 hours

UPDATE: in just 15 minutes I trimmed the White on both wing tips and applied and trimmed the Blue on P & S wing. My scrap will cover the Landing Gear Doors nicely...

Image

Now I will cover the Doors in Blue, finish the center section and Cover the Top of the Wing in Sand.

Mitch

Okay it is now 1710... so in less than 1 hour I covered the wing with 10 pieces of paper in 3 colors and covered the landing gear doors.

Heres the TOP...
Image

and heres the BOTTOM...
Image

That was fun, but I'm going to take a break, Tonight I will cover the Fuselage, and that will be in another post...

This was LIVE from Mitch's Aircracft Factory...

PS Update :?: I need to review old posts or look in my book or maybe my support Engineer Wildpig can remind me... WASHIN/WASHOUT... Before I wet the wing I think I want the aft wingtips to curve up slightly? Is that correct? It's Happy Hour now and I don't want to look in my notes right now... TAH TAH

PPS Here is another good reason to get a Magna Board and Magnets...

Image

I'll check these tail pieces after diner... Mitch
Mitch
 
Posts: 1347
Joined: Mon Aug 22, 2011 9:16 pm
Location: Kent, WA

Re: Build a 400 series WW2 Fighter for less than $20

Postby Mitch » Mon Aug 13, 2012 9:31 pm

OKAY GUYS... it's 1930, that's 7 thirty, for all you civilians, I did my homework...

WASHOUT... Wingtips up... Better control and reduce chance of stall... So tonight I think I will work on Plastic Parts, and spray wing with water mist and brace in magnets with a little washout.

I think I will wait until tomorrow to paper Fuselage because I want to be fresh to do that. I still think I can finish things up by tomorrow night, and have the plane ready for Feild Test and Balancing the next day. Of course detail parts will come latter, but all the required groundwork has been included from that work shift called in on Sunday.

The tail is ready to come out of there clamps (magnets)...

Image

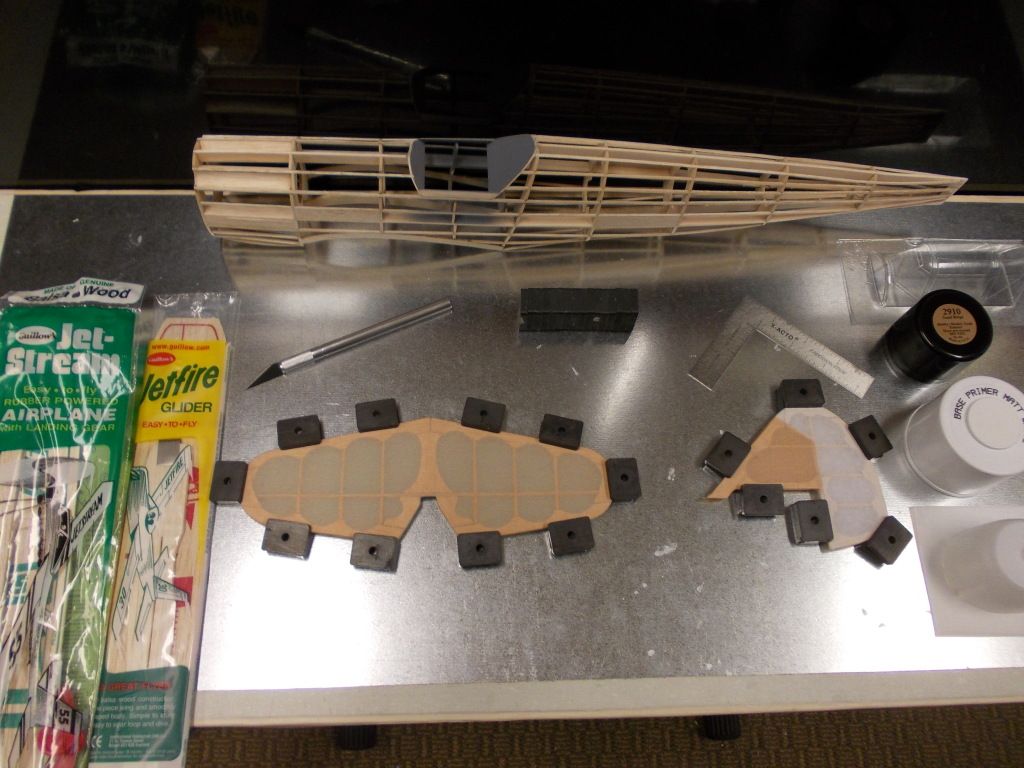
Also... the last time I went to the LHS I bought a handfull of Guillow Jetfire's and a few Jet Streams. I plan to have these with me and give them to my young helpers that seem to follow me... I'm becoming the Pide Piper... or Piper Cub... or something...

I will check back in before lights out at 2400, or Midnight...

Mitch

PS Took tail off building board and they are as straight as an arrow. This is an improvement over Emil. For Emils tail I just sanded it thin to reduce wieght... It works but it is very thin and looks like a potato chip. Fredrichs tail weighs the same, and 1. Has the desiered Thickness 2. Is Straight 3. Looks Good :D
Mitch
 
Posts: 1347
Joined: Mon Aug 22, 2011 9:16 pm
Location: Kent, WA

Re: Build a 400 series WW2 Fighter for less than $20

Postby Mitch » Mon Aug 13, 2012 10:19 pm

2000 hrs... Here's the Wing...

I sprayed with water mist and let rest for 15 minutes off the table, wing is sitting on roll of tape 3 inches off table in this picture...
Image

Then I set in the brace... Placed on table... Raised rear outboard wingtips 1 magnet (3/16 inch) up...
Image

I hope the wrinkle I induced will come out... We will see...

I also remember I need to correct one problem with the Fuselage. The B1 frames are not perfectly square. The way I correct that is I will add more material, let dry, then sand the entire forward bulkhead true and square. So I will work on that tonight and cover the Fuselage when I get a good rest...

Mitch

PS. Favorite Line in a movie... Did you see the "Flight of the Phoneix" ... quickly... plane crashes in Sahara, they let an Aircraft Engineer redesign and rebuild plane... Pilot finds companies catalog (for model airplanes). Pilot confronts Engineer and asks "You build toys?" to which the Engineer replies "ABSOULTLY NOT, I DESIGN MODEL AIRCRAFT!"

Point of the Story is we are ALL MODEL AIRCRAFT ENGINEERS! I thank you all for your input! :D

UPDATE... Time: 2120... Wing is dry and looks PERFECT :D Here is a picture... With 3/16 Washout at wingtips...

Image

Tune in tomorrow for Fuselage work and Final Assembly... Good Night, Mitch
Mitch
 
Posts: 1347
Joined: Mon Aug 22, 2011 9:16 pm
Location: Kent, WA

Re: Build a 400 series WW2 Fighter for less than $20

Postby akofly » Tue Aug 14, 2012 7:50 am

Coming together nicely Mitch. Very neat work.
akofly
 
Posts: 15
Joined: Tue Feb 28, 2012 9:03 am

Re: Build a 400 series WW2 Fighter for less than $20

Postby Steve Blanchard » Tue Aug 14, 2012 8:50 am

Mitch,

Great job so far. I'm looking forward to the finished build and flight reports. With the passion you are showing for details and new ways to make them I think you'd be interested and well served by looking into the FAC (Flying Aces Club). You will be amazed at what you find in rubber powered scale models. I am attaching a link to one of the FAC Squadrons that hosted the Nats this year, the DC Maxecuters. It is a link to their picture pages, specifically to a group of pics from the Nats. take a look and see if it is something you'd like to join in on. If so there is more info I can give you.

http://www.dcmaxecuter.org/052JULY2012P ... OPAGE.html

Steve
Steve Blanchard
 
Posts: 343
Joined: Tue Jun 14, 2011 10:08 am

Re: Build a 400 series WW2 Fighter for less than $20

Postby Wildpig » Tue Aug 14, 2012 11:21 am

That magnet board is a handy-dandy thing to have. Worked out real well putting in that washout. I'm surprised that wrinkle came out. Looks nice. :D

The original Flight of the Phoenix movie was great. 8) That line you quoted was a neat moment in the movie.

I'm really thinking about getting a magnet board after looking at your build thread.

Really looking forward to the flight test.
Wildpig
 
Posts: 529
Joined: Thu Jan 26, 2012 9:41 am

Re: Build a 400 series WW2 Fighter for less than $20

Postby Mitch » Tue Aug 14, 2012 11:32 am

Thanks Guys. :D I think you hit the right word, I have a PASSION for these balsa models. Moreover now that I am getting them to fly. It's the cat's MEOW! :D I looked for a club and found FLYING ACES but it seems they don't have any activity here in the NW. I was going to ask you guys about them at the end of this build. Maybe I will contact them and I can start a chapter in the NW? :D

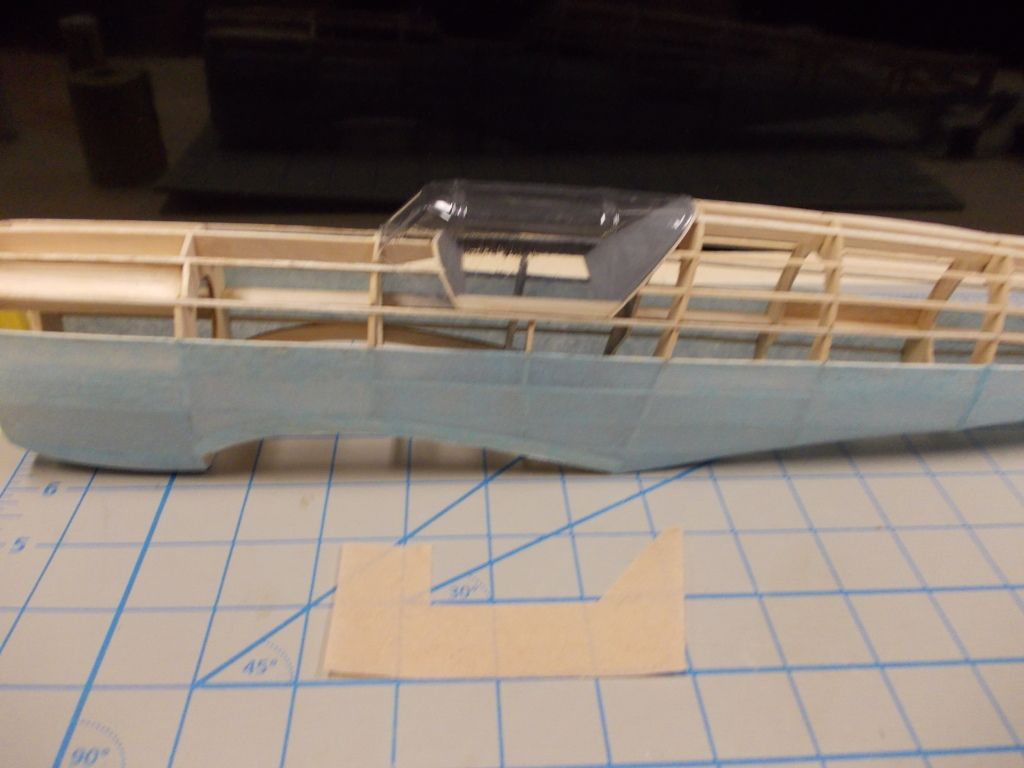
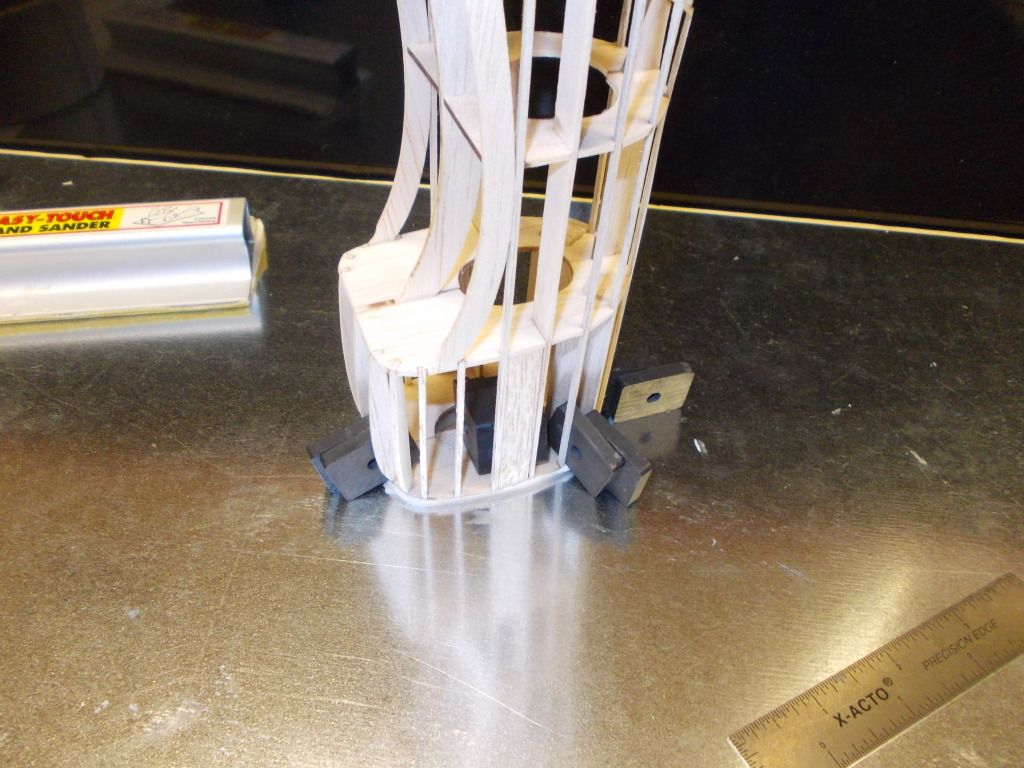
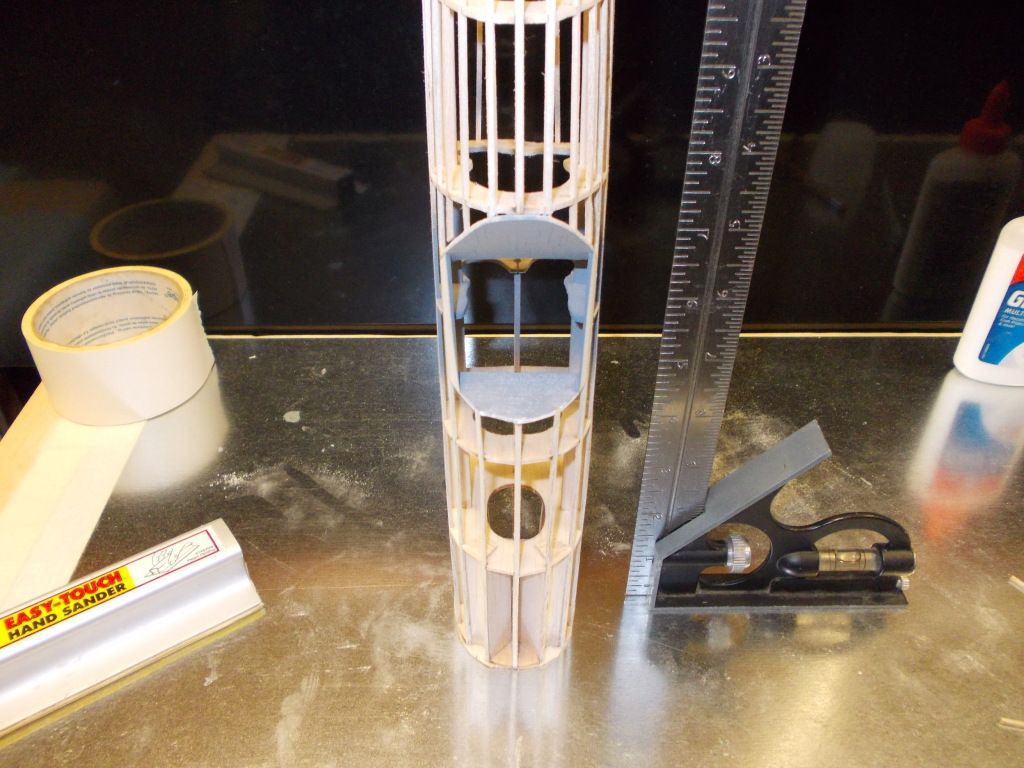
So last night I added 3/32 sheet to Stbd side and 1/16 sheet to Port side of frame B1. Clamped with magnets...
Image

This AM I sanded smooth and square and here she is...
Image

Before the Fuselage would not even stand on her nose now she is square.

I have the day off today so I will continue to work on the Fuselage thoughout the day, covering then Dope everything.

:!: Note on covering Fuselage. I do not follow Guillows pattern. I cover with as large a piece as I can. As you see the way I cover you will see every seem. I want as few as posible. I work Fore to Aft, Bottom to Top. I may even wet some pieces because of the compound curves. I do not PULL on the paper when it is wet. This LITE Tissue I work with will be VERY WEAK WET, and it will pull apart VERY EASILY!

Mitch

PS I will edit this post thoughout the day or start a new post if someone responds. I will NOT go "LIVE" as I do not want any pressure on myself to perform. Covering the Fuselage is, I believe the MOST challangeing aspect of the build process! Thank You

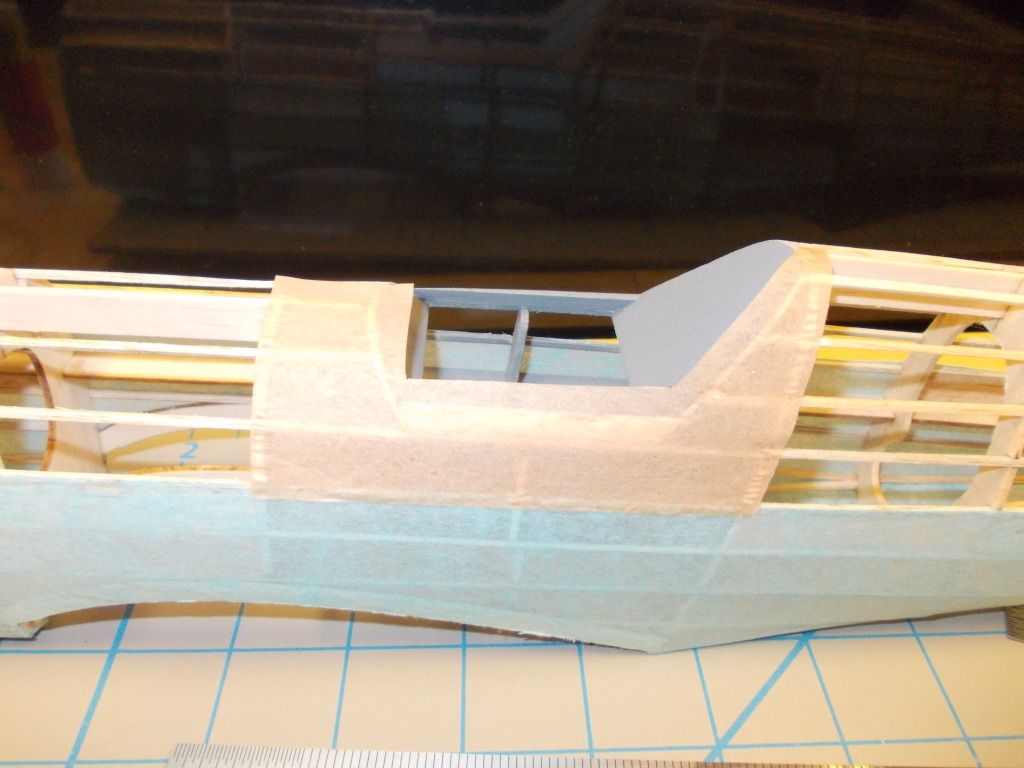
UPDATE: Just when I fix one mistake, I find another...
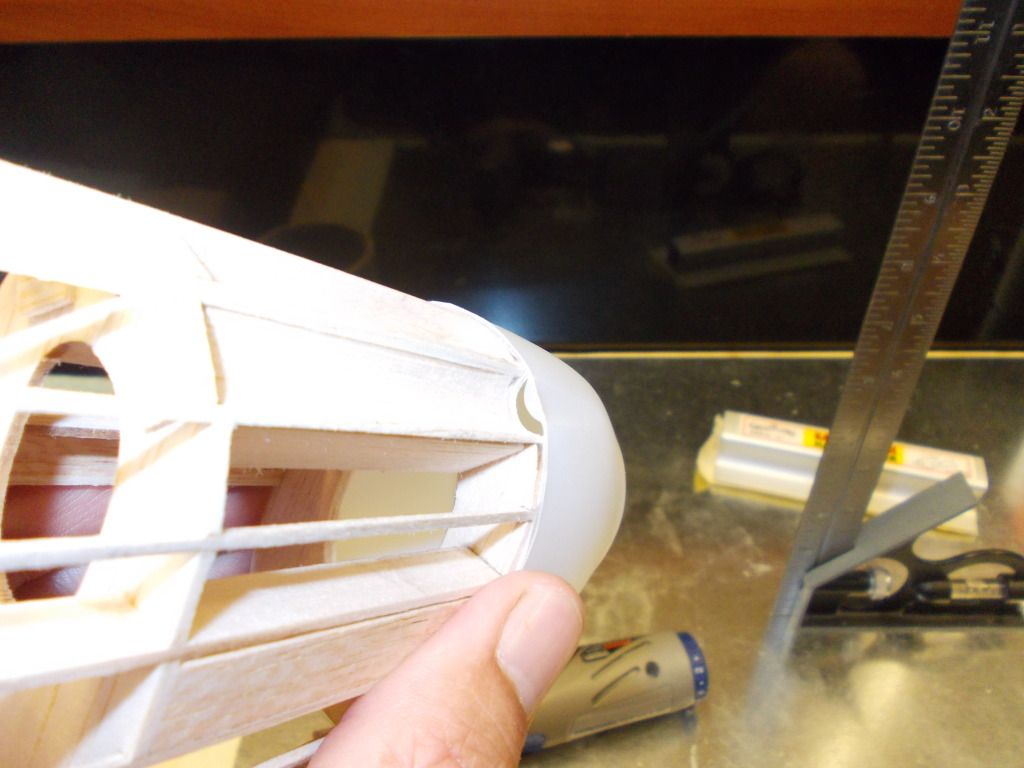
Image

Just now I check fitting of plastic cowling and realize the forward end of the gun ports I carved DO NOT line up with the plastic part... I plan to proceed with covering and fix this at the final fitment stage... with balsa filler.

Another note on reason for balsa inserts... Add on parts will bond better to a solid understucture than just to paper! In the picture above you can see my insert that the exhaust pipes will come out of. The top of this piece does not touch the 1/16 stringer... There is a reason for this, and will be made clear during the final fitting of extra parts! :mrgreen:

:!: UPDATE: I tried to cover a large area of the bottom with wet the paper... was too much... and started over... I will cover dry with smaller pieces... When I feel the glue is dry I will trim and then continue...
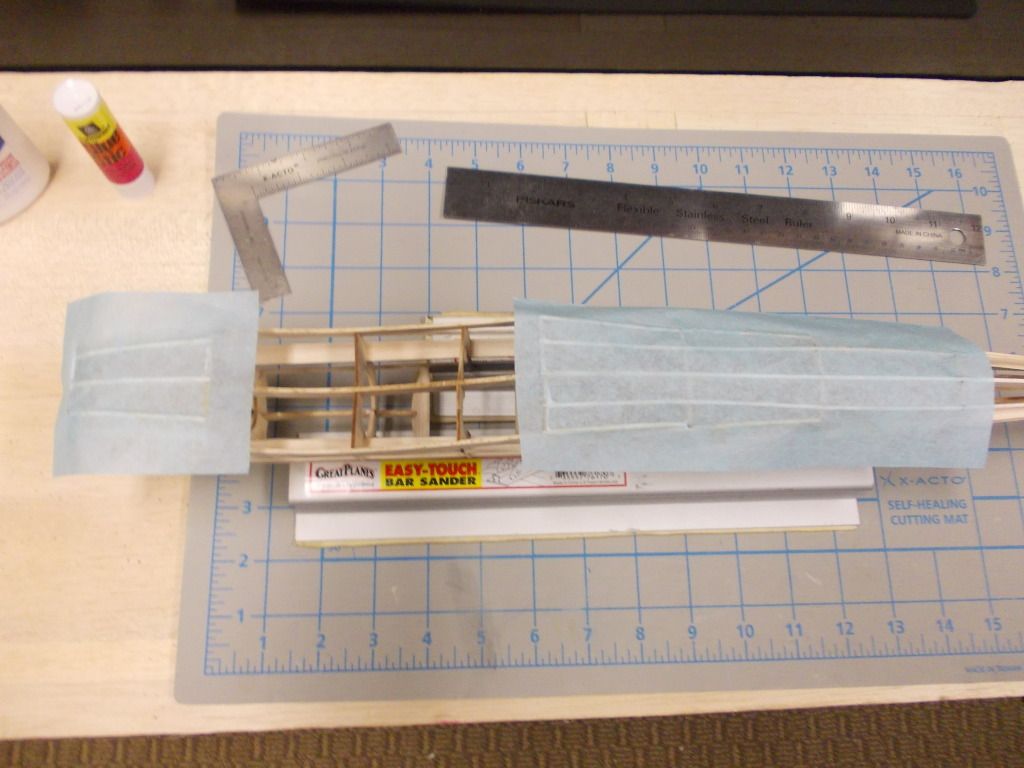
Image

I will continue to cover with BLUE and post picture when all the BLUE is on.

:!: UPDATE: so all the BLUE is on... I will take a break as it is Lunch time now...
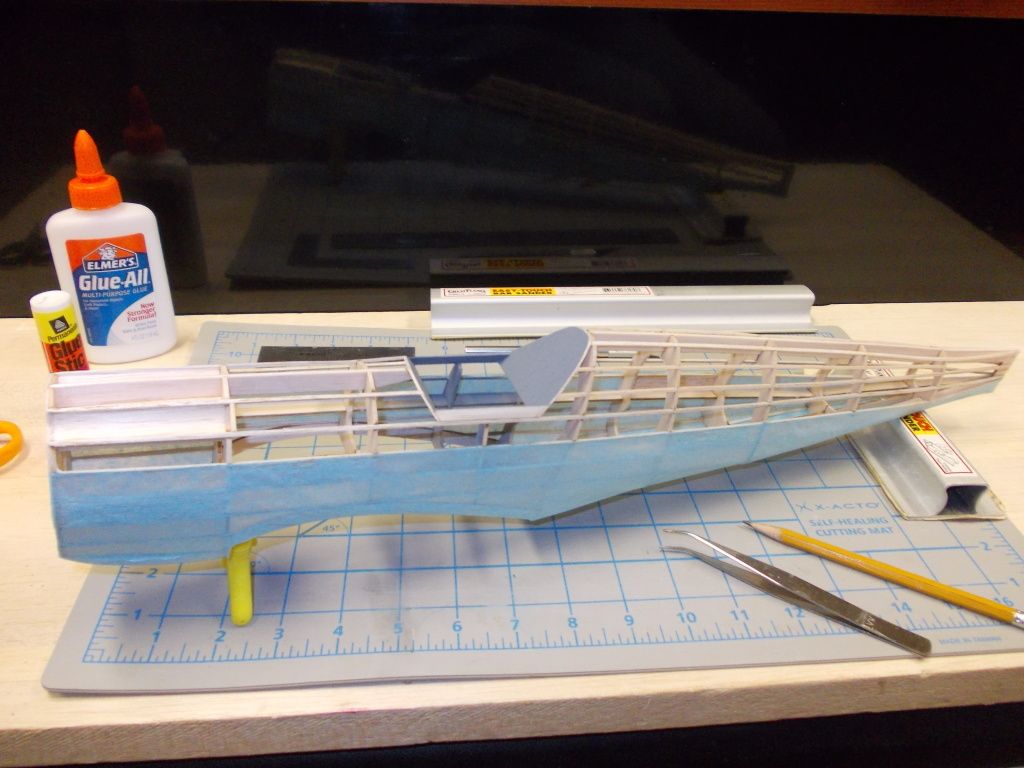
Image
I will let the glue dry, after lunch I will spray with water, when that is DRY I will continue with top SAND cover...
Mitch
 
Posts: 1347
Joined: Mon Aug 22, 2011 9:16 pm
Location: Kent, WA

Re: Build a 400 series WW2 Fighter for less than $20

Postby Steve Blanchard » Tue Aug 14, 2012 3:00 pm

Mitch,

Some FAC squadron contact info maybe in your area? I am assuming you are in Washington? If not just say the state and I'm sure there is at least one squadron there.

SQUADRON # 34 The Eagle Squadron Homer L. Smith 14719 32nd Drive S E
homer_smith@msn.com MILL CREEK, WA 98012

SQUADRON # 59 Wing Warpers John Robison 2128 S. Wall Street
509-534-2205 johnr@hei.net SPOKANE, WA 99203

Steve
Steve Blanchard
 
Posts: 343
Joined: Tue Jun 14, 2011 10:08 am

Re: Build a 400 series WW2 Fighter for less than $20

Postby Mitch » Tue Aug 14, 2012 4:07 pm

Steve,

Thanks so much, Mill Creek is less than an hour NORTH of me , as I live south of Seattle, WA.

While waiting for the BLUE to dry I sanded the cowling, it has 2 coats of WHITE and is in my garage, also trimmed the canopy. Will mask and spay paint with Model Masters 2910 Sand Biege.

The model is ready to handle now and I will finish the top in sand. I will start in the center and work out, fore and aft. I took some time, but I like to get a close fit with this first piece of paper. It is much easier to mark, cut, and trim at this stage, off the model. I will cut a duplicate, attach, then work from there... There will be one piece forward. Then 2 pieces aft. The first piece aft will go all the way to B9, that is where the fuselage changes direction, then I will add the last piece. All of these will be port and stbd, so x 2. 8 Pieces in total for the TOP.

Image

Mitch

The paper went on and then 6 more on top, and 14 on bottom so total of 20 pieces of paper... I'M DONE FOR THE DAY!

Image

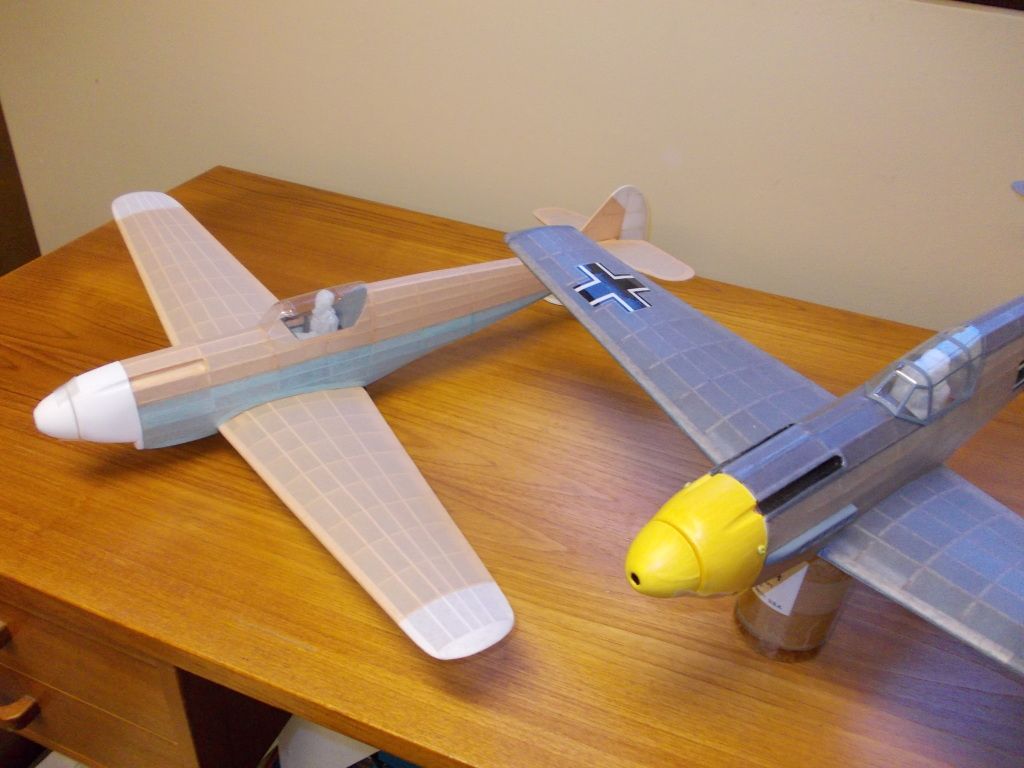
No more work today, so Fredrich gets mocked up and poses with a picture with Emil.

Image

I will inspect the paper touch up any wrinkles I see. Start to cut out insignia, but I will save the doping process for tomorrow morning.

Mitch
Mitch
 
Posts: 1347
Joined: Mon Aug 22, 2011 9:16 pm
Location: Kent, WA

Re: Build a 400 series WW2 Fighter for less than $20

Postby Wildpig » Tue Aug 14, 2012 10:01 pm

:?: Could you weigh Fred as posed in the picture before you dope it?
I'm curious as to how much weight doping adds.
Wildpig
 
Posts: 529
Joined: Thu Jan 26, 2012 9:41 am

PreviousNext

Return to General Building Questions

Who is online

Users browsing this forum: No registered users and 39 guests