Spinners

Ask other modelers for a little help / knowledge ?

Spinners

Postby Mitch » Wed Mar 27, 2013 2:34 pm

I have not used my spinners yet because I thought I would "retire" the model and add a 3 bladed prop...
I have decided to fly my WW2 birds with spinners as I will be going to a contest soon...
I have seen models here flying with spinners and have a couple of questions...

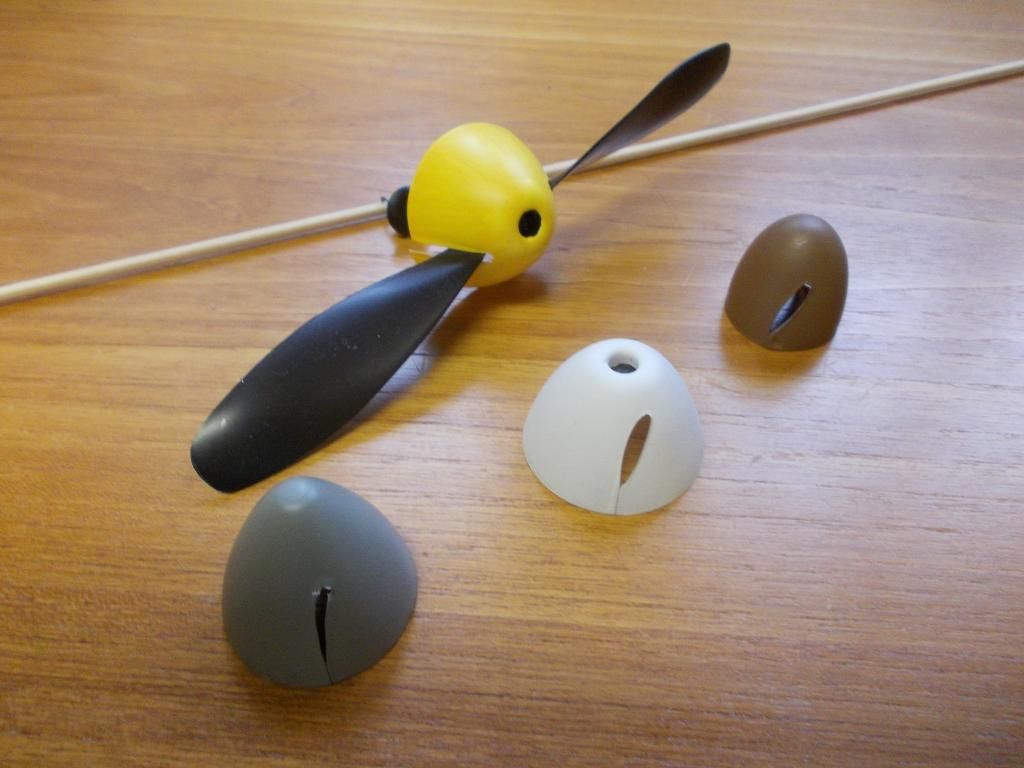
Here is my work so far:
Image
The grey one is for the Spit and I just started on it... as you can see the yellow one the prop does not fit just right. The white one is for the other 109 and the brown one is for the Zero.

I first cut down the center of the mark with a small sissors, then open up the slot with my x-acto...

1. I cant quite get it to fit right. I suppose I need to keep opening the slit until I get a good fit, but I am concerned it will be open too much?
2. How do I secure the spinner? I was planning on a drop of white glue... so I could remove it if I had to.
3. I am concerned about it being centered exactly. Is it very critical?

Thanks for any of your answers or comments. Mitch... always learning :?
Mitch
 
Posts: 1347
Joined: Mon Aug 22, 2011 9:16 pm
Location: Kent, WA

Re: Spinners

Postby Phugoid » Wed Mar 27, 2013 2:53 pm

I make my own by plunge moulding, then I have a few to go at to get it right. I also make a thin ply (or hard balsa) disc at the rear.

I've even filled the spinners with lead for the noseweight, you can't get much further forward of the C of G than that!

Andrew
Phugoid
 
Posts: 952
Joined: Wed Jan 20, 2010 8:17 am

Re: Spinners

Postby Mitch » Wed Mar 27, 2013 4:21 pm

Thanks for the quick reply... I am afraid I will ask you to explain the "plunge mold" thing

I like the idea of the backup disc...That way the spinner will keep its nice round shape.

I would be afraid of adding wt in the spinner, wouldn't that upset the spinning prop? That might be for my next generation...

I'll do some more trimming and remove more plastic and then make the "back up plate"

I welcome any more advice... THANKS, M :D
Mitch
 
Posts: 1347
Joined: Mon Aug 22, 2011 9:16 pm
Location: Kent, WA

Re: Spinners

Postby Wildpig » Wed Mar 27, 2013 5:19 pm

plunge mold is making a positive mold shape out of solid material (balsa, aluminum,etc.). Heat up some plastic sheet in an oven and "plunge" your "mold" into the plastic sheet. Let it cool and remove your "plunger". Trim plastic as needed.

Positive mold shape is just a solid object of want you want to mold, the opposite being a negative mold or inverse shape.
I think Mike Stuarts Free Flight site has a tutorial. He plunge molds canopies.
Great fun.
Wildpig
 
Posts: 529
Joined: Thu Jan 26, 2012 9:41 am

Re: Spinners

Postby Mitch » Wed Mar 27, 2013 6:20 pm

Thanks so much... that does sound like fun... Here's my progress so far:
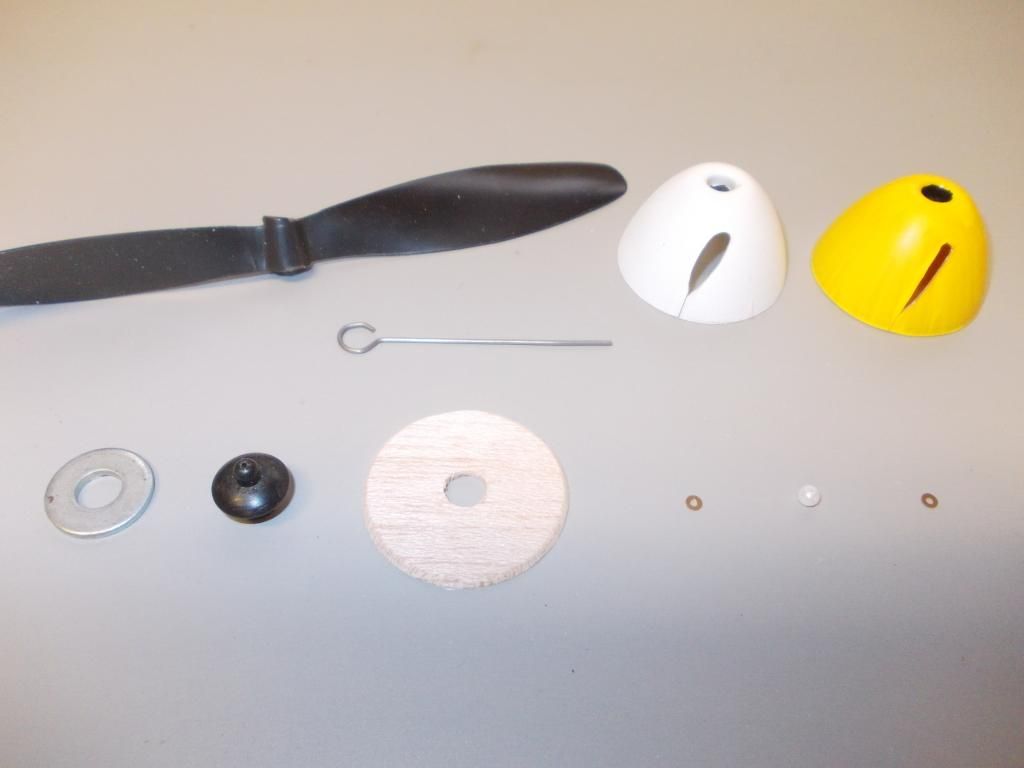
Image
I opened up the prop slits on the white spinner, the yellow one is where I was at... I will do that latter.

The pieces are laid out in the order of assembly...

1. Washer (don't know size, got from my junk jar) for nose wt. will slip over shank of thrust button
2. Thrust button supplied from Guillows
3. 1/16 balsa back up plate...(I was going to put this on the other side of thrust button but decided things would not fit)
4. Washer (got from SIG but have not used yet)
5. bearing bead (also from SIG)
6. Another Washer (just out of picture to the right)
7. Propeller

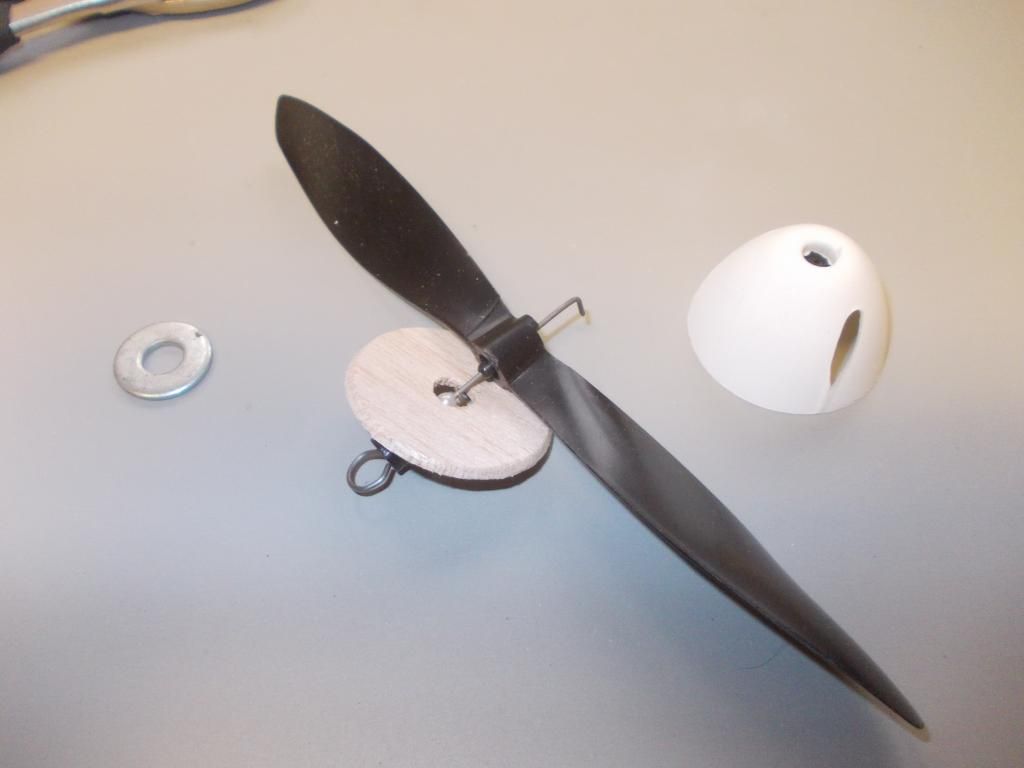
...and here it is assembled:
Image

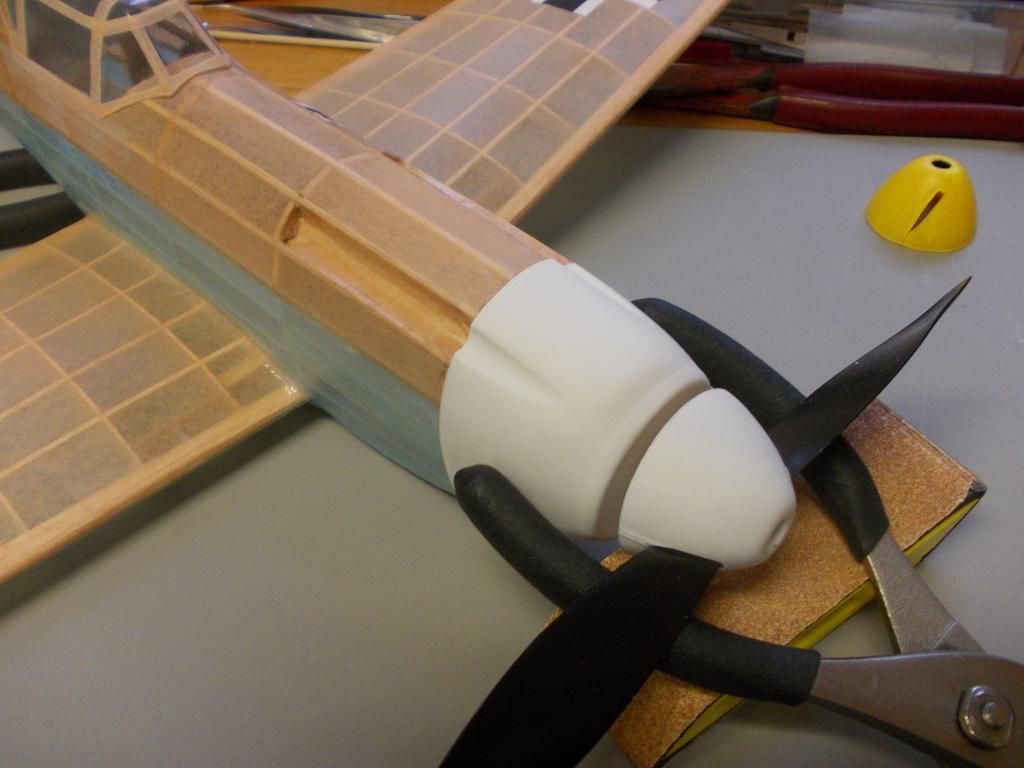
...and here it is installed:
Image
This is just a test fit... NO rubber holding the prop in.

The spinner has a large clearance to the cowl but that can be adjusted by trimming back the Guillow Thrust button OR not using the washers and bead.

So now I will use white glue to hold the back up plate to the spinner... I think this will work out well! :D

So I will install the 2 mg's on the fuselage and get her ready for another test flight!!!

Thanks, Mitch... I couldn't have gotten this far without my Support Team! :mrgreen:
Mitch
 
Posts: 1347
Joined: Mon Aug 22, 2011 9:16 pm
Location: Kent, WA

Re: Spinners

Postby joecrouse » Thu Mar 28, 2013 11:57 am

I am against spinners they are expensive and they make your car look goofy.
joecrouse
 
Posts: 216
Joined: Mon May 23, 2011 9:20 am

Re: Spinners

Postby Bill Gaylord » Sun Mar 31, 2013 5:18 am

joecrouse wrote:I am against spinners they are expensive and they make your car look goofy.

That reminds me of my thoughts about plunge versus vacuum molding: I am against vacuum molding, since it takes time to build the vacuum machine which cuts into valuable building time.
In all honesty I'm overdue for a vacuum molding station, but the plunge molding has served well, especially for smaller parts like spinners. I tack glue molded spinners on so that I can easily cut them off for prop nut access. I tend to lose a few here and there due to glue failure, but always have a replacement on hand since they're easy to make.
Bill Gaylord
 
Posts: 904
Joined: Sun Nov 09, 2008 1:29 pm
Location: Grove City PA

Re: Spinners

Postby Mitch » Sun Mar 31, 2013 9:43 am

Thanks Bill and Everyone...

I think I will try that plunge molding soon... after WESTFAC...

I still have some teething problems with my spinner (off center). I plan, as you say to center it and put a drop of glue on. I plan to bring extra propellers. I bought a toolbox from Harbor Freight and I am assembling my "Field Box"

I hope I can get at least one of my models to reach the 20 second minimum flight time... and if not that AT LEAST 12 seconds to match the first flight of the WRIGHT Bros. We all start somewhere.
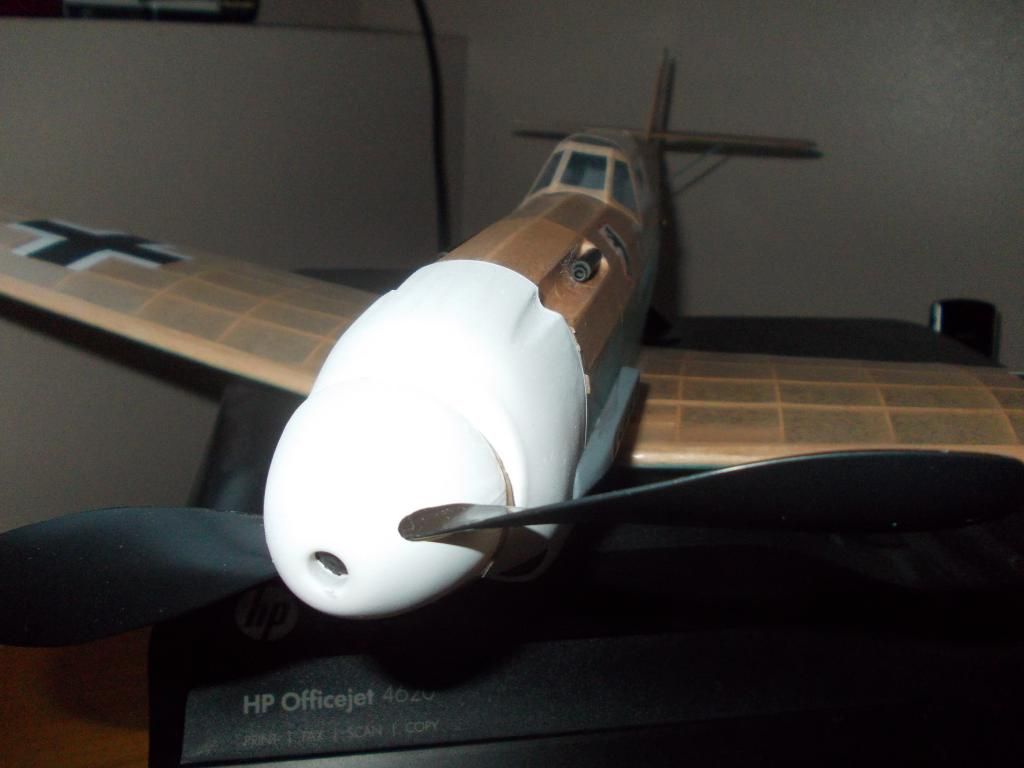
Image
Almost ready for flight testing, needs air scoop and a few other detail to pass the FAC Pilot Pre Flight Checklist!

Mitch :D
Mitch
 
Posts: 1347
Joined: Mon Aug 22, 2011 9:16 pm
Location: Kent, WA


Return to General Building Questions

Who is online

Users browsing this forum: Bing [Bot] and 47 guests