My P-39 Aircobra

Ask other modelers for a little help / knowledge ?

My P-39 Aircobra

Postby Mitch » Sun Jun 23, 2013 6:44 pm

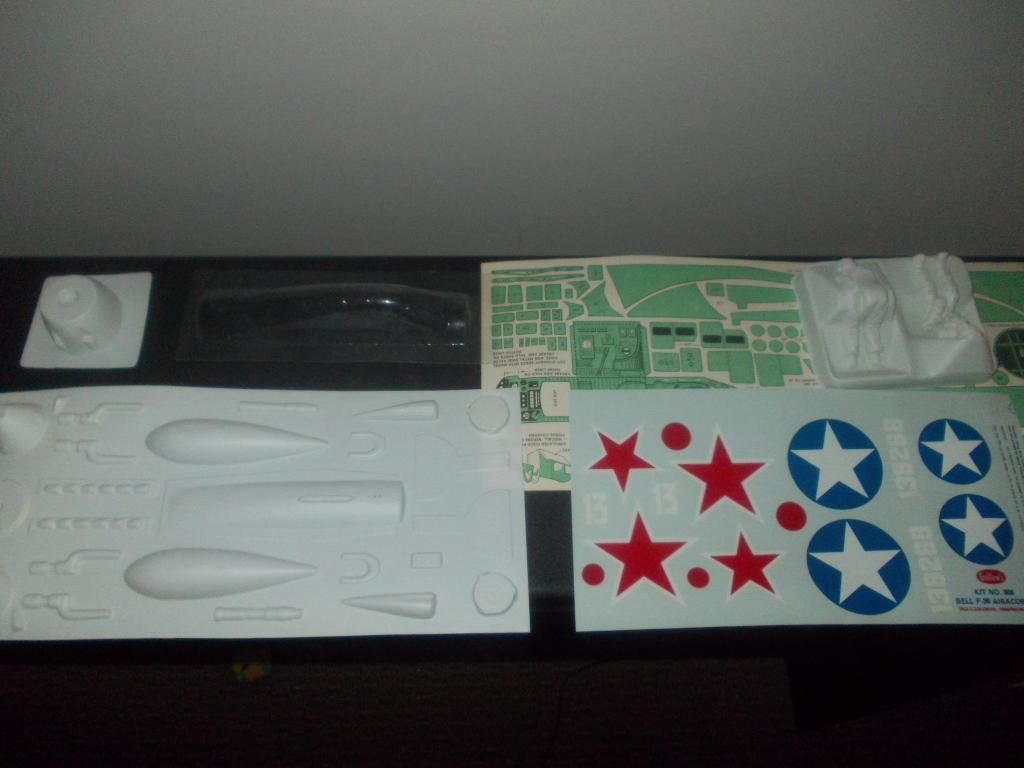
Hey Guys...I had this in the closet for the past few years and saw it on ebay today and found a discrepancy:
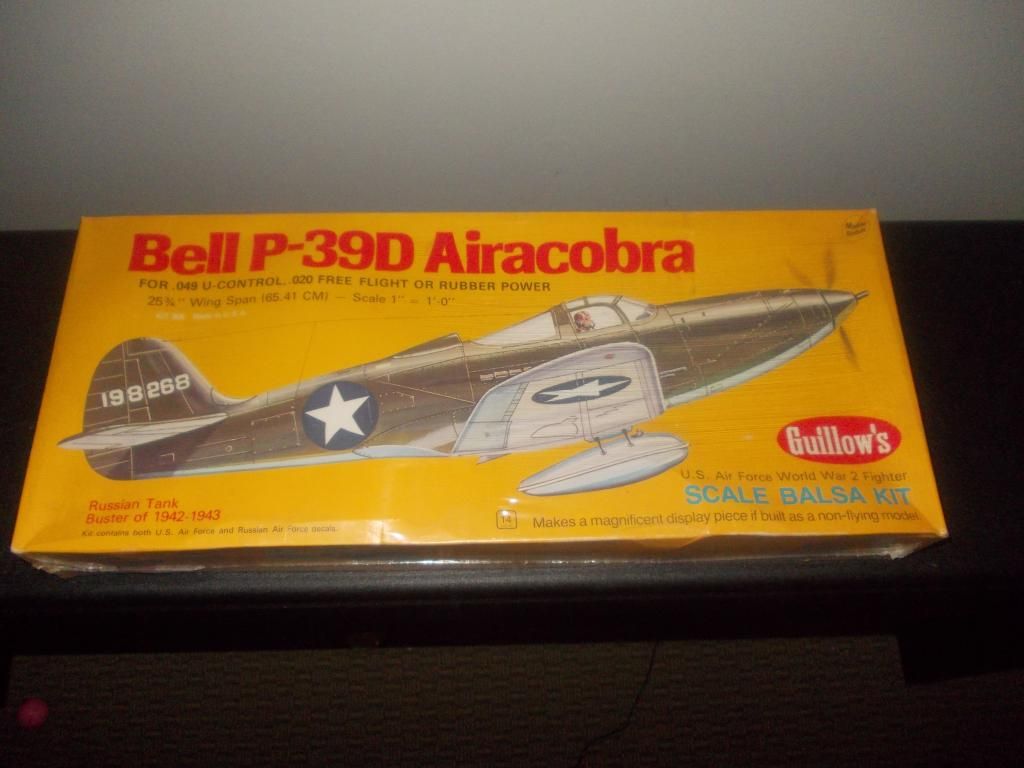
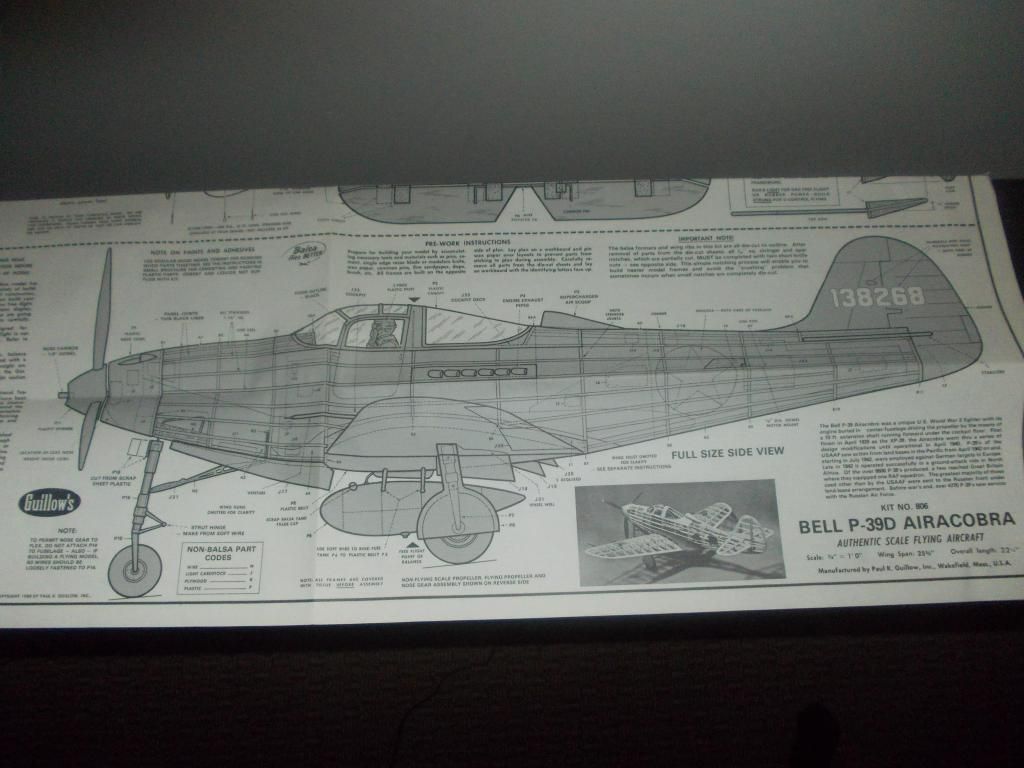
I never opened mine up until today... The box says: 1" = 1' that would mean 1/12 scale
Image
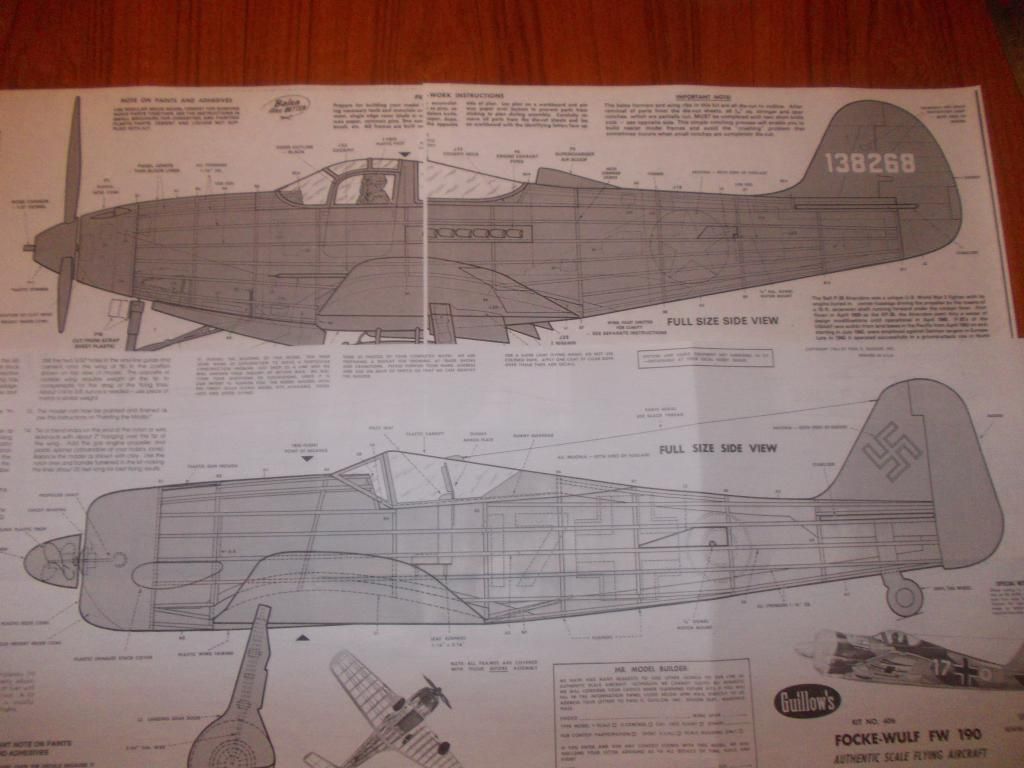
The plans say 3/4"=1' That's 1/16th scale. The model is actually 1/16 scale! I AM OKAY WITH THAT, JUST WANTED TO LET YOU ALL KNOW!
Image
So it is the same scale as all the 400 series and the 1000 series. I though I would someday build this as a RC model, but just now realize it's the same scale as the rest of my WW2 collection.

I do not see a copyright date on the plans, but inside the kit is the catalog and they had 5, 1000 series models at this time, also had the 2001 P-38 Lightning.
I will make copies of the plans tomorrow and try to make some molds. It comes with the full figure pilot just like the 1000 series... I do not know why this model was not in the 1000 series, where I think it belongs. I do not remember when this kit came out or why it was discontinued.

When I build this plane I will make it for rubber so I will just use parts in kit for templates! Try to keep it as light as possible! Mitch :D

FYI: Just found the copyright date: 1980
Last edited by Mitch on Sun Jun 23, 2013 9:33 pm, edited 1 time in total.
Mitch
 
Posts: 1347
Joined: Mon Aug 22, 2011 9:16 pm
Location: Kent, WA

Re: My P-39 Aircobra

Postby David Lewis » Sun Jun 23, 2013 8:14 pm

Sometimes the scale (or wingspan) listed on the box, Web site, plans and actual model itself, do not all agree with each other. And occasionally the wings are a different scale than the fuselage. For these reasons, I measure the fuselage side view on the plans to calculate the scale. I don't simply divide the wing span of the model (even as measured on the plans) by the wing span of the full size airplane.

The scale fidelity of model airplane kits in the 1950s and 1960s was generally poor because it wasn't a big selling point that consumers cared about, accurate research, photos and documentation were difficult, costly or impossible to obtain, the kits were marketed as toys for boys, and the average modeller wasn't as knowledgable, sophisticated and demanding back then. The scale was sometimes adjusted to make the parts fit in the box.

It's only recently that Guillow's mentioned the scale at all in their online catalog listings, and the person who inputs the data probably just reads it off the plans. A typo can creep in there every once in a while, too. It never hurts to verify.
David Lewis
 
Posts: 289
Joined: Thu Jun 13, 2013 11:47 am
Location: Orlando FL

Re: My P-39 Aircobra

Postby Mitch » Sun Jun 23, 2013 9:28 pm

Thanks for the comeback... I do not know, but I suspect they listed the scale on the box as 1"=1' (approximate) as a marketing aspect. I do not fault them... These "larger" kits were always expensive for me. I think it was a tough sell to make this plane with a smaller ws than the 400 Mustang and put it in the 1000 series. So they made the 800 series. I do not know, I am just guessing.

The real plane LOA 30 feet, 1/16 scale = 22.6 inches, model is 22 1/4 inches
The real plane WS 34 feet, 1/16 scale = 25.5 inches, model is 25 3/4 inches

The details in the kit and material and supplies are in line with the 1000 series. It has 2 sets of decals. I just opened mine for the first time tonight after I saw the ebay listing with the box and the plans had 2 different scales.

I am HAPPY it is the scale it is. I just want to let anyone know who may be bidding on the ebay listing. I believe it is a VERY nice kit, the only problem for me is I want it to fly so I have to create all my replacement parts rather than using the kit!

Image

Mitch :D

PS My kit is NOT for sale! Hope to start building after my NEW FW 190-A7. Mine will carry the Russian markings.
Mitch
 
Posts: 1347
Joined: Mon Aug 22, 2011 9:16 pm
Location: Kent, WA

Re: My P-39 Aircobra

Postby Bill Gaylord » Tue Jun 25, 2013 11:38 am

This kit is at the top of my list of the "want to acquire" Guillows kits. If there's one that I believe would enhance sales if put back into production, it's the P39. Nice kit to have stashed away Mitch. I even went to the trouble of piecing together one of those poorly scanned multi-page PDFs that was floating around the model forums, :shock: and now I can find a good single scan on the web. Still it's nothing like having those lovely molded parts, which is why we all want to get our hands on the kits. :D I'd be tempted to make plaster molds so that you could make spare parts if necessary.
Bill Gaylord
 
Posts: 904
Joined: Sun Nov 09, 2008 1:29 pm
Location: Grove City PA

Re: My P-39 Aircobra

Postby BillParker » Tue Jun 25, 2013 4:46 pm

I had a bunch of fun with that one too!

The design is a real "Corvette..."

Image


Image


bp
William H. Parker Jr. (Bill Parker)
President, Parker Information Resources
http://www.parkerinfo.com/ap.htm bparker@parkerinfo.com
BillParker
 
Posts: 1031
Joined: Sat Jan 19, 2008 1:21 pm
Location: Houston, Texas

Re: My P-39 Aircobra

Postby Mitch » Tue Jun 25, 2013 8:02 pm

First of all my apologies to the Bell Corp. as this is my Airacobra, not Aircobra.
I think it will make a good balsa flyer, look at this:
Image
I can fit at least 2 more inches of rubber than the FW and look where the cg is! Right over the center of the cockpit! The cg for the FW is forward of that by OVER 2 INCHES!

So here is my plan. Test fly my repaired FW, and build my NEW FW along with my Airacobra.

Plans for the P-39:

1. Build light, 1/32 ribs, etc.
2. Increase wing dihedral
3. Adjust angle of attack of rear stabilizer
4. Move rear peg forward slightly
5. NO landing gear
6. 9 inch prop

I am open to comments and suggestions... Starting build tomorrow! Mitch :D
Mitch
 
Posts: 1347
Joined: Mon Aug 22, 2011 9:16 pm
Location: Kent, WA

Re: My P-39 Aircobra

Postby Mitch » Wed Jun 26, 2013 1:47 pm

I've been working 2 jobs for the past month and finally have a day off... and it's raining... so...

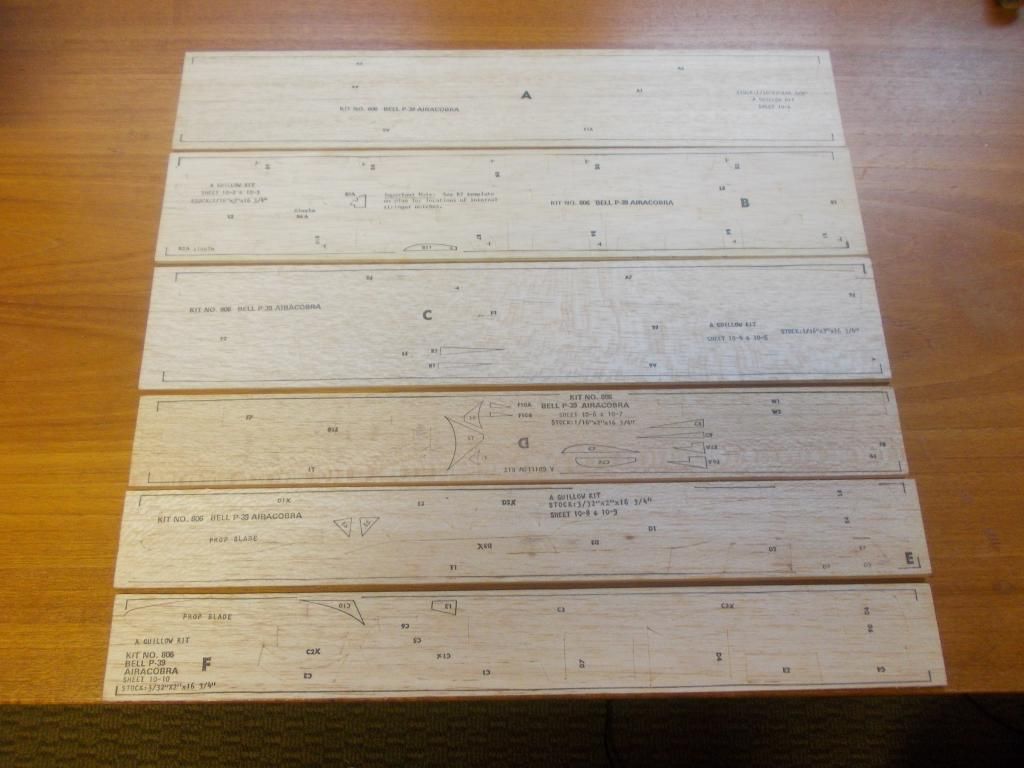
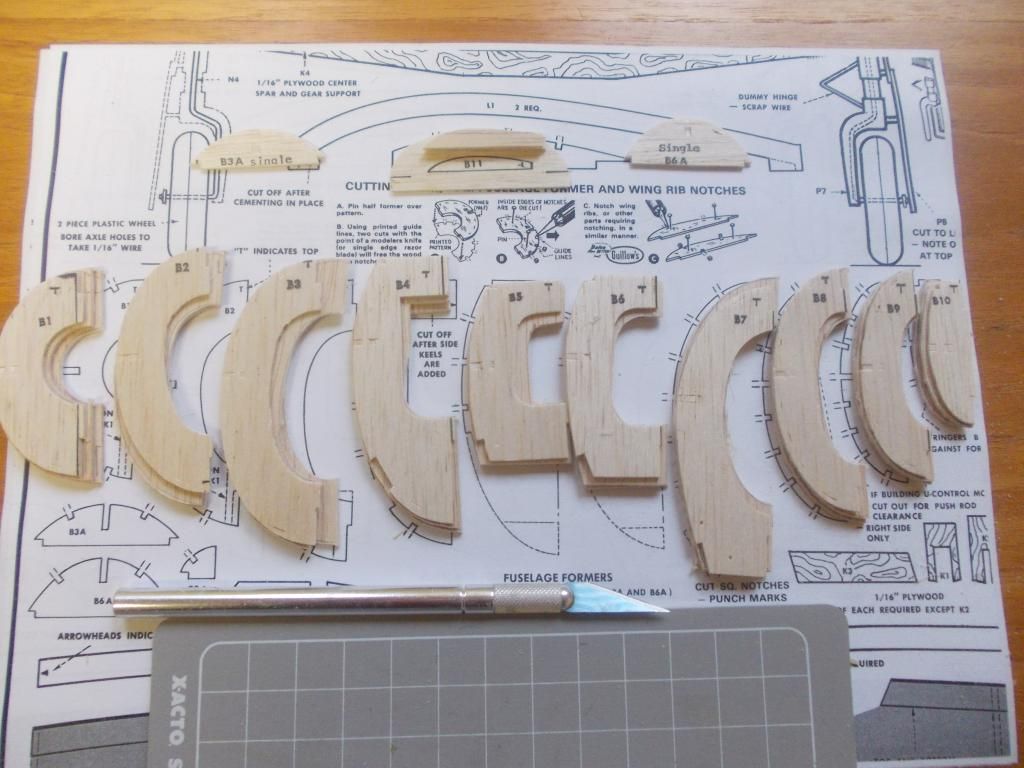
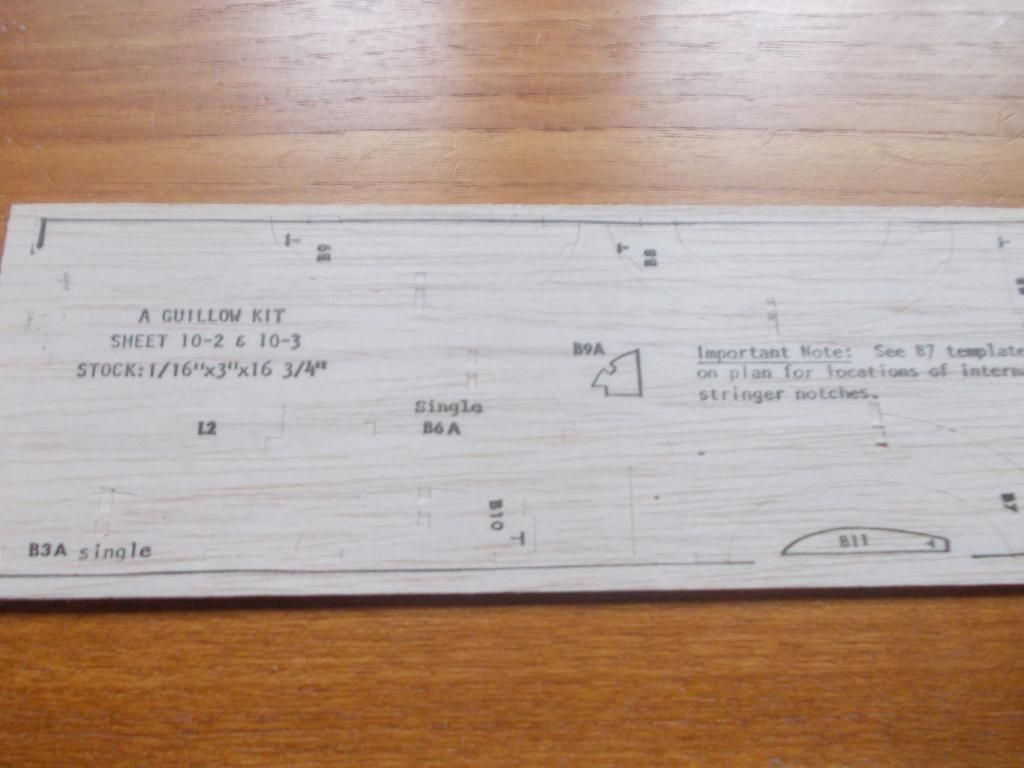
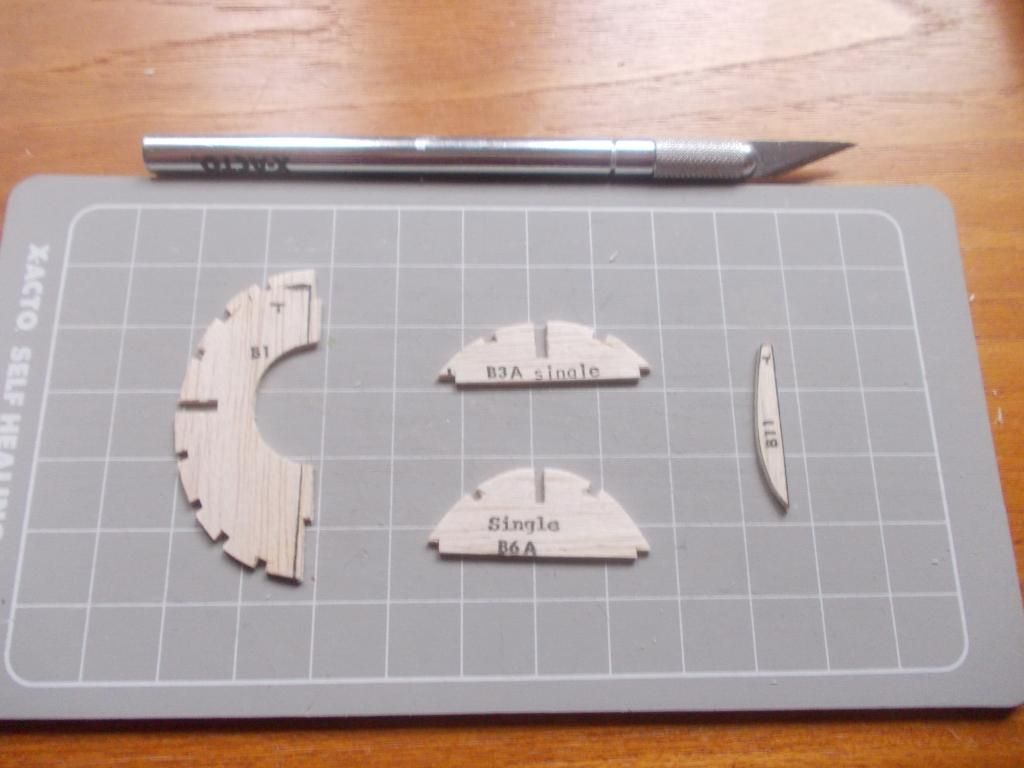
It is time for me to start... ALL the wood in this kit weighs in at over 200 grams. That's ALL the wood, parts still in sheets. This is a die cut kit and comes with 10 sheets of parts plus plywood and 4 sheets of balsa and 2 sheets of stringers. The notches in this kit are not cut out. Only the bottom of the notch is die cut. This is so the die cut does not crush the part and makes for a cleaner build. Also I see some of the smaller parts are printed instead of die cut.

On my Stearman kit (same series) the instructions say "for a rubber powered model, sand all parts to half thickness". My plan will be to make new parts (1/16) out of 1/32.

I believe the ribs are large enough to include lightening holes... we'll see.
Image

I plan to use ALL new wood for my build. ONLY remove what I need to use as templates. I'll start working on the wing now... :D Mitch
Last edited by Mitch on Wed Jun 26, 2013 8:43 pm, edited 1 time in total.
Mitch
 
Posts: 1347
Joined: Mon Aug 22, 2011 9:16 pm
Location: Kent, WA

Re: My P-39 Aircobra

Postby Mitch » Wed Jun 26, 2013 4:46 pm

I didn't say before, but I am building this plane for FAC Mass Launch rules: I will use the minimal amount of material to construct this model. It only has to pass inspection. That is, it will not receive any points for how it looks, it just has to pass inspection... The mission of this build is for FLIGHT TIME! I plan to use NO plastic parts except for the canopy and perhaps the spinner.

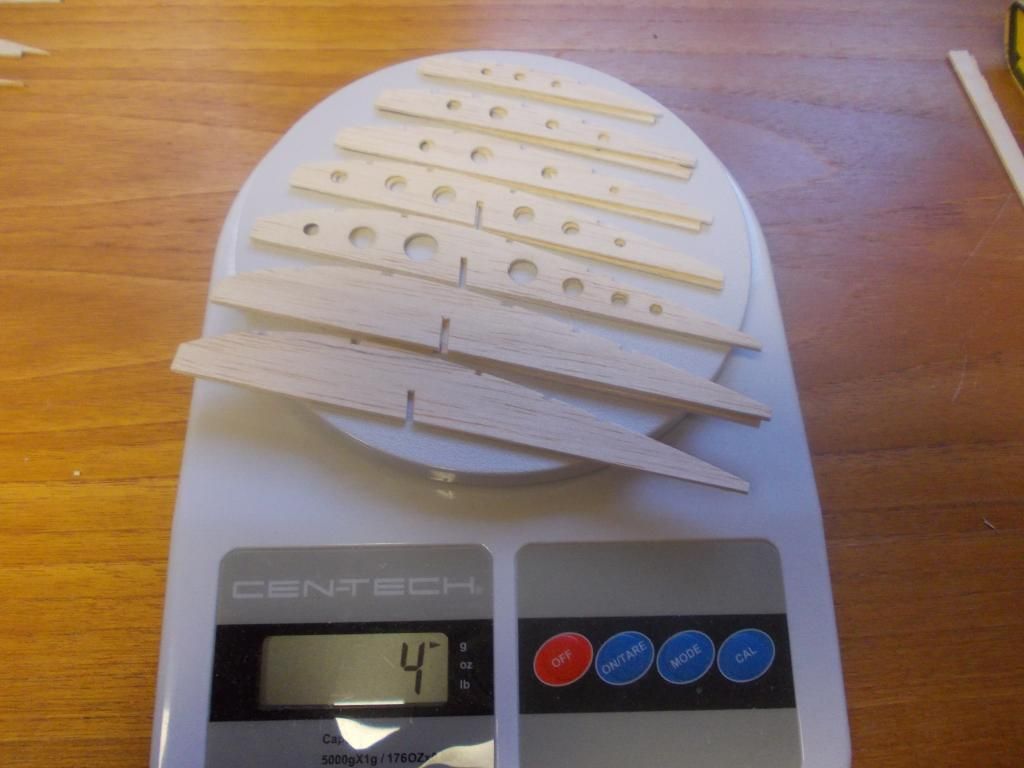
Okay after a couple of hours work I have all the wing ribs I need:
Image
That is ALL the wing ribs... the center 3 are 1/16, from there I will use the just the even ribs, F2,F4,F6,F8,F10. They are 1/32.
My latest wing for the FW came out at 17g before dope... I hope to get this done at 17g or LESS!

Now I need to cut out the Fuselage Frames.

Mitch
Mitch
 
Posts: 1347
Joined: Mon Aug 22, 2011 9:16 pm
Location: Kent, WA

Re: My P-39 Aircobra

Postby SteveM » Wed Jun 26, 2013 8:15 pm

Nice work on a kit that is hard to come by. Are you using the wood parts for templates or the patterns on the plans?

The rain should end soon, I hear that summer might get started tomorrow or Friday.
SteveM
 
Posts: 498
Joined: Wed Oct 24, 2007 1:06 pm
Location: Beaverton, OR

Re: My P-39 Aircobra

Postby Mitch » Wed Jun 26, 2013 8:36 pm

Thanks, and for this build I as using the parts from the kit as templates. Guillows did not complete the notches in the die cut. They did this to create clean cut parts. The bottom of the notch is there so you only need to make 2 careful cuts. For me I leave it alone and the piece makes a nice template.

In the past I have built the wings from 1/32 and use the Guillows fuselage frames, but I do not expect to buy this kit again so I will save the pieces for templates, since I will like to be able to build the model again. I got an extra B3A and B6A so I will use the parts from the kit!

For my 100 series I increase the scale, to 1/14 (24 to 28" ws) for that I use the plans. That is more work.

Taking a break now:
Image
I'll do the finishing sanding and notches tomorrow. Mitch
Mitch
 
Posts: 1347
Joined: Mon Aug 22, 2011 9:16 pm
Location: Kent, WA

Re: My P-39 Aircobra

Postby Mitch » Thu Jun 27, 2013 9:06 am

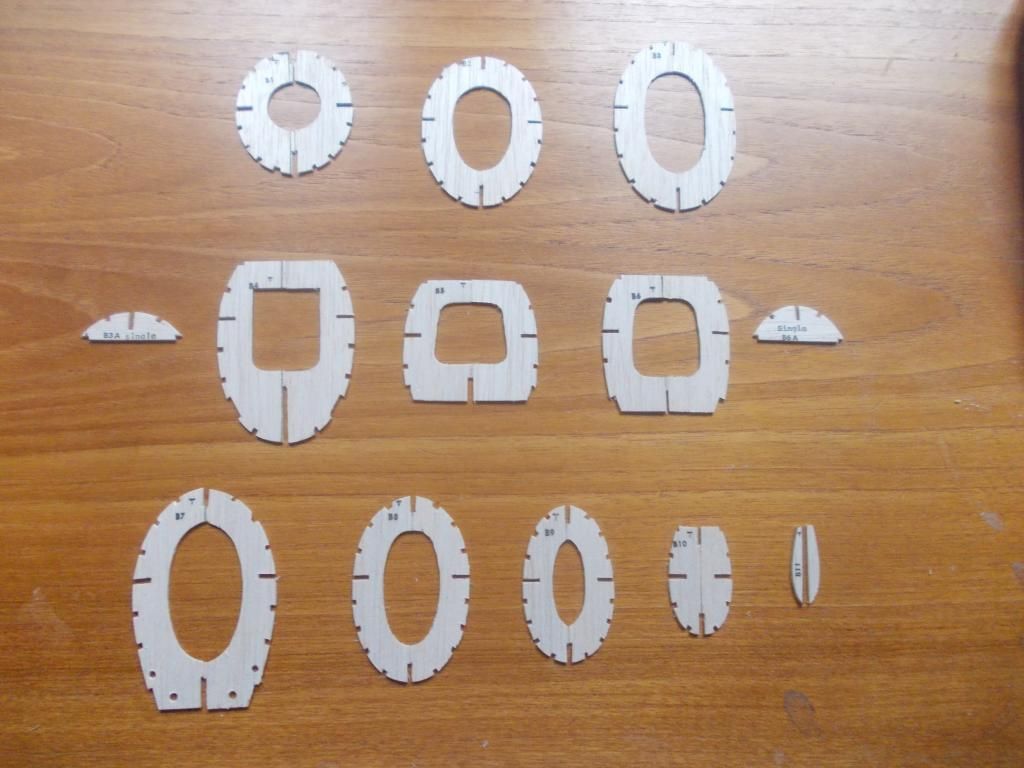
Change of plans today... after weighing in my fuselage frame B parts, I am not saving any weight with my hand cut ones. Actually they are a bit heavier. So I will save those and use the ones from the kit for this build!
Image
I must say Guillows did a very nice job with the die cut of this kit. Maybe because of the low production, this kit is cut clean and sharp. Moreover, that is why Guillow did not cut out the notches. I will finish those this AM and start building the fuselage. Also note that there are some small parts that are only printed, too small to die cut.

I will also use the A parts from the kit, but first copy the side keels, A6 & A7. They never show you those on the plans as they expect you should not break or loose those.

I know lazer cut kits are great, but I believe this was the Zenith of Die Cutting!

Hope to have this model finished in 2 weeks... Back to work at day 2! Mitch

UPDATE: Start with a fresh blade or your will just crush the wood:
Image
100 + notches to go, then fuselage build up...
Mitch
 
Posts: 1347
Joined: Mon Aug 22, 2011 9:16 pm
Location: Kent, WA

Re: My P-39 Aircobra

Postby Mitch » Thu Jun 27, 2013 6:16 pm

Okay... that wasn't so bad... yeah lazer cut is easier, but what the heck...
Image
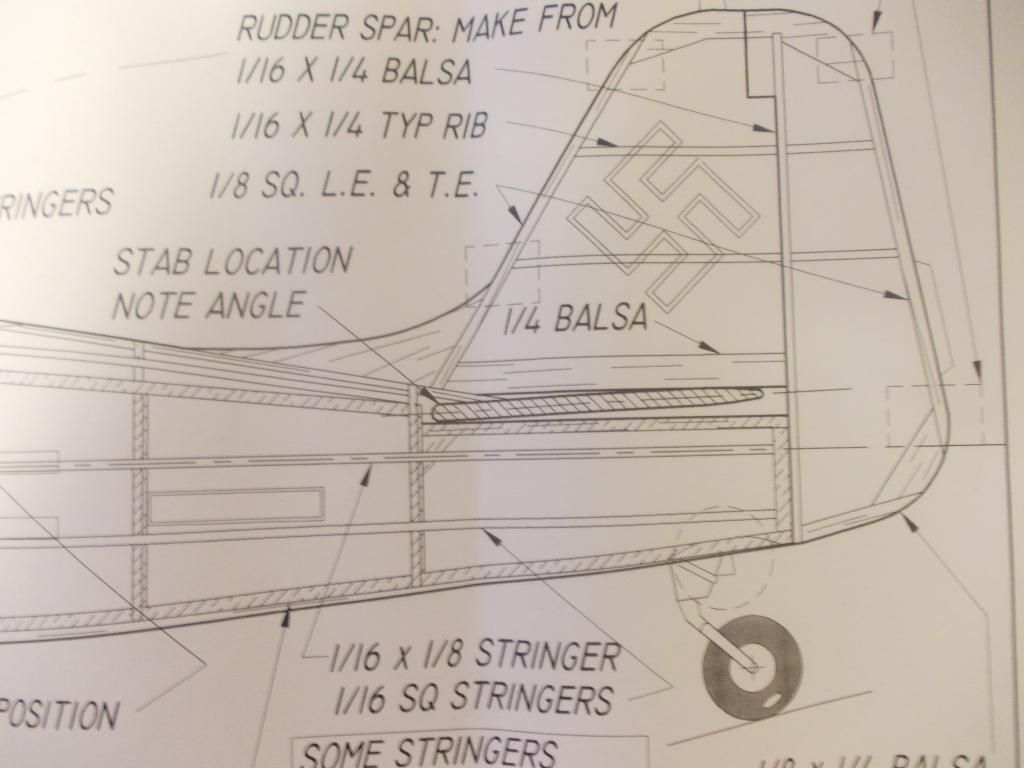
So before I lay down the "A" parts I decide to change the angle of the stabilizer, I cut out 2 small pieces out of A2:
Image
The reason I am doing this is...
1. My tail will be at a better attack angle for the initial flight pattern
2. Made a bit more room for a thicker stabilizer
I got this idea from a "Mike Midkiff" plan:
Image
This is from plans of the FW 190F (same scale as Guillows)
This will be one of the changes as I rebuild my Guillows FW. I will plan to build the Guillow FW with some "Midkiff" improvements!
Don't let me get side tracked I want to build this Airacobra! This plane will (hopefully) fly at the next FAC contest I go to!
Mitch... Keep Building, Keep Flying, Keep Learning!
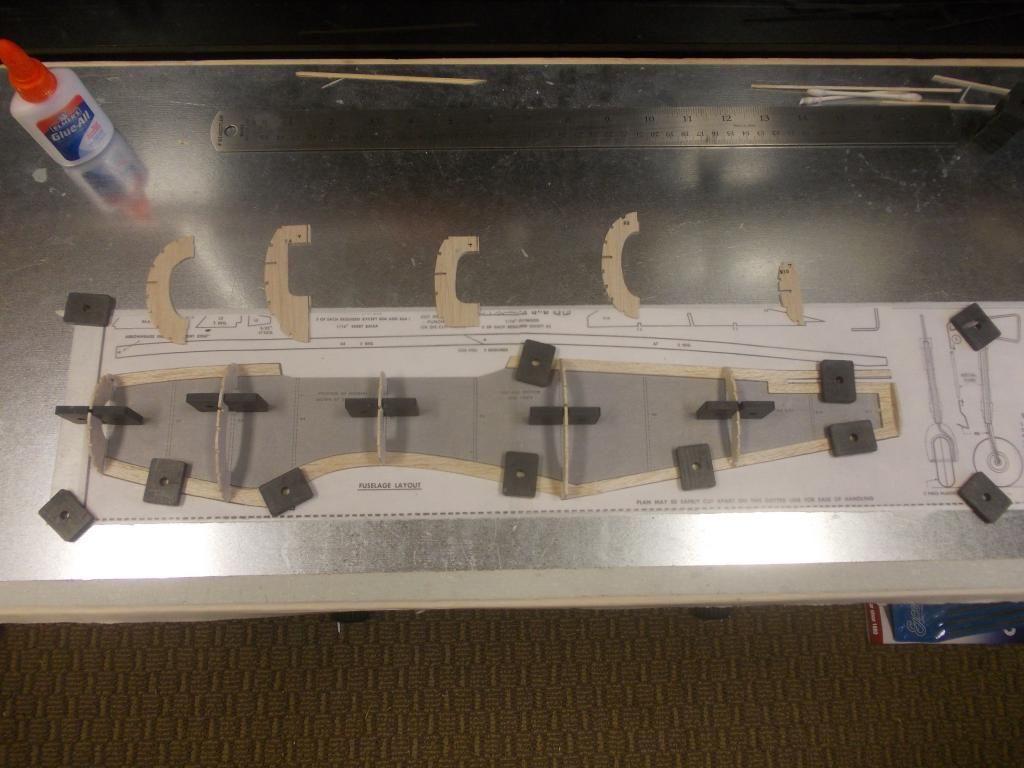
UPDATE: Okay... before 5pm and the Keel gets laid down... Construction begins!
Image
I will need to let things dry then add the next set of frames. Can't have the magnets too close.
Hope to have the fuselage coming together before "Lights Out" tonight! :D
PS I see Guillows did give me the printed picture of A6 and A7, so I can reproduce everything from the plans! :D
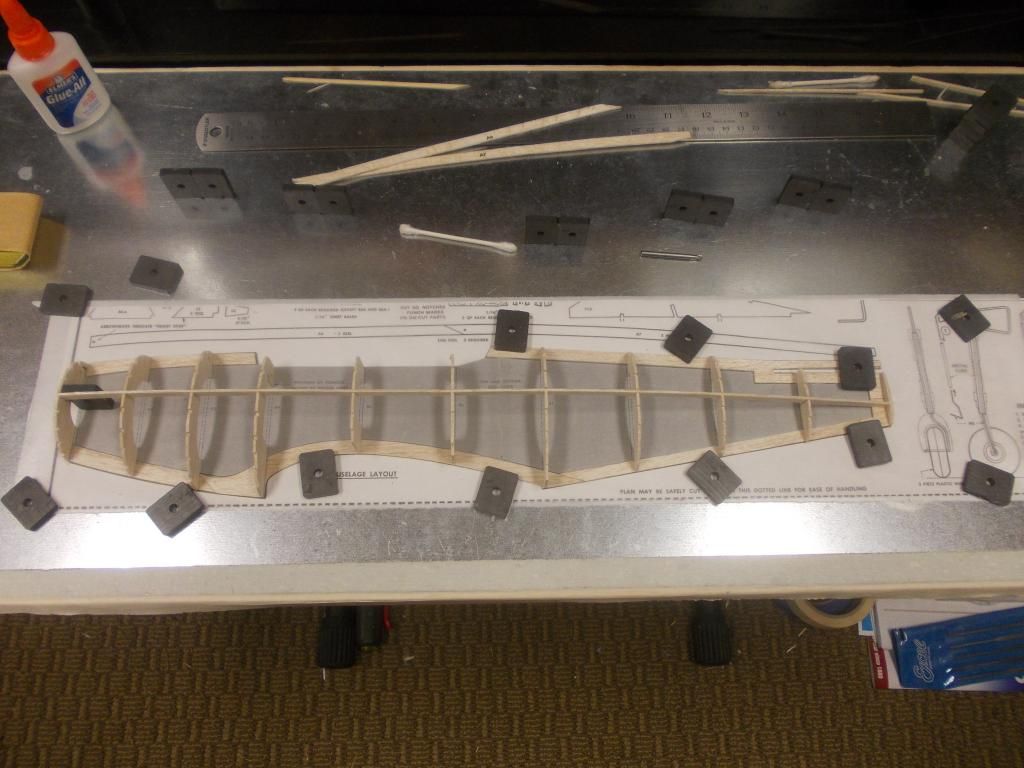
END of DAY 2:
Image
I hoped to have more done but other things got in the way...all is good...
Tomorrow is another day...
Mitch
 
Posts: 1347
Joined: Mon Aug 22, 2011 9:16 pm
Location: Kent, WA

Re: My P-39 Aircobra

Postby Mitch » Fri Jun 28, 2013 9:33 am

Day 3 Morning:
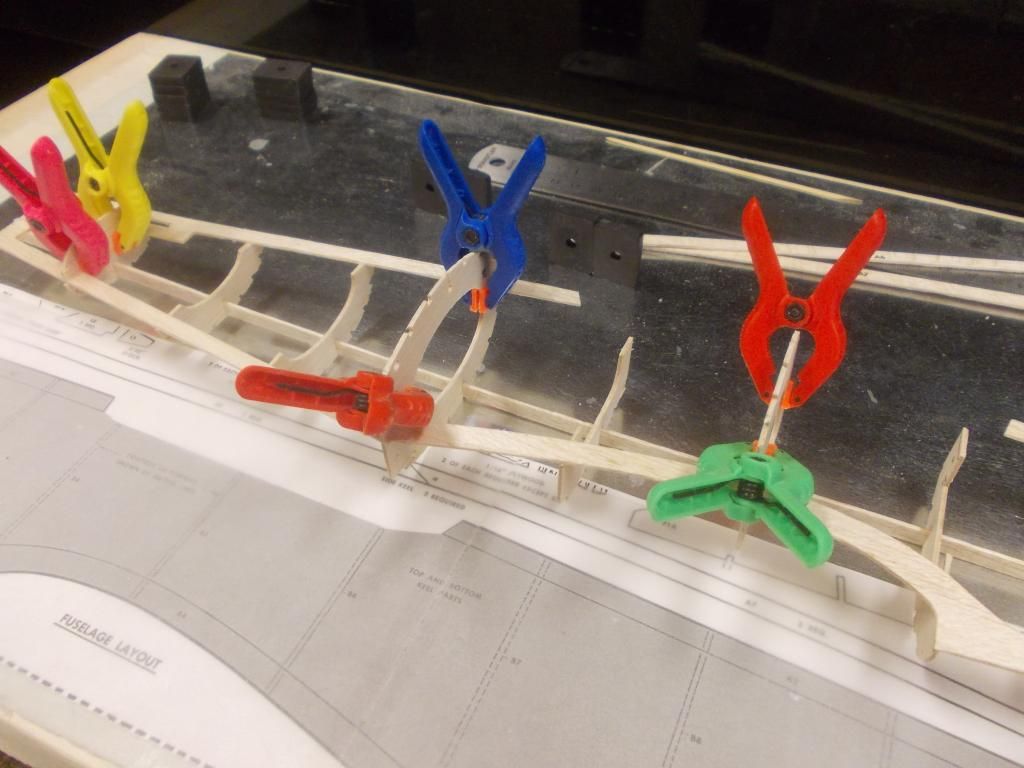
The half fuselage is dry and time for the stbd side of frames. There are a few ways to get this done. I am simply using some clamps. When dry I will add a few more frames.
Image
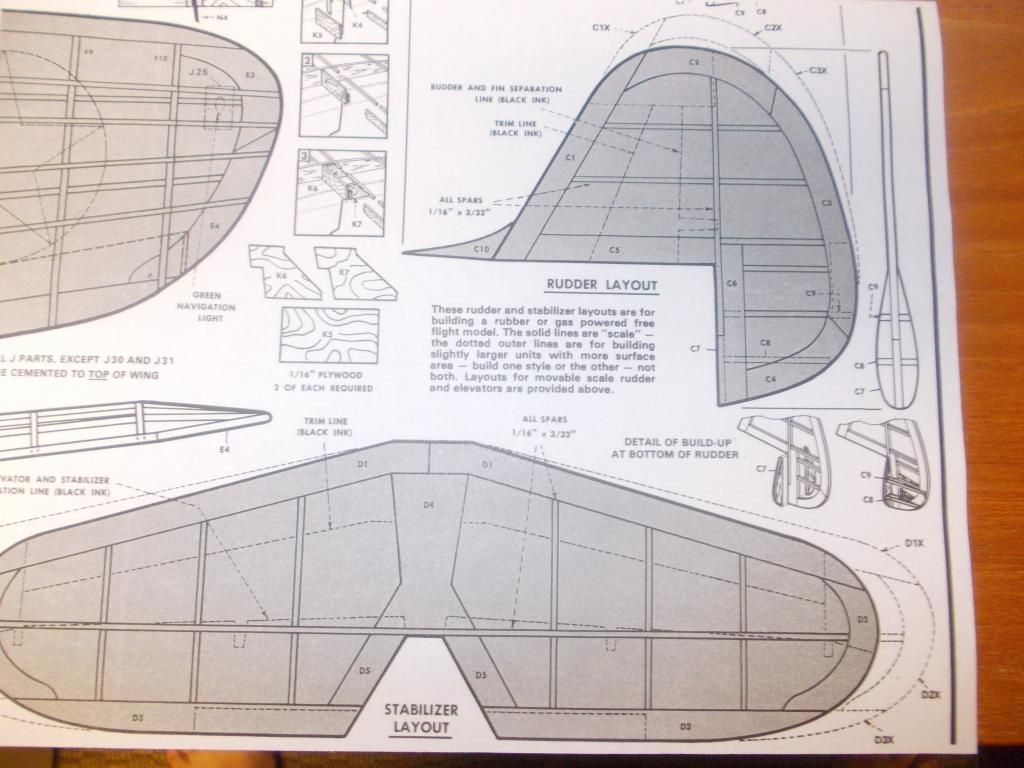
Meanwhile my building area is now free again and I will start on the tail. This model comes with enough parts to make the scale tail or one slightly larger.
I will make the larger one for free flight.
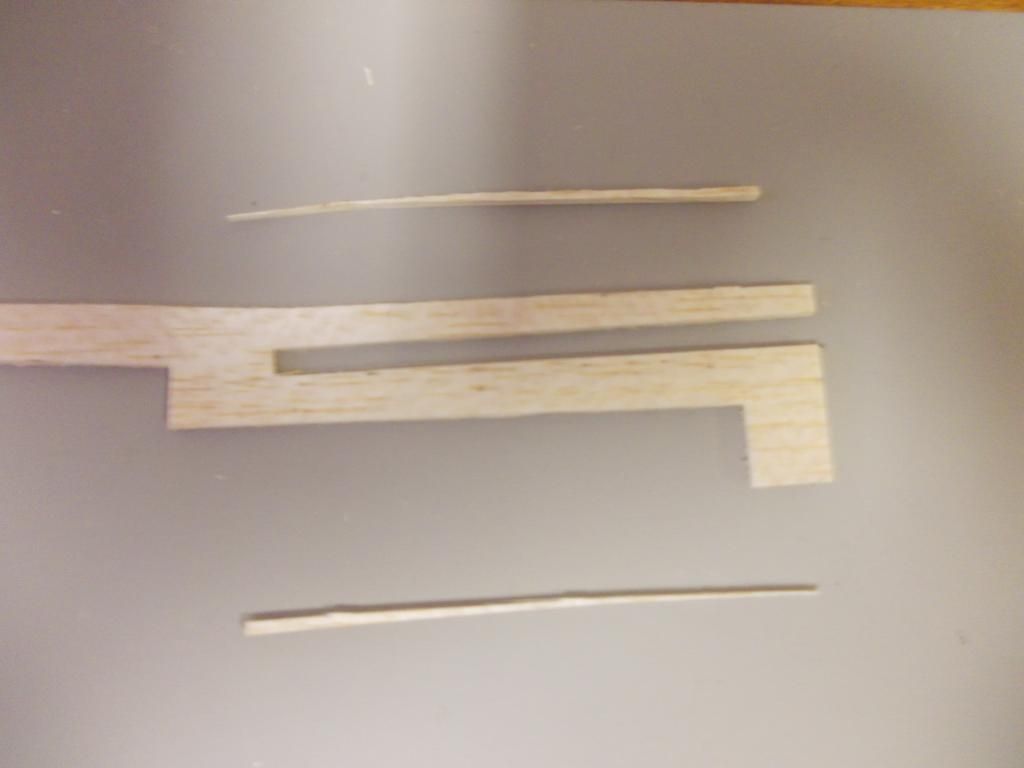
Image
So I will use the "X" parts. When finished I will remove some material from the inside of the tail to lighten!
Mitch
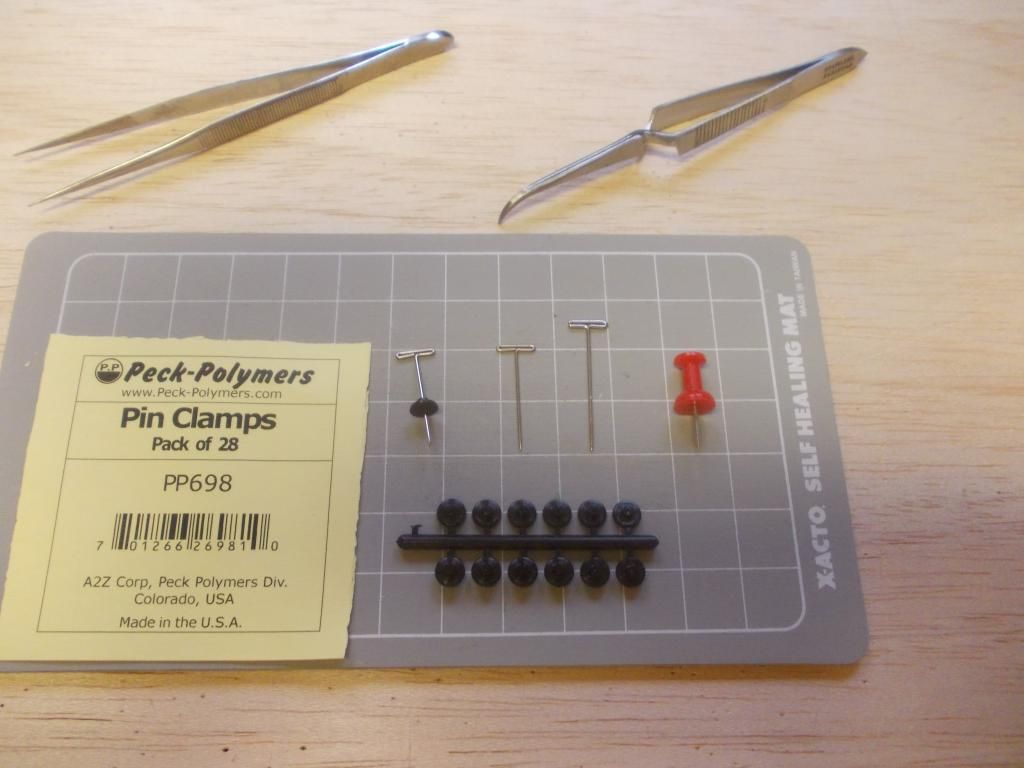
:!: Tool Tip: For small work, like the tail magnets do not work well. I use T pins. I recently found these Pin Clamps that are very helpful. They fit over the 1" T pins. Before I had these I used Push Pins that worked okay!
Image
Mitch
 
Posts: 1347
Joined: Mon Aug 22, 2011 9:16 pm
Location: Kent, WA

Re: My P-39 Aircobra

Postby Bill Gaylord » Fri Jun 28, 2013 6:20 pm

Mitch wrote:First of all my apologies to the Bell Corp. as this is my Airacobra, not Aircobra.

We'll let you go on that one. The Russian narrator on the Military Channel calls it an "Aircobra". :D
Bill Gaylord
 
Posts: 904
Joined: Sun Nov 09, 2008 1:29 pm
Location: Grove City PA

Re: My P-39 Aircobra

Postby goose » Fri Jun 28, 2013 9:55 pm

Mitch wrote:Tool Tip: For small work, like the tail, magnets do not work well. I use T pins. I recently found these Pin Clamps that are very helpful. They fit over the 1" T pins. Before I had these I used Push Pins that worked okay!


Thanks for showing those. They have been out of production for a couple of years and were hard to come by. Glad to see that A2Z has picked them up and is producing them again.
Creating Sawdust.
goose
 
Posts: 104
Joined: Mon Sep 19, 2011 10:33 pm
Location: Littleton, CO, USA

Next

Return to General Building Questions

Who is online

Users browsing this forum: No registered users and 28 guests