My P-39 Aircobra
27 posts
• Page 2 of 2 • 1, 2
Re: My P-39 Aircobra
Mitch, I sent you a PM with some info that you might find useful.
- SteveM
- Posts: 498
- Joined: Wed Oct 24, 2007 1:06 pm
- Location: Beaverton, OR
Re: My P-39 Aircobra
Thanks to all for the input...I got the PM. Thank you for that. I had this kit in my attic for about the past 5 years and only decided to build it when I realized the kit was 1/16 scale and not 1/12 scale. I LIKE this scale for RUBBER POWER! The kit was sealed and it is COMPLETE! I made copies of all the plans I need and am working off of my copies. I started watching all the videos on YouTube and wondered why they were calling it the Air-a-cobra. Then I looked at the box again and thought "How did I not see that?"
End of Day 3:
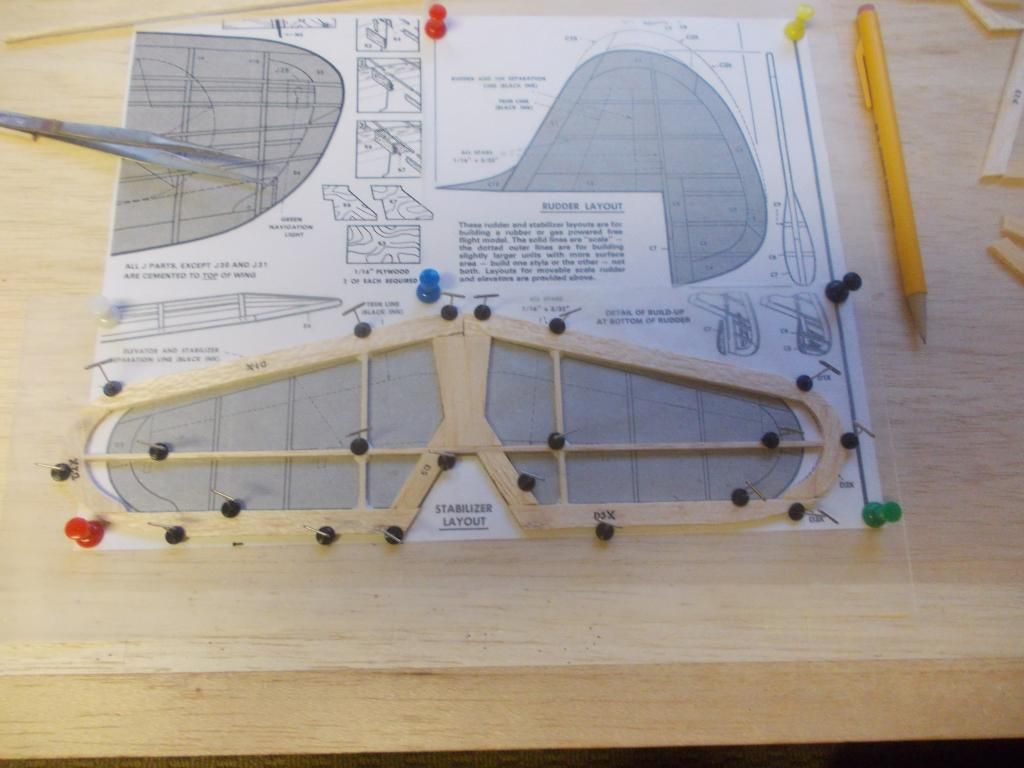
Got the stabilizer built up with my "pin clamps". This is only the second time I've used these and they work GREAT!
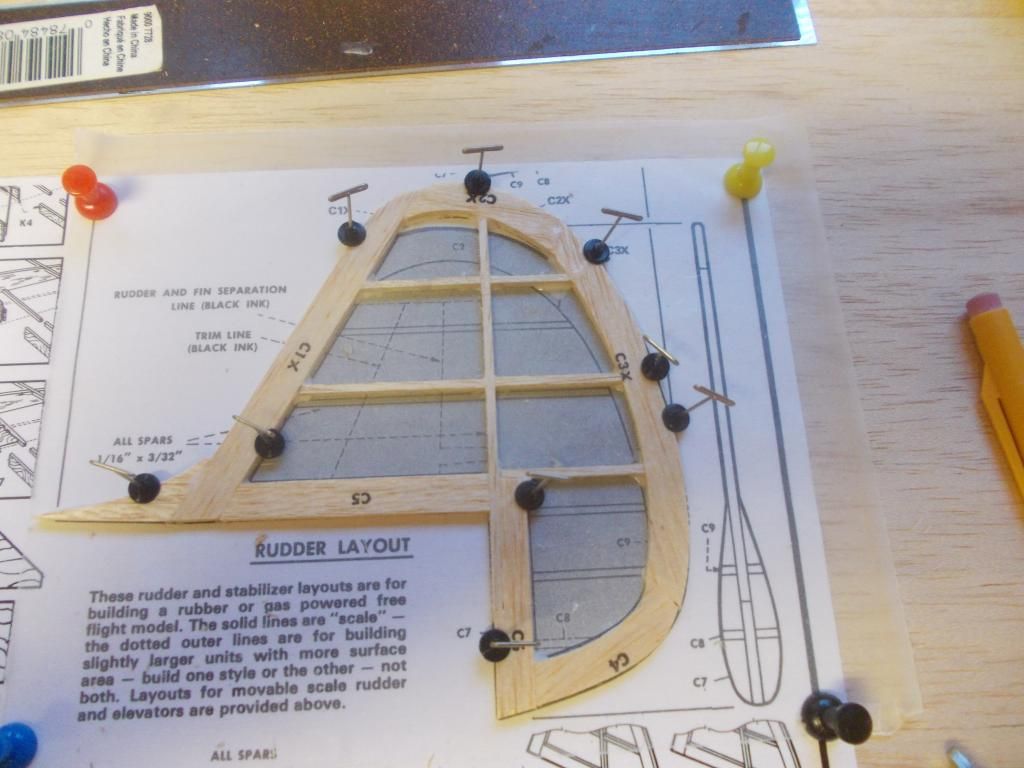
...and the rudder.
The bottom of the ruder is built up more. I used 1/32 stock. They kit parts were not die cut but printed on 1/16.
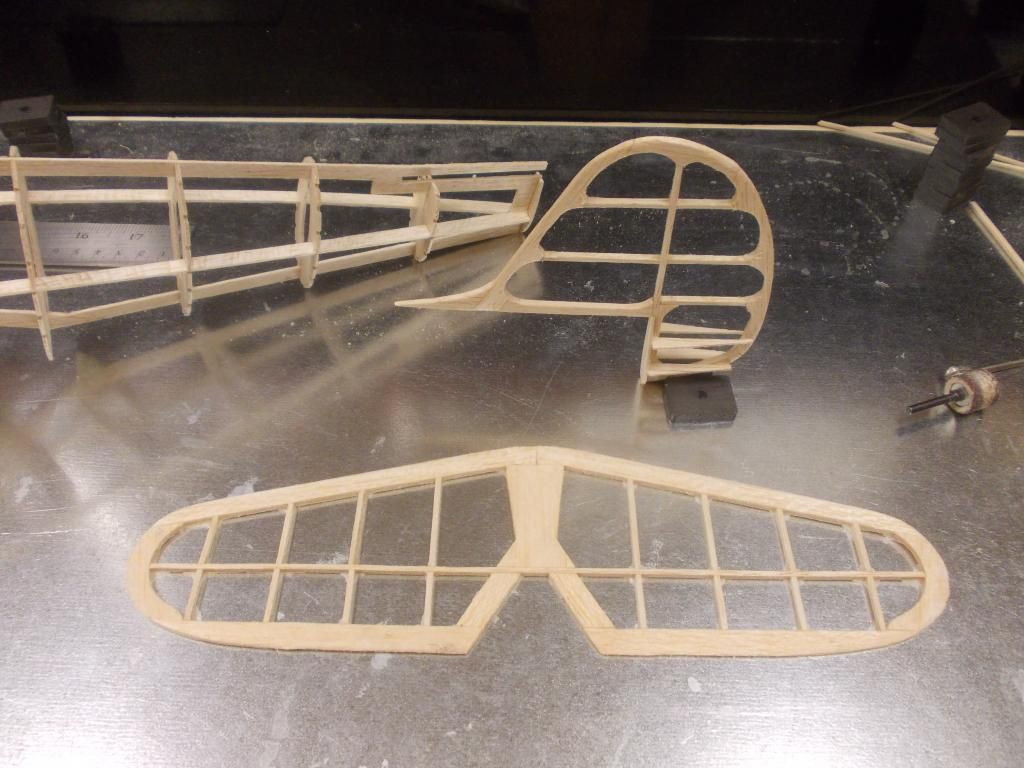
The bottom pieces of the rudder are just put on and the glue needs to dry, then I will sand down. I deviated from the plans a bit on the rudder.
The rudder weighed 2g when it came off the table. It now weighs 1g. The stabilizer weighs 3g. I will sand it down and hope for 2g.
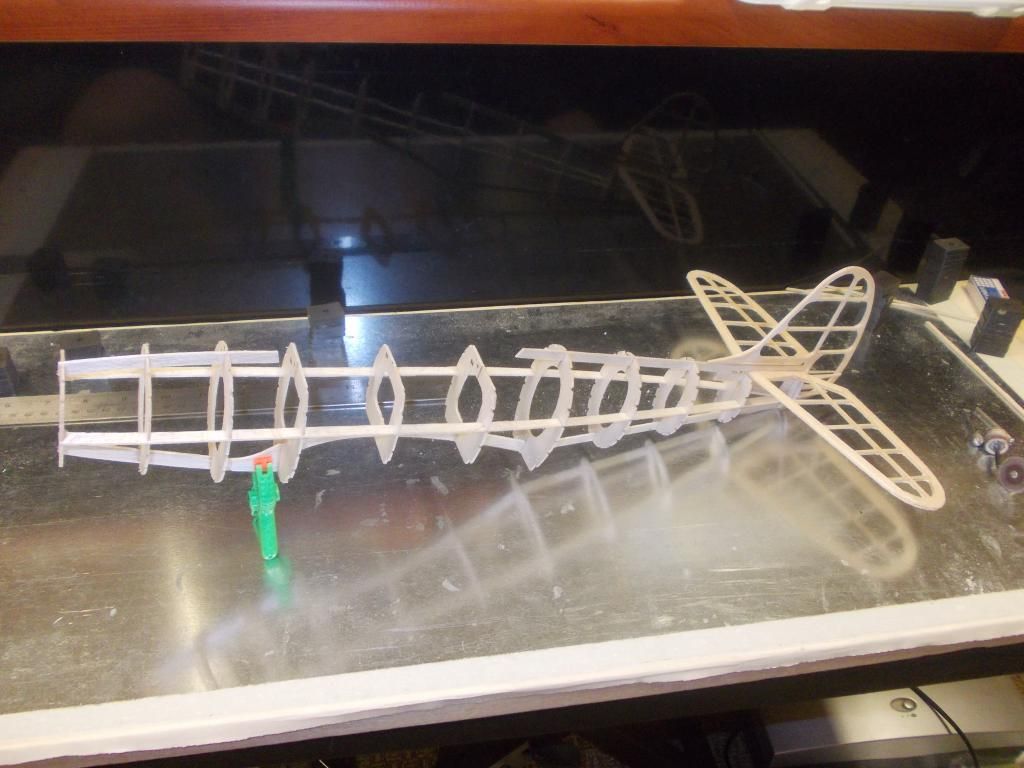
Here is the Mock Up so far:
I really only worked on the model a few minutes here and there during the day...
Tomorrow I should be able to run the stringers and build up the wing!
The rain stopped and now we are in a HEAT wave... It got over 80 degrees today!
Mitch
End of Day 3:
Got the stabilizer built up with my "pin clamps". This is only the second time I've used these and they work GREAT!

...and the rudder.

The bottom of the ruder is built up more. I used 1/32 stock. They kit parts were not die cut but printed on 1/16.

The bottom pieces of the rudder are just put on and the glue needs to dry, then I will sand down. I deviated from the plans a bit on the rudder.
The rudder weighed 2g when it came off the table. It now weighs 1g. The stabilizer weighs 3g. I will sand it down and hope for 2g.
Here is the Mock Up so far:

I really only worked on the model a few minutes here and there during the day...
Tomorrow I should be able to run the stringers and build up the wing!
The rain stopped and now we are in a HEAT wave... It got over 80 degrees today!
Mitch
- Mitch
- Posts: 1347
- Joined: Mon Aug 22, 2011 9:16 pm
- Location: Kent, WA
Re: My P-39 Aircobra
Morning coffee and sanding, Day 4:
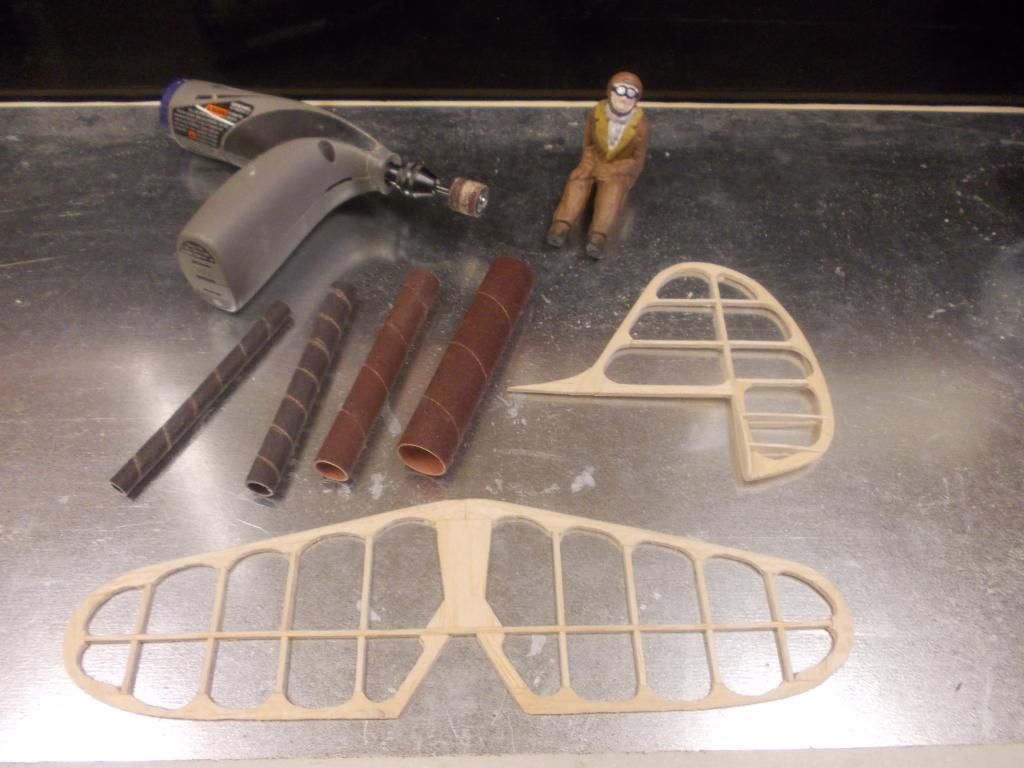
I use a Dremel tool when I can, it makes quick work. But for the finishing up I got these 'tube' sanders from a modeler I met at WESTFAC IV...
I got other neat stuff from him which I will show latter, find his supplies at:
http://www.gizmogeezer.com
He is a very good modeler, fine person and is a great storyteller!
So... the rudder is at 1g and the stabilizer is 2g. Now I need run the stingers on the fuselage and build the wing! Mitch
Mid Day UPDATE:
Whilst doing some errands I came across this at a Garage Sale:
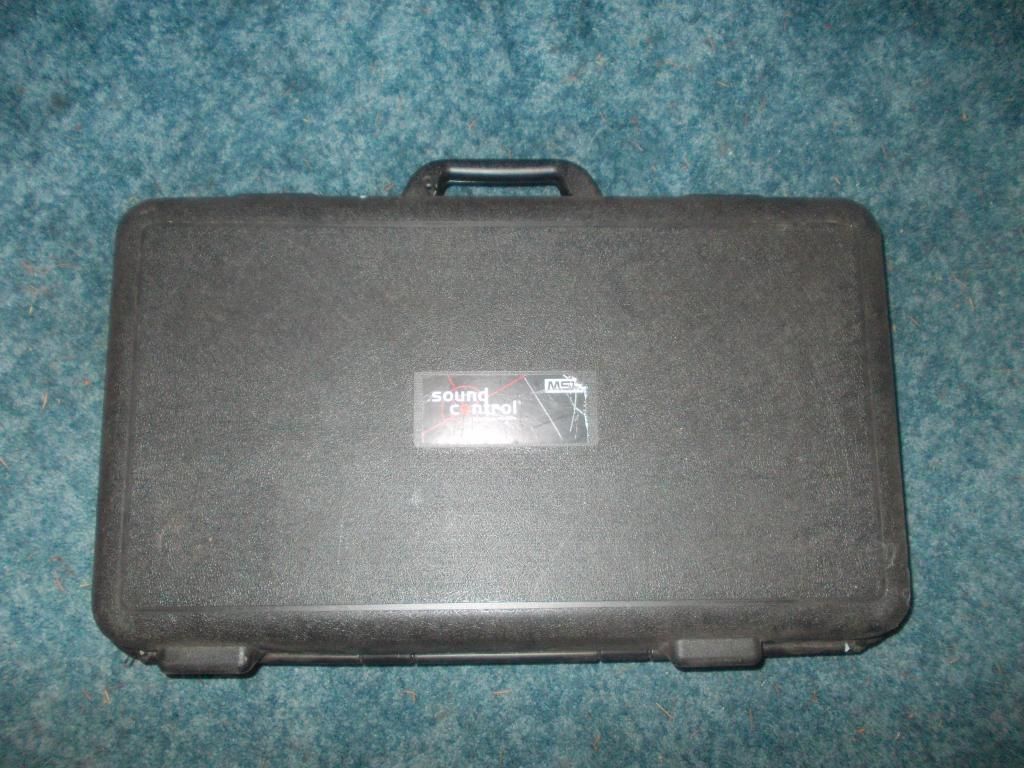
Bought it for a Fiver...Now I can transport my models:
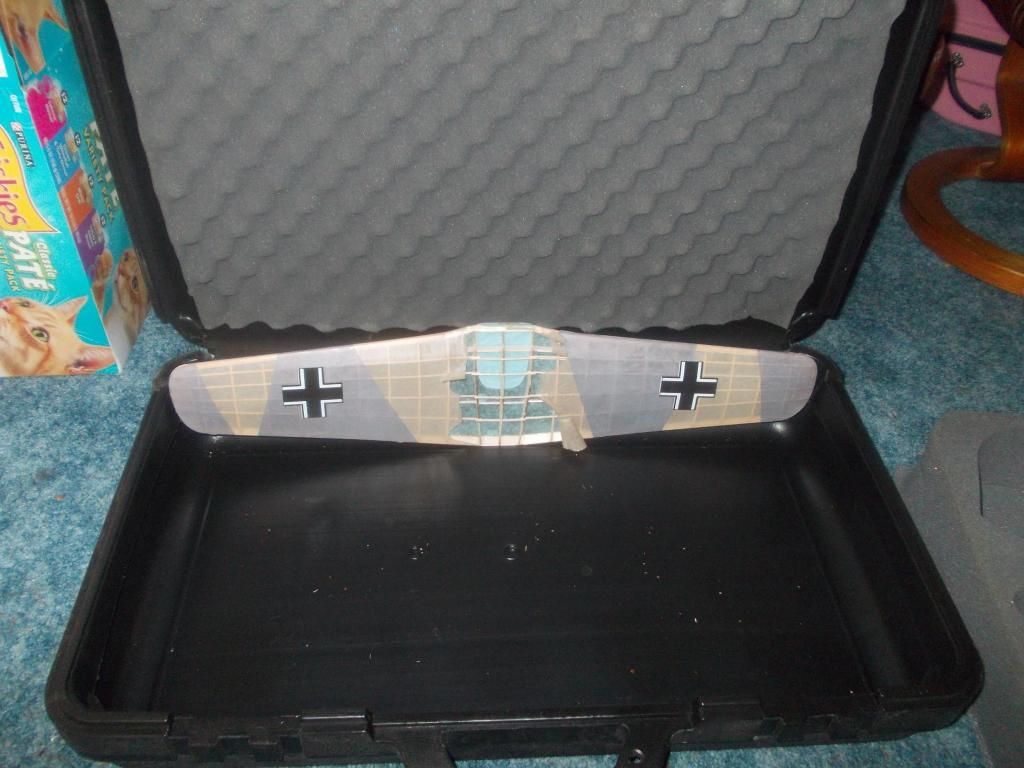
I think I can fit at least 3... Back to work:
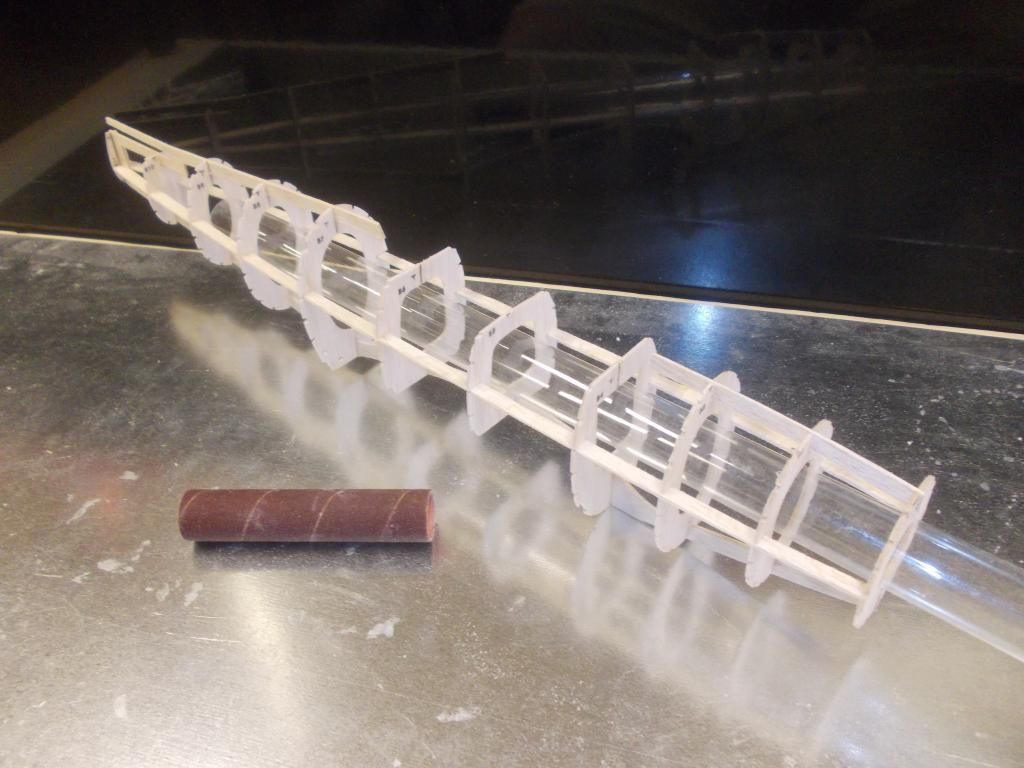
Did some sanding inside of B1, B4 and B9 with my tube sander to make sure my "Blast Tube" will fit... This model will be getting MAXIMUM winds for MAXIMUM flight time and I do NOT want the rubber band exploding inside my NEW P-39! Mitch
PS: The Blast Tube is inserted during the winding process of the rubber motor. When the motor is fully wound, the winder is taken off, then you hook on a wire reach rod, then slide the blast tube out. Then the propeller hooked on, and you are ready to FLY!
AFTERNOON UPDATE:
I sprayed L1 parts with Windex (ammonia softens the wood better than water alone) then glued and clamped in place:
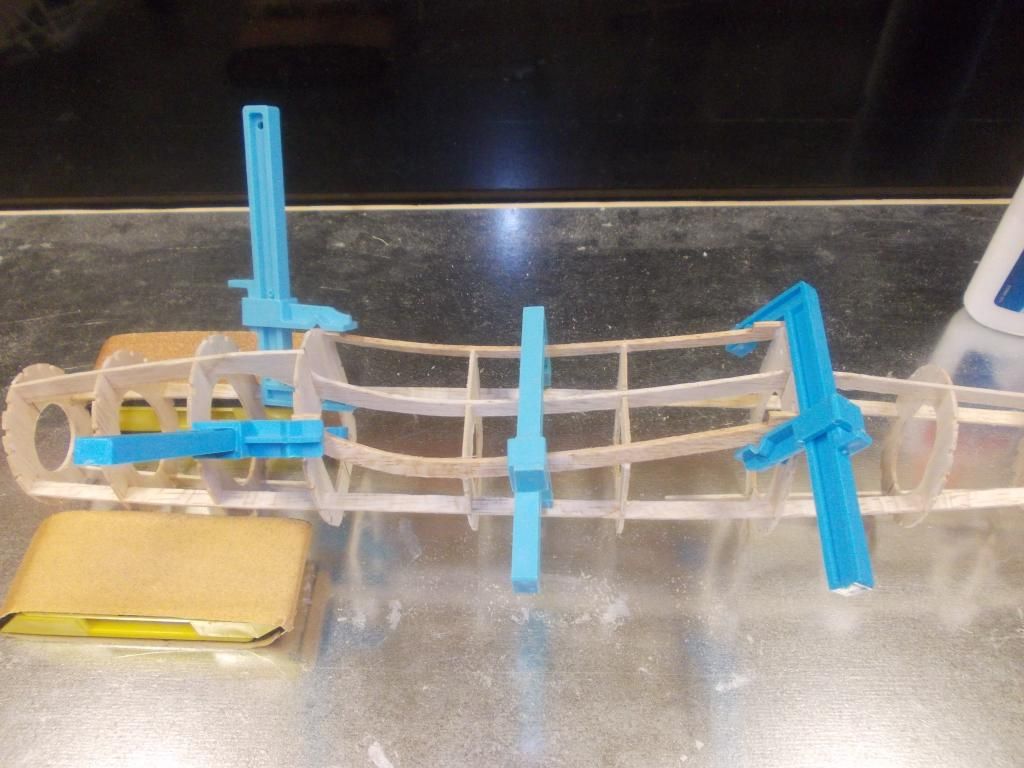
I will set this aside until tonight, then start installing the stringers... I'll start on the WING now!

I use a Dremel tool when I can, it makes quick work. But for the finishing up I got these 'tube' sanders from a modeler I met at WESTFAC IV...
I got other neat stuff from him which I will show latter, find his supplies at:
http://www.gizmogeezer.com
He is a very good modeler, fine person and is a great storyteller!
So... the rudder is at 1g and the stabilizer is 2g. Now I need run the stingers on the fuselage and build the wing! Mitch
Mid Day UPDATE:
Whilst doing some errands I came across this at a Garage Sale:

Bought it for a Fiver...Now I can transport my models:

I think I can fit at least 3... Back to work:

Did some sanding inside of B1, B4 and B9 with my tube sander to make sure my "Blast Tube" will fit... This model will be getting MAXIMUM winds for MAXIMUM flight time and I do NOT want the rubber band exploding inside my NEW P-39! Mitch
PS: The Blast Tube is inserted during the winding process of the rubber motor. When the motor is fully wound, the winder is taken off, then you hook on a wire reach rod, then slide the blast tube out. Then the propeller hooked on, and you are ready to FLY!
AFTERNOON UPDATE:
I sprayed L1 parts with Windex (ammonia softens the wood better than water alone) then glued and clamped in place:

I will set this aside until tonight, then start installing the stringers... I'll start on the WING now!
- Mitch
- Posts: 1347
- Joined: Mon Aug 22, 2011 9:16 pm
- Location: Kent, WA
Re: My P-39 Aircobra
David Duckett wrote:80 degrees heat wave? It's 115 degrees at 2:00 pm in Tucson!!!
It was 77F in our house at 4:40am this morning when we gave up on trying to sleep. Few people have A/C and at this time of year 70-80% humidity during the night is par for the course. If you make yourself a glass of ice water you'll get more water by licking the outside of the glass than drinking its contents. It's not harsh weather, we're just not accustomed to it or equipped for it.
- SteveM
- Posts: 498
- Joined: Wed Oct 24, 2007 1:06 pm
- Location: Beaverton, OR
Re: My P-39 Aircobra
Yeah that Arizona heat is a DRY heat...Like your oven set on warm. Seriously our average summer we have 3 days over 90F. The weather people are forecasting 90+ temps on Monday AND Tuesday! I do not have AC, but we have something in the NW that Arizona does not have... TREES!
During the hottest part of the day my house is in the shadow of a large Maple tree. It's 85 outside, 75 inside and about 70 in my basement. Working on the Airacobra and watching MLB, Chicago @ Seattle.
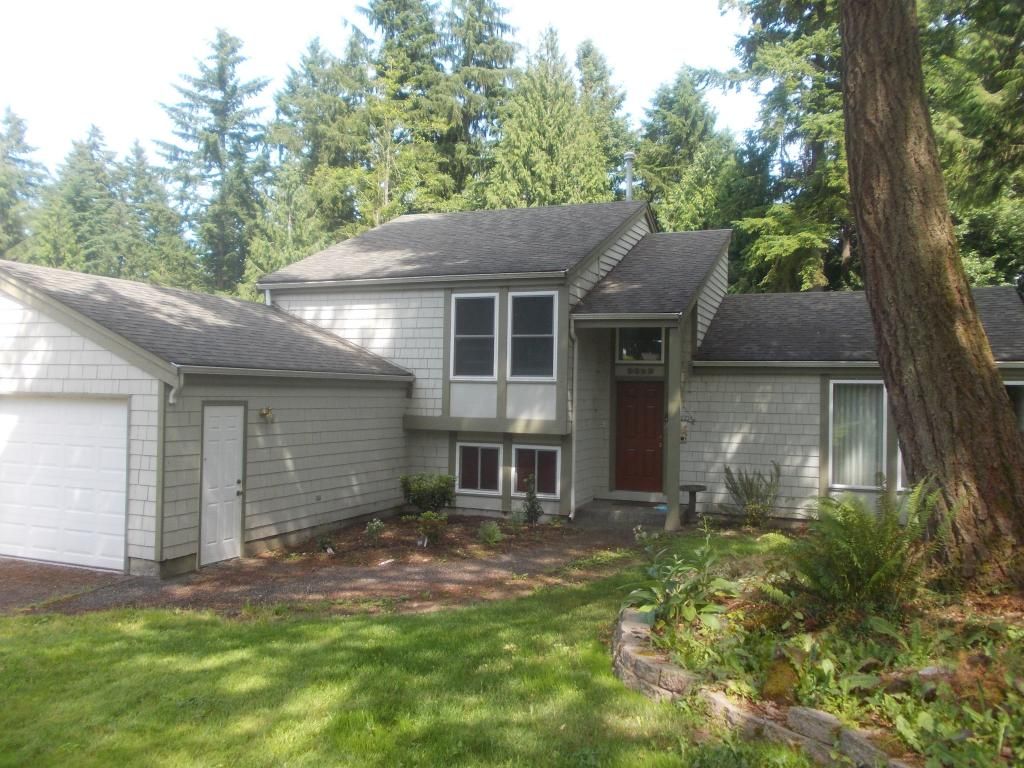
Mitch... yes and SEATTLE lost again!
END of the Day Report:
Dave... I hope you are staying cool with AC. We are not suppose get tan up here, we just RUST. I know the entire west coast is feeling the HEAT!
Anyway... here is the Airacobra thus far:
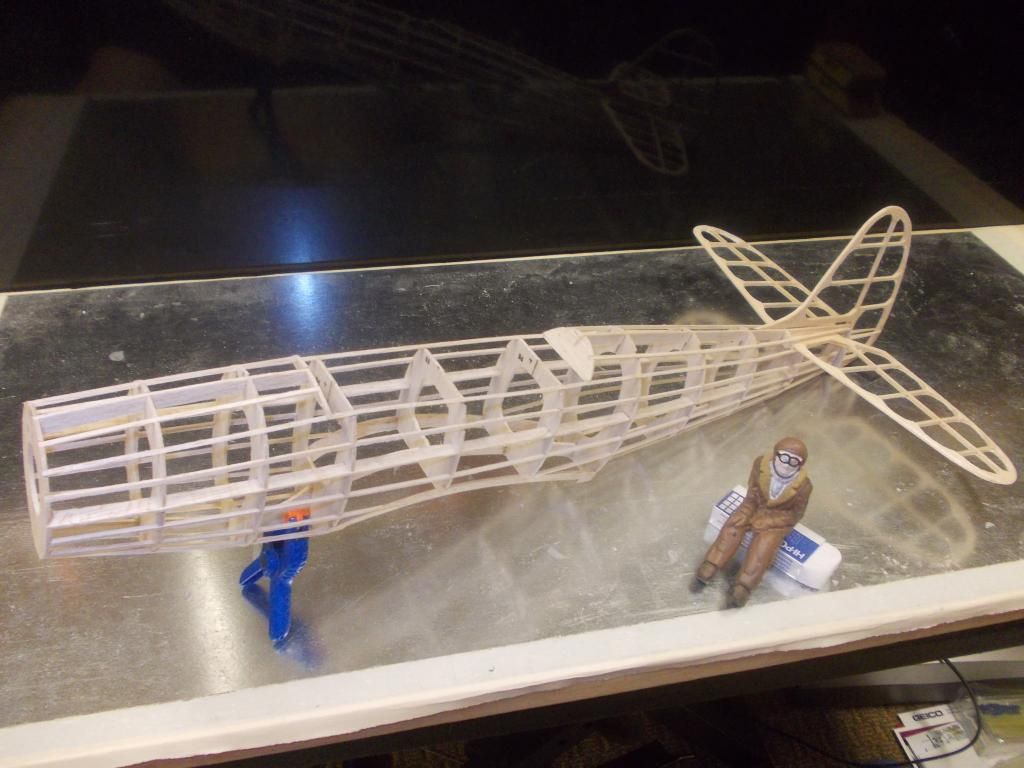
I was working on the wing tips today but not happy with the results... I will re-do that tomorrow and should build the wing!
I hope you all can stay cool though this heat wave. Mitch
During the hottest part of the day my house is in the shadow of a large Maple tree. It's 85 outside, 75 inside and about 70 in my basement. Working on the Airacobra and watching MLB, Chicago @ Seattle.

Mitch... yes and SEATTLE lost again!
END of the Day Report:
Dave... I hope you are staying cool with AC. We are not suppose get tan up here, we just RUST. I know the entire west coast is feeling the HEAT!
Anyway... here is the Airacobra thus far:

I was working on the wing tips today but not happy with the results... I will re-do that tomorrow and should build the wing!
I hope you all can stay cool though this heat wave. Mitch
- Mitch
- Posts: 1347
- Joined: Mon Aug 22, 2011 9:16 pm
- Location: Kent, WA
Re: My P-39 Aircobra
Day 5 NOON Report:
Did a bit of work on the fuselage:
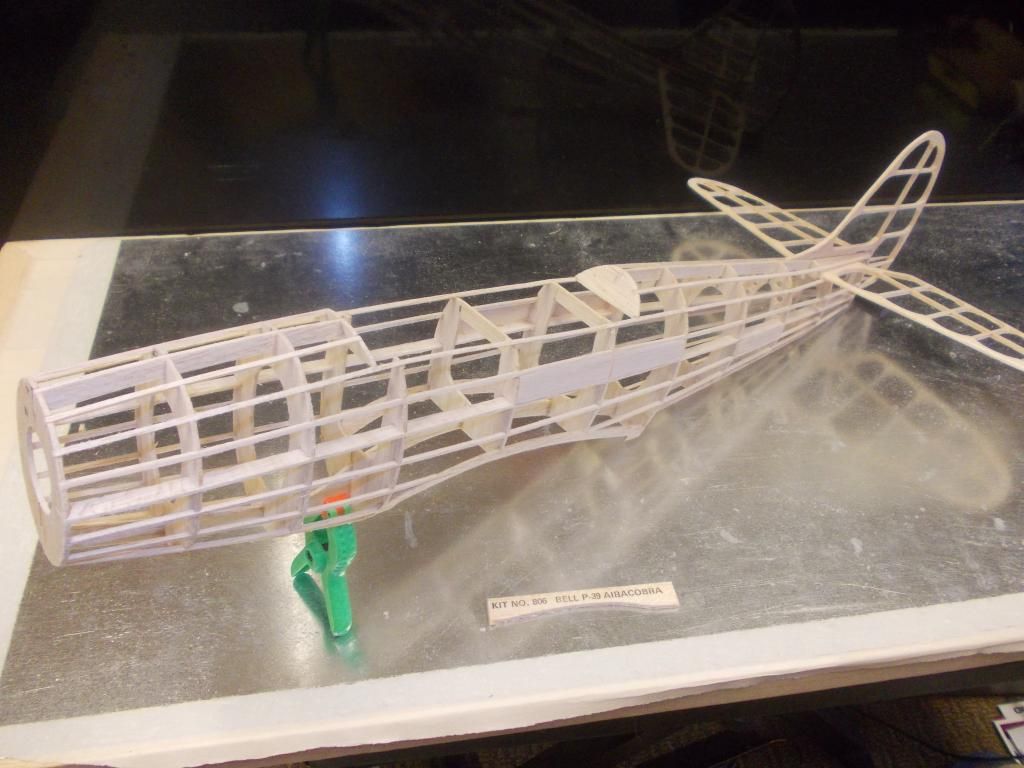
Removed the top part of B4, B5, B6. Left B4 off replaced B5 and B6 with 1/32 with the grain running horizontal
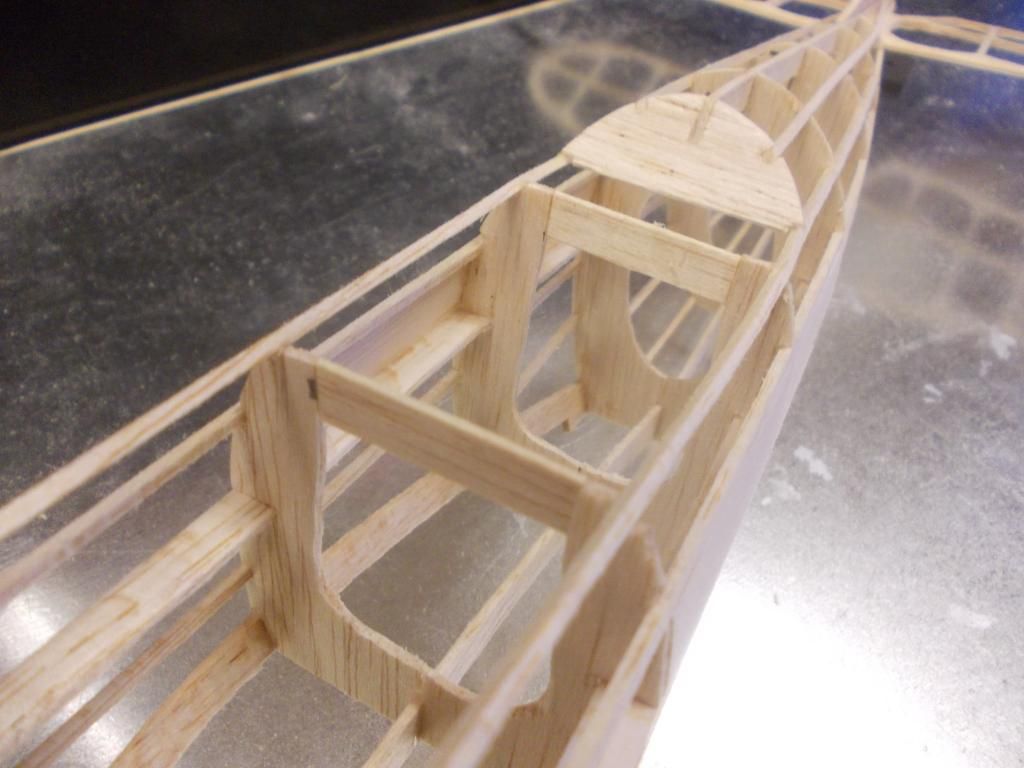
Added 1/32 sheet to the side for installation of exhaust pipes
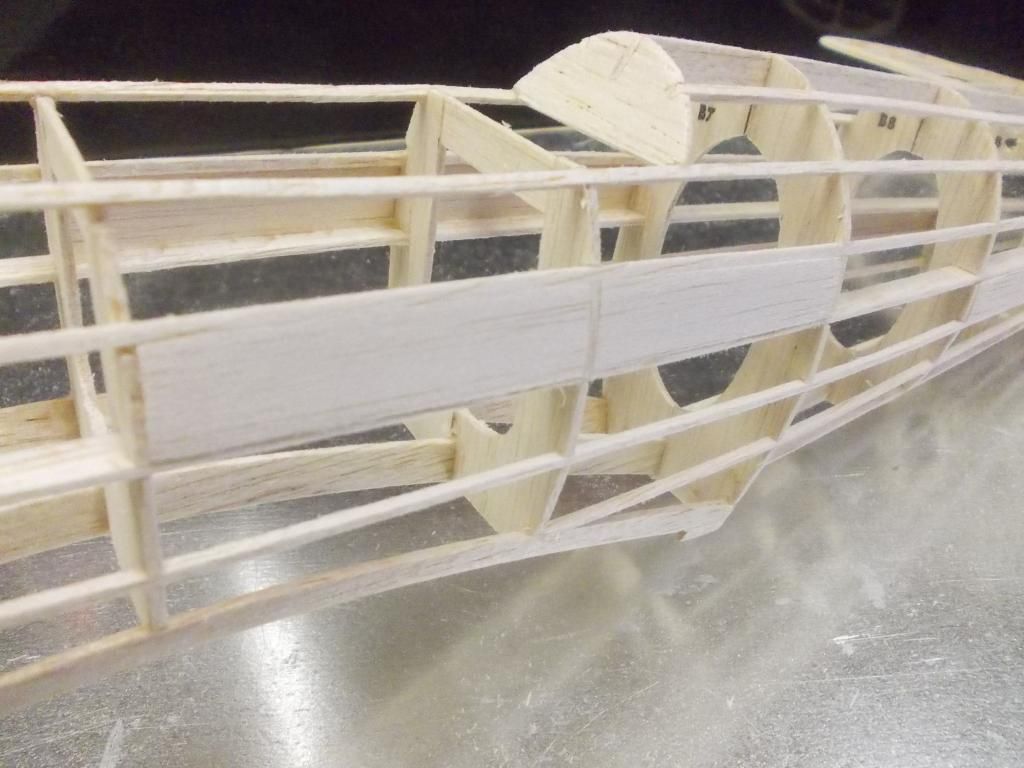
Installed 1/16 near the rear for the Rear Peg. I like to have the peg between the frames as it is easier for me to load the rubber.
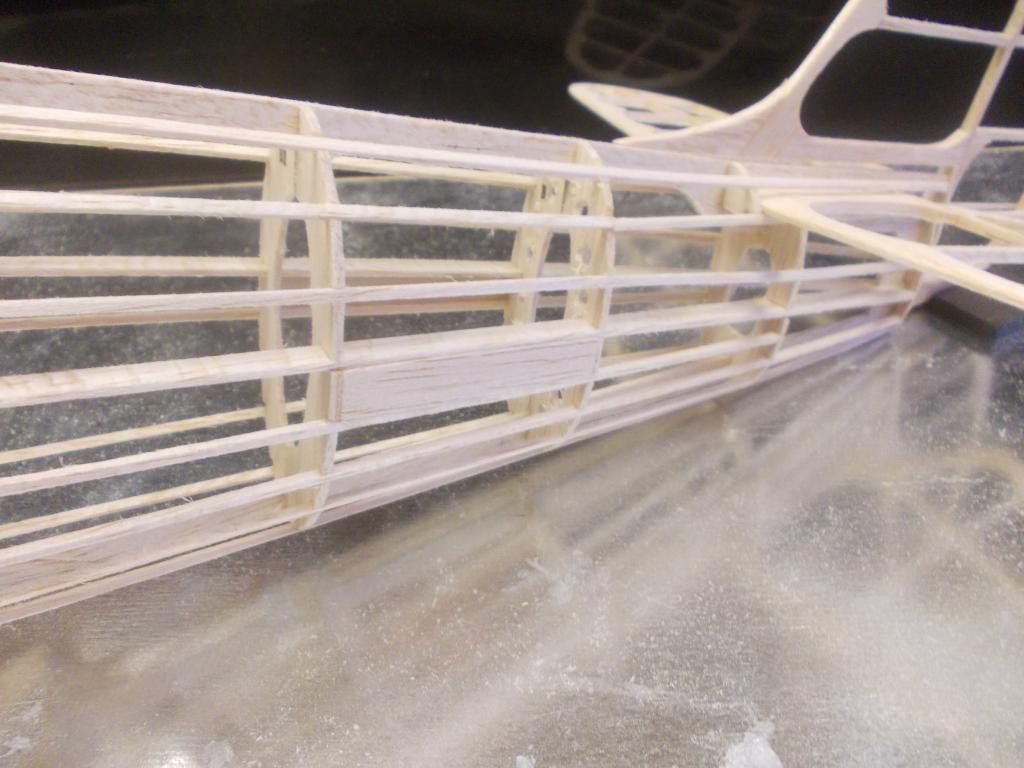
The weight of the fuselage went from 17g to 18g, so I made some lightening holes in frames B9 and B10, and with some more sanding got the weight back to 17g. So the weight of the fuselage and tail are now at 20g.
I need to get to work on the wing! Mitch
Okay, getting started on the wing, the basic layout:
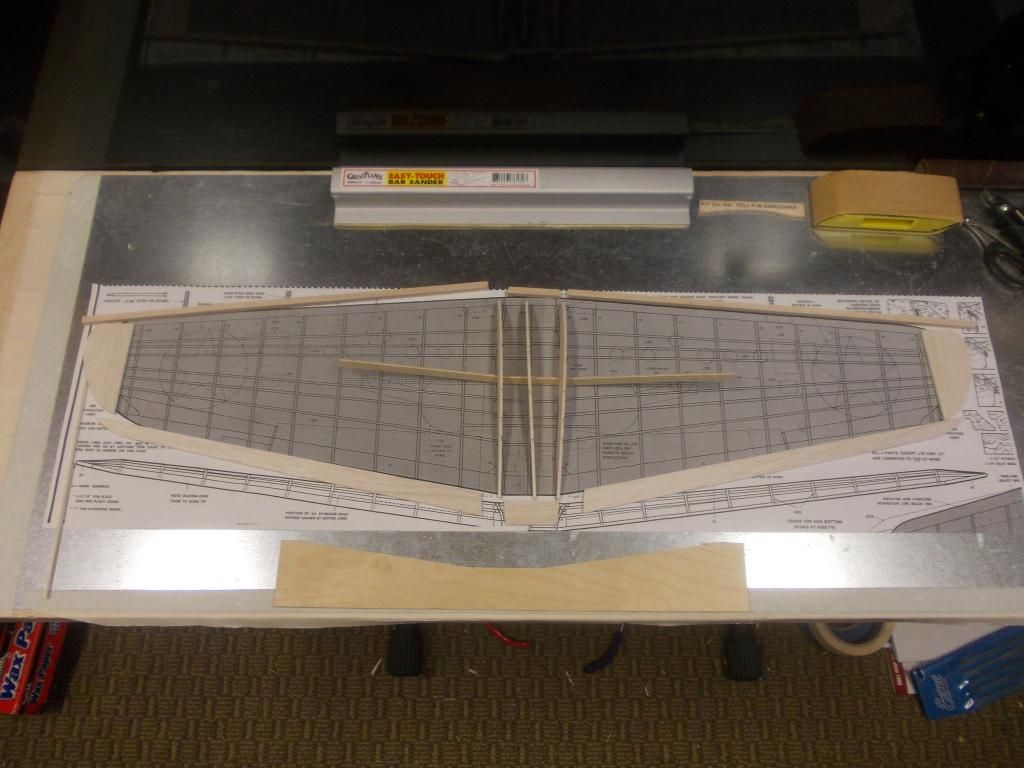
I will make a new brace, there is plenty of extra plywood. I did my math and I came up with the Wing Area of 147 square inches. So my goal is for 73g AUW (All Up Weight). That would put a wing load of .5g per square inch. I think that is a realistic goal for a Guillows Model. With the hook to peg length of 14 inches that will get me ample room for long rubber and I should be able to safely wind her up to 1600! Mitch... Back to work
End of the day... 94 degrees outside, and not much work on the model today. Here is the NEW wing brace made from the extra plywood from the kit:
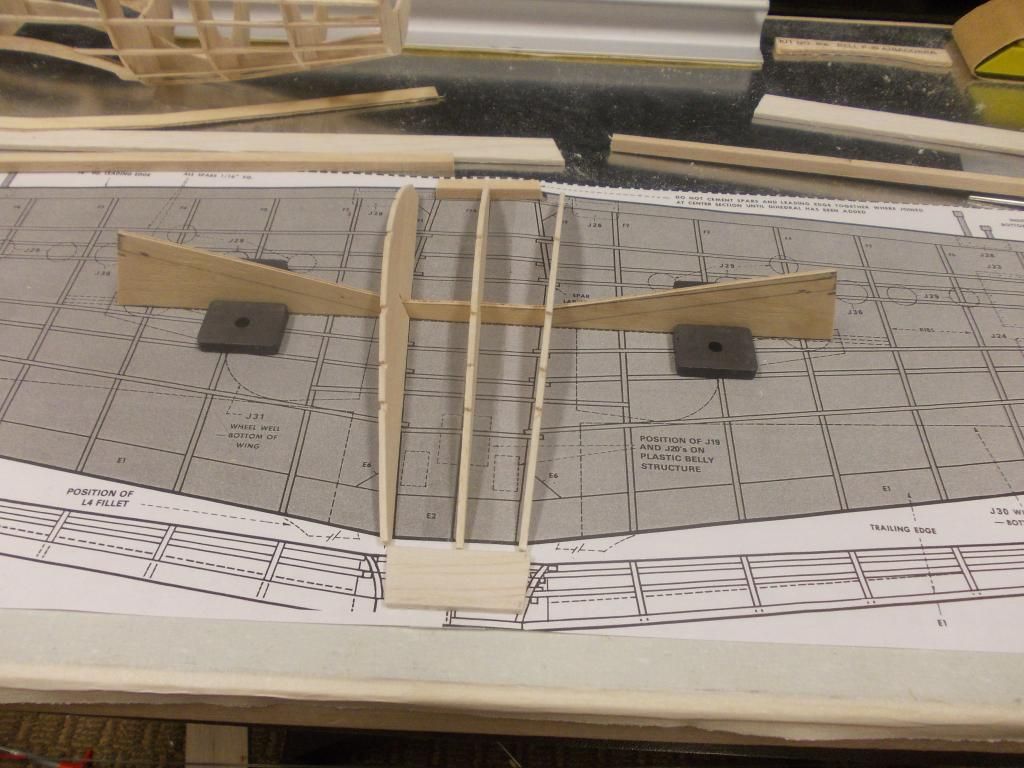
The wing dihedral will be about 3 inches! I am leaving the bottom on the plywood for now, until I build the wing. If the wing tips are too high I can simply adjust the plywood angle and then trim off the bottom when I am satisfied. I still think I can have this plane finished in 14 days! I am also planning on having this wing removable for transporting the model. I am not sure how to attach. I think I will try magnets. Mitch
Did a bit of work on the fuselage:

Removed the top part of B4, B5, B6. Left B4 off replaced B5 and B6 with 1/32 with the grain running horizontal

Added 1/32 sheet to the side for installation of exhaust pipes

Installed 1/16 near the rear for the Rear Peg. I like to have the peg between the frames as it is easier for me to load the rubber.

The weight of the fuselage went from 17g to 18g, so I made some lightening holes in frames B9 and B10, and with some more sanding got the weight back to 17g. So the weight of the fuselage and tail are now at 20g.
I need to get to work on the wing! Mitch
Okay, getting started on the wing, the basic layout:

I will make a new brace, there is plenty of extra plywood. I did my math and I came up with the Wing Area of 147 square inches. So my goal is for 73g AUW (All Up Weight). That would put a wing load of .5g per square inch. I think that is a realistic goal for a Guillows Model. With the hook to peg length of 14 inches that will get me ample room for long rubber and I should be able to safely wind her up to 1600!
End of the day... 94 degrees outside, and not much work on the model today. Here is the NEW wing brace made from the extra plywood from the kit:

The wing dihedral will be about 3 inches! I am leaving the bottom on the plywood for now, until I build the wing. If the wing tips are too high I can simply adjust the plywood angle and then trim off the bottom when I am satisfied. I still think I can have this plane finished in 14 days! I am also planning on having this wing removable for transporting the model. I am not sure how to attach. I think I will try magnets. Mitch
- Mitch
- Posts: 1347
- Joined: Mon Aug 22, 2011 9:16 pm
- Location: Kent, WA
Re: My P-39 Aircobra
Morning Day 6:
Getting the wing mocked up:
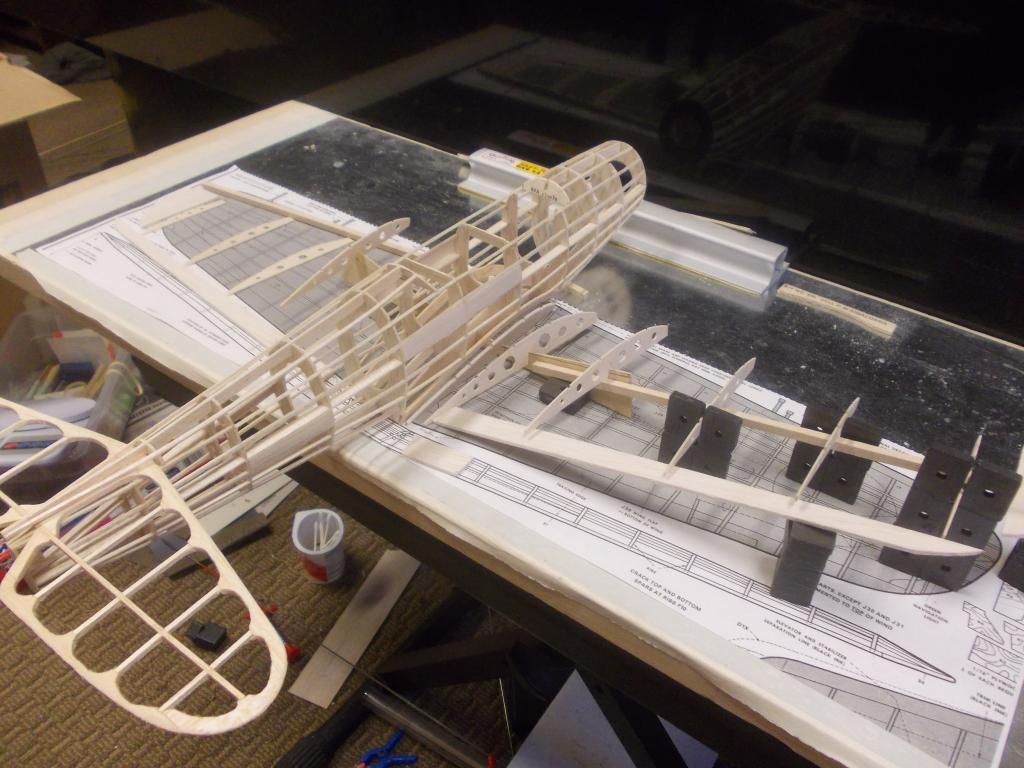
I am thinking this over again, and think for this first build use the kit wing parts. I will still only use half the ribs and have the add lightening holes. I am concerned the wood I choose for the E parts is not strong enough when I trim It down. I know some FAC builders use Bass wood in certain places. If cut thin enough it is still light enough and is stronger for the purpose. If I build the wing removable I will be able to make another wing and switch out!
So... I started this build saying I would use ALL new balsa, but now will be using ALL the kit wood! My plans keep evolving, but I keep moving forward!
Mitch
Getting the wing mocked up:

I am thinking this over again, and think for this first build use the kit wing parts. I will still only use half the ribs and have the add lightening holes. I am concerned the wood I choose for the E parts is not strong enough when I trim It down. I know some FAC builders use Bass wood in certain places. If cut thin enough it is still light enough and is stronger for the purpose. If I build the wing removable I will be able to make another wing and switch out!
So... I started this build saying I would use ALL new balsa, but now will be using ALL the kit wood! My plans keep evolving, but I keep moving forward!
Mitch
- Mitch
- Posts: 1347
- Joined: Mon Aug 22, 2011 9:16 pm
- Location: Kent, WA
Re: My P-39 Aircobra
It's looking great! Always wanted to build a P-39 since they were produced in the Buffalo area.
- Arlo DiPasquale
- Posts: 207
- Joined: Tue Jun 10, 2008 9:22 am
- Location: Minneapolis, MN
Re: My P-39 Aircobra
Mitch,
Why no efforts to skinny down on the fuselage? You are doing a great job everywhere else. Worried about strength for the motor?
Looking great!!!
Steve
Why no efforts to skinny down on the fuselage? You are doing a great job everywhere else. Worried about strength for the motor?
Looking great!!!
Steve
- twospruces
- Posts: 96
- Joined: Tue Nov 20, 2012 9:27 pm
Re: My P-39 Aircobra
Thank You, and basically, YES! I did lighten B9 and B10, those are aft of the rear peg. I made sure there was enough room for a blast tube so I did a little sanding inside. I removed/ replaced the tops of B4,5,6. One of the challenges of building an OOP kit is I get to build it once. I can not buy replacement parts. I think I built the Me 109 about 4 times, the P-51 at least 3 times.
There are some ways the stingers went in that I have NEVER seen before and I do not want to remove too much of a B part to weaken the structure. Look at this:
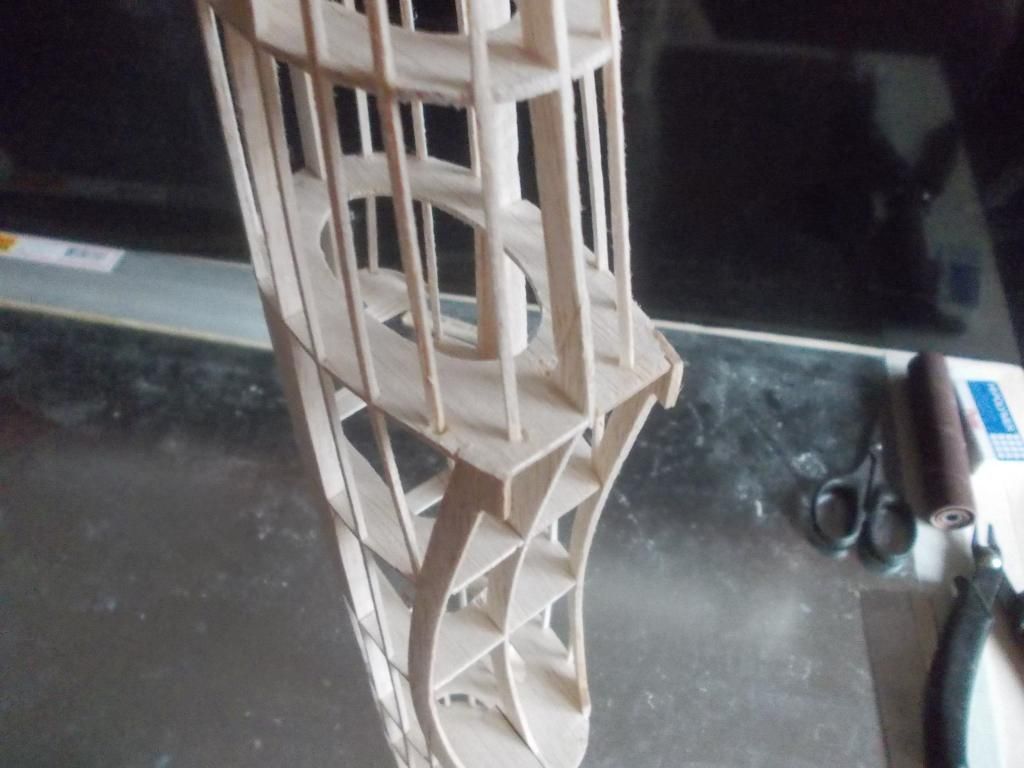
The stringers go into B6, I did not want to trim down the inside and remove the strength for that. It's not too late for me to lighten this up some more. I will finish the "Bones" and weigh it all together and decide how to proceed.
Yesterday I bout some Plaster of Paris:
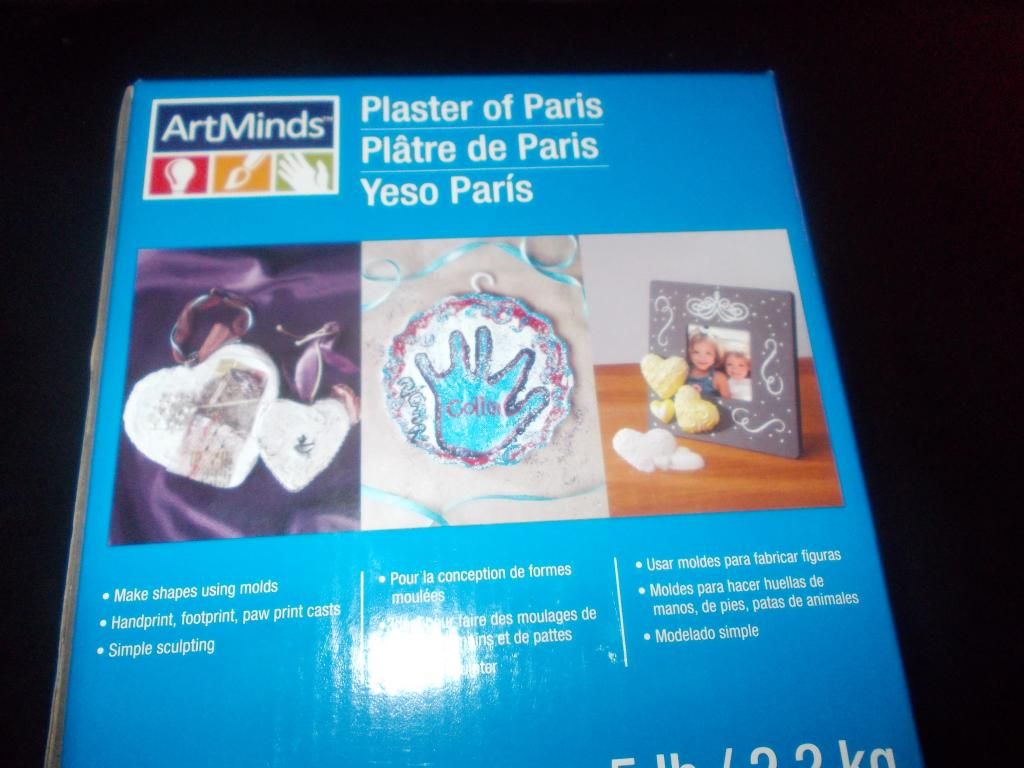
So I plan to make a mold of the canopy... I also bought a vacuum forming tool and that should arrive shortly.
I am also going to use the kit E and F parts, as the balsa I chose is very light but may be too weak. I will work on that today! Model production slowing down with the Holiday coming, but I want this plane to be ready for flight tests in 14 days! Mitch
Mitch
Okay, took your advice and looked at my fuselage, trimmed down the A parts aft of the peg and a few more lighten holes. The fuselage is now at 16g!
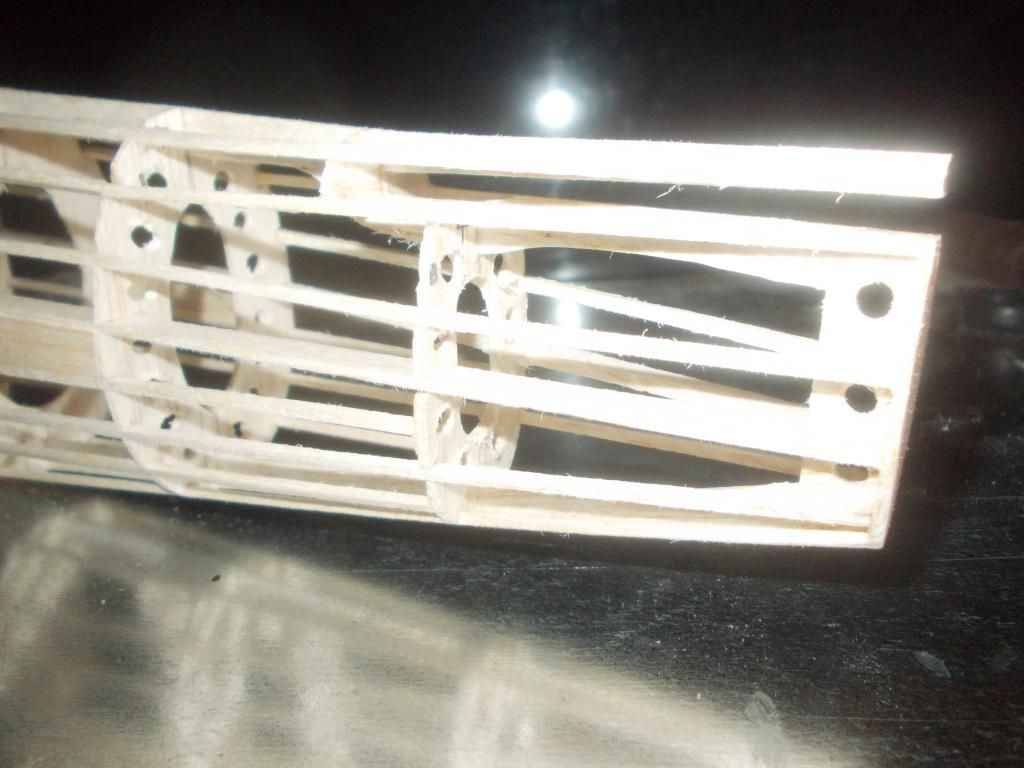
There are some ways the stingers went in that I have NEVER seen before and I do not want to remove too much of a B part to weaken the structure. Look at this:

The stringers go into B6, I did not want to trim down the inside and remove the strength for that. It's not too late for me to lighten this up some more. I will finish the "Bones" and weigh it all together and decide how to proceed.
Yesterday I bout some Plaster of Paris:

So I plan to make a mold of the canopy... I also bought a vacuum forming tool and that should arrive shortly.
I am also going to use the kit E and F parts, as the balsa I chose is very light but may be too weak. I will work on that today! Model production slowing down with the Holiday coming, but I want this plane to be ready for flight tests in 14 days!
Okay, took your advice and looked at my fuselage, trimmed down the A parts aft of the peg and a few more lighten holes. The fuselage is now at 16g!

- Mitch
- Posts: 1347
- Joined: Mon Aug 22, 2011 9:16 pm
- Location: Kent, WA
Re: My P-39 Aircobra
Happy 4th of July:

I was on my boat with my Yacht Club for the past few days:
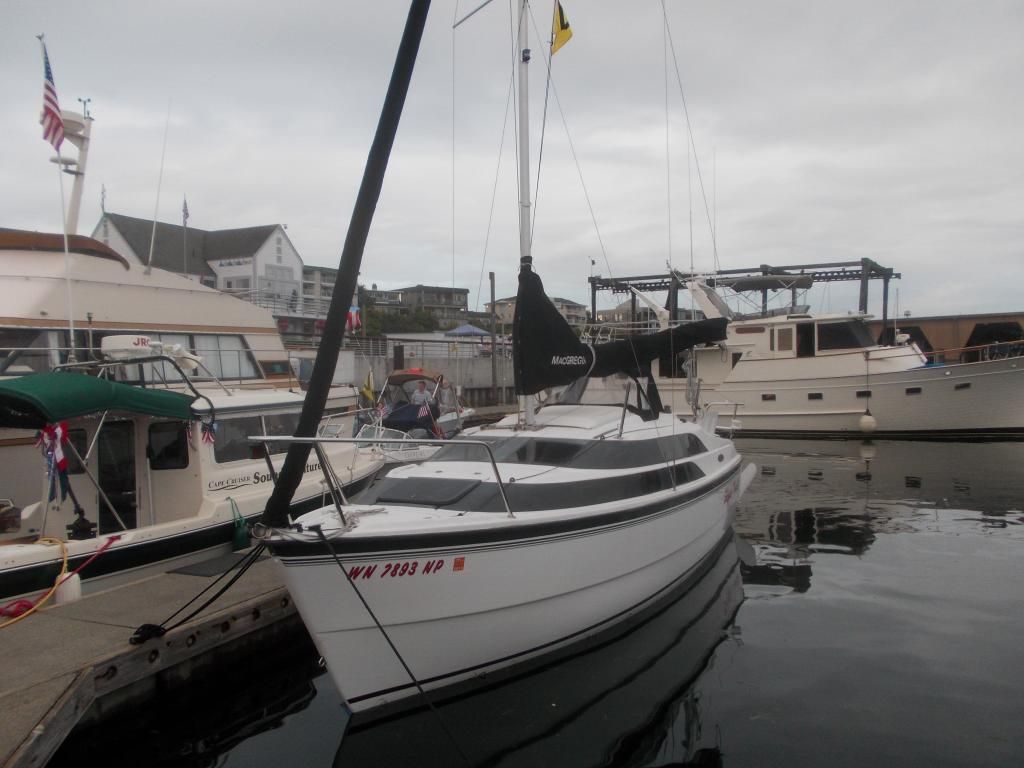
This is the Des Moines Yacht Club... the "V" stands for Vagabonder... I was the only sailboat at the Rendez-Vous
When I got home I had a package with a few new model and some other neat stuff:
 I am having a difficult time with photobucket right now... I got a NEW vacuum forming machine, and NEW adjustable nose bearings, I will post pics when I get photobucket figured out.
I'll get working on the model again and hope to have it in the air by the end of the week. Mitch

Okay here are some pictures of some new "TOYS"
Here is a picture of the ADJUSTABLE thrust bearing I just got... They came in a 2 pack. I think I will order more. I got them from "Shorty's Basement"
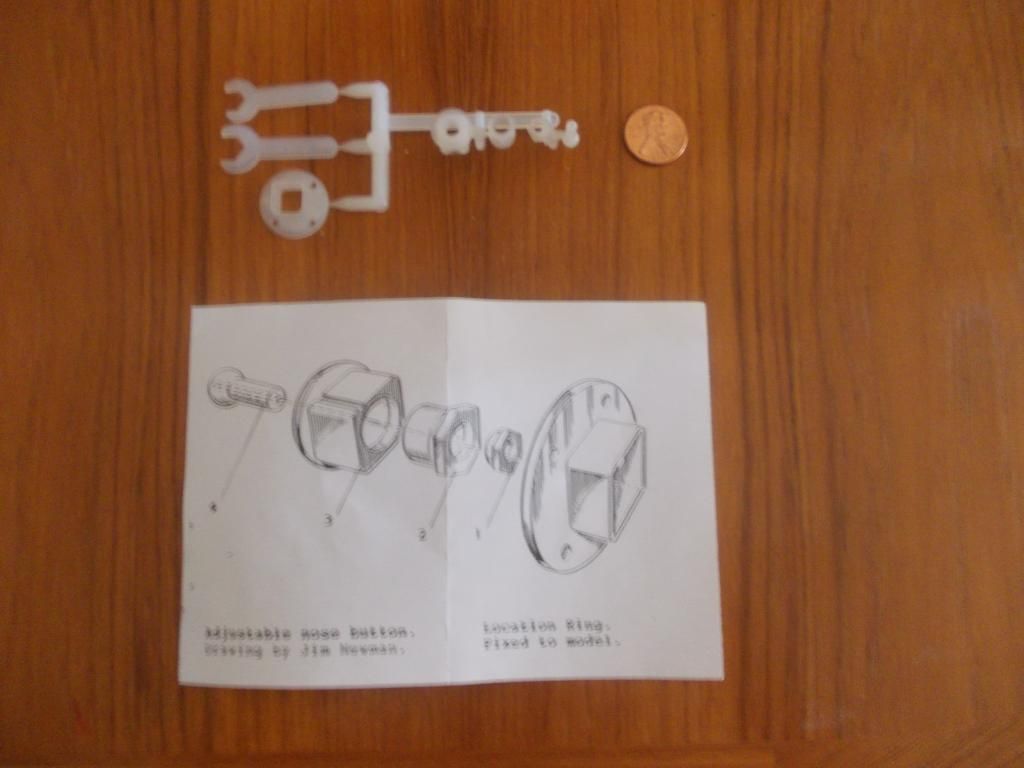
I plan to use this in my P-39 and new FW 190-A7! The pieces fit together tightly, then you rotate parts 1 and 2 to get the desired direction of thrust!
AND here is a NEW TOOL I just received... a vacuum forming machine:
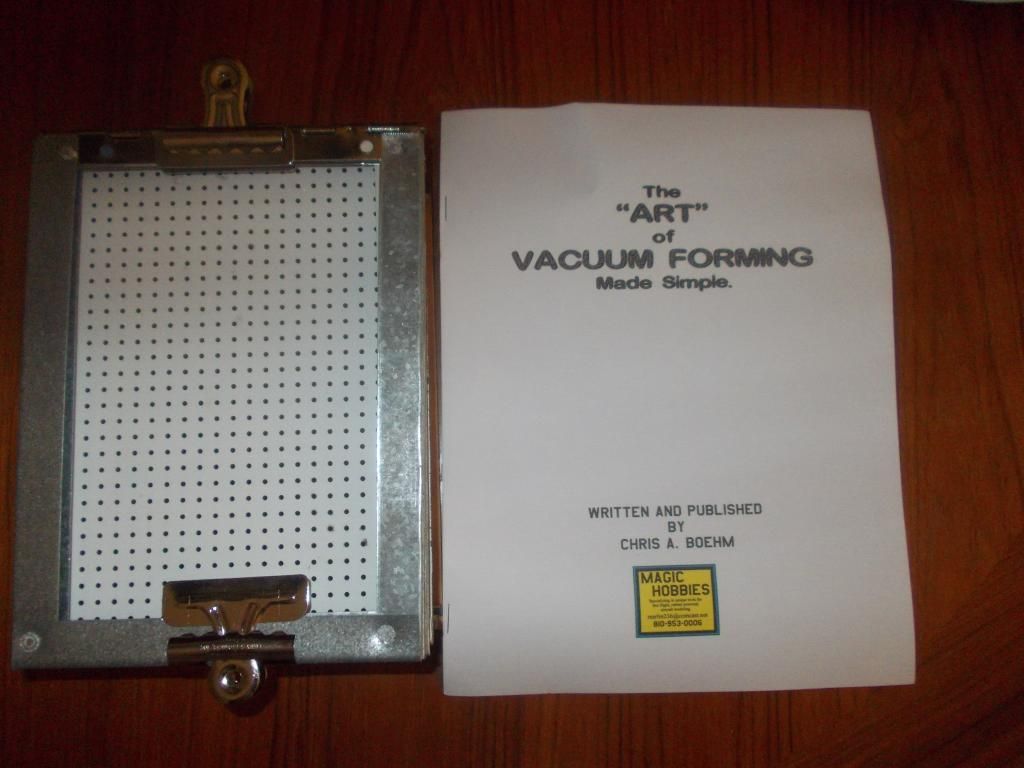
I plan to make lighter parts and a new canopy for my p-39!

That's all for now... Hope you ALL had a FUN and SAFE 4th of July! Mitch

I was on my boat with my Yacht Club for the past few days:

This is the Des Moines Yacht Club... the "V" stands for Vagabonder... I was the only sailboat at the Rendez-Vous
When I got home I had a package with a few new model and some other neat stuff:
I'll get working on the model again and hope to have it in the air by the end of the week. Mitch

Okay here are some pictures of some new "TOYS"
Here is a picture of the ADJUSTABLE thrust bearing I just got... They came in a 2 pack. I think I will order more. I got them from "Shorty's Basement"

I plan to use this in my P-39 and new FW 190-A7! The pieces fit together tightly, then you rotate parts 1 and 2 to get the desired direction of thrust!
AND here is a NEW TOOL I just received... a vacuum forming machine:

I plan to make lighter parts and a new canopy for my p-39!

That's all for now... Hope you ALL had a FUN and SAFE 4th of July! Mitch
- Mitch
- Posts: 1347
- Joined: Mon Aug 22, 2011 9:16 pm
- Location: Kent, WA
Re: My P-39 Aircobra
Hi Guys...and Ladies,
Just thought I would update my build post. Since I am going back to sea (to Alaska) in 3 days I will not finish my build before then. I will not post any more pictures until I get off the ship. That will be August 14th. I am planning out the rest of the year 2013, and plan to go to Denver for my next Flying Contest. I will plan to fly either the P-39 or my NEW FW-190 (to be built), an Inline Engine Race plane and a Radial Engine Race plane and a Glider (Jet or Rocket powered German WWII prototype).
KEEP BUILDING, KEEP FLYING, KEEP HAVING FUN
Mitch
- Mitch
- Posts: 1347
- Joined: Mon Aug 22, 2011 9:16 pm
- Location: Kent, WA
27 posts
• Page 2 of 2 • 1, 2
Return to General Building Questions
Who is online
Users browsing this forum: No registered users and 33 guests
