My P-38 for 2015, my "Wicked Woman"

Ask other modelers for a little help / knowledge ?

Re: My P-38 for 2015, my "Wicked Woman"

Postby Brenda » Thu Feb 19, 2015 4:16 pm

Well so much for the tide swinging in your favor lookie at these.
Image

I just tried a hand launch with no rubber and no props. Sailed about 25 feet with tiny nose up then down. I think with the props on it and machine guns in the nose it will flatten out a bit more. If I've done this right no extra weight to add!
Brenda
 
Posts: 120
Joined: Wed Aug 20, 2014 1:02 pm

Re: My P-38 for 2015, my "Wicked Woman"

Postby Mitch » Sat Feb 21, 2015 9:47 pm

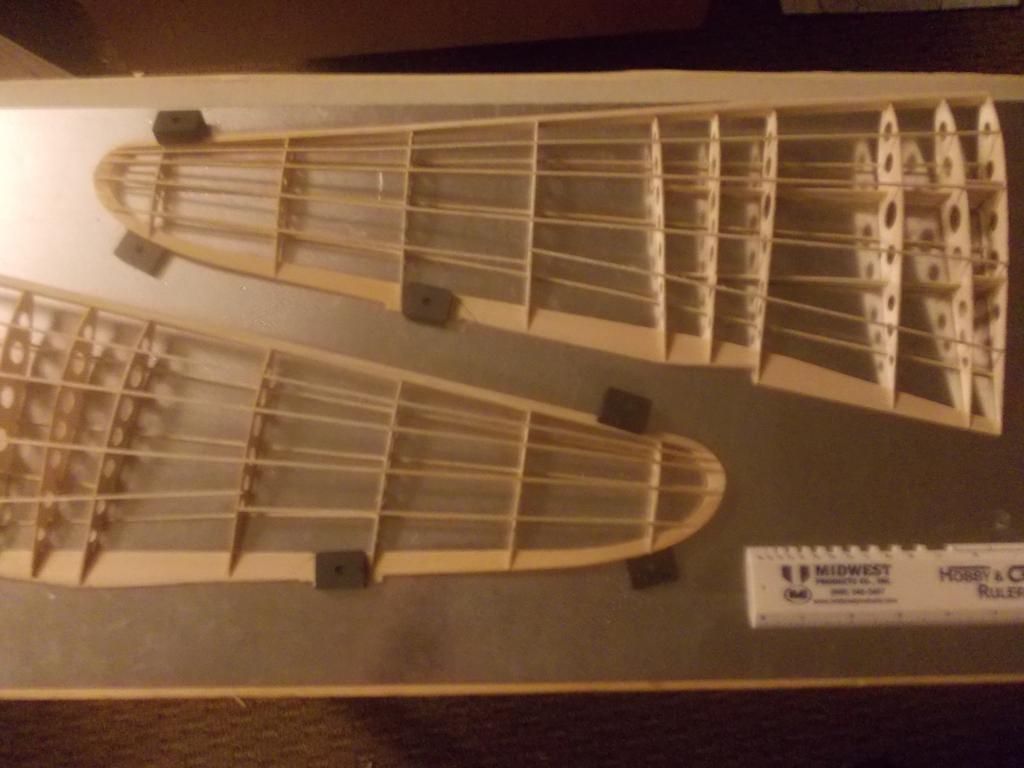
Okay, getting something done today. Setting in the washout the way I like to do it.
Image
Bending the frame of the wing for that washout. When framework is dry, and washout is established, then I will cover.

Brenda, you are ahead of me on this twin engine build, but I should have more time now in the next few weeks. I will plan to:

1. Test fly my new Me109.
2. Finish and test glide my FW190. First without paint and markings.
3. Finish the fitting work on the P-38 and decide what to cover the model with.

My planes usually have a 10:1 glide ratio. That is, from an overhead toss, they will fly for about 60 feet. I am not saying my P-38 will do that, we will see. But since you are going ROG that will be a huge disadvantage as I believe most of your power will be spent getting that plane airborne. I will be tossing my plane at flight speed and the stopwatch will start when she leaves my hands. I am looking forward to both of our results. :D

Mitch
Mitch
 
Posts: 1347
Joined: Mon Aug 22, 2011 9:16 pm
Location: Kent, WA

Re: My P-38 for 2015, my "Wicked Woman"

Postby Mitch » Sun Feb 22, 2015 5:47 pm

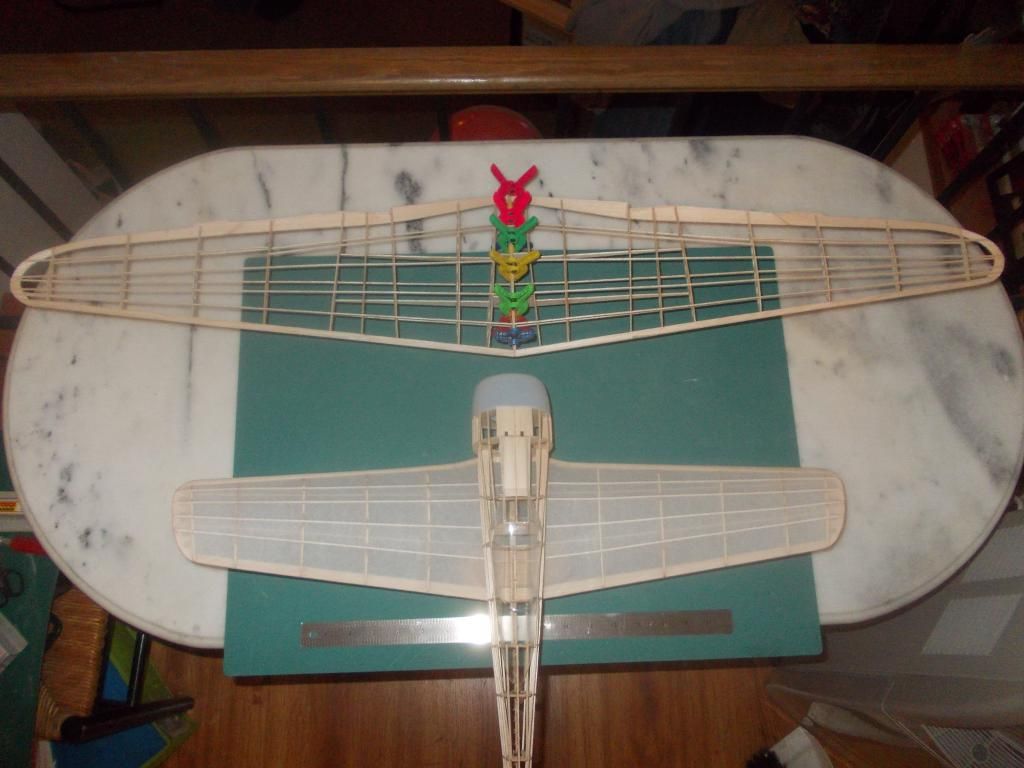
Okay with the FW getting finished I got some work done on the P-38... Check out this WINGSPAN!

Image

The dihedral in the P-38 is set as per Guillow plans for free flight model. The F1's were set at a predetermined angle. Since I am going rubber powered FF, I added 1/16 strip on the bottom of ONE F1 and that increased the dihedral to what Guillow recommended!

Mitch
Mitch
 
Posts: 1347
Joined: Mon Aug 22, 2011 9:16 pm
Location: Kent, WA

Re: My P-38 for 2015, my "Wicked Woman"

Postby Mitch » Sun Feb 22, 2015 11:11 pm

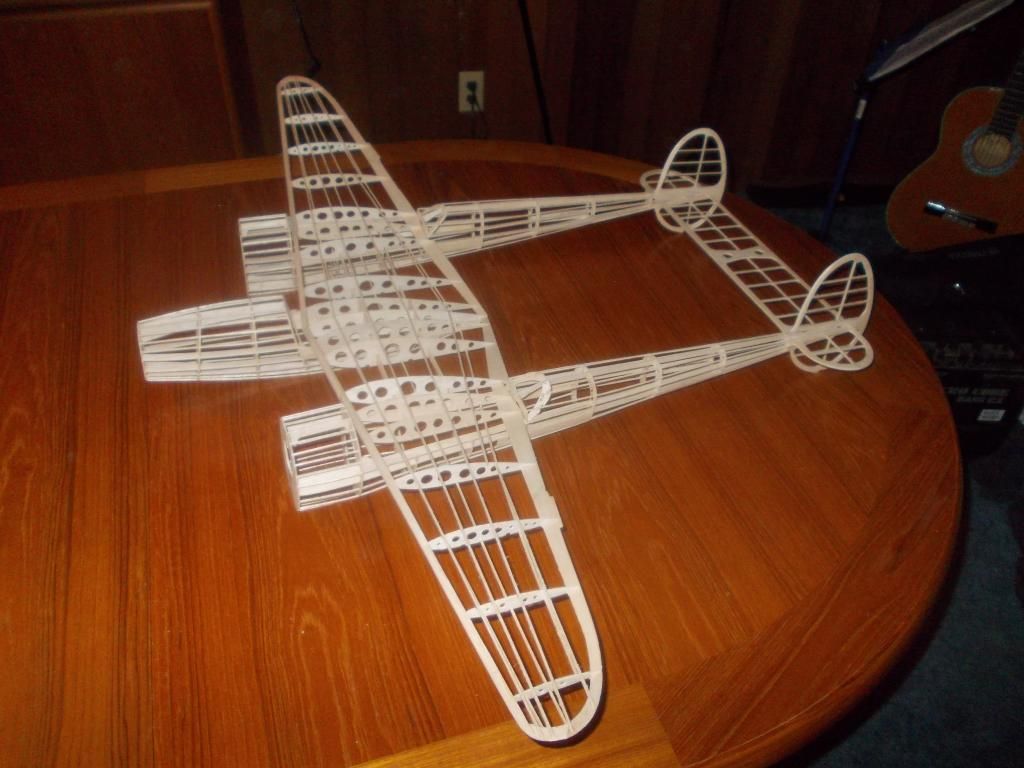
Okay here is the skeleton...
Image

I have a couple problems that I could have avoided. Remember I built this model aboard ship and did not have my scale.

1. The wing is heavy on one side, way heavy...and it's the PORT side. I would prefer the STARBOARD side, since with everything being equal she will turn to port with that twin thrust.

2. One Fuselage is heavier than the other. And Since I trimmed the side keels and added gussets I can not switch the fuselages at this point. The PORT fuselage is heavier...ARGHHHHHHHHHHHHHHHHHHHHHHH!!!!!!!!!!!!!!!!

3. The weight of just the skeleton you see here weighs in at 102 grams!

I knew she would be heavy, but now with being heavy to PORT, I am in more trouble. I guess one could say "Double Trouble!" Of course I can balance her but that is more weight!

Oh well. I will continue to work on her and hope I can get a 10 second flight?

Mitch

PS: I have a thought...Since she is so heavy already, I might add a 3rd spot for the rear peg. Between the 2 I have already. This would be directly where the air coolers are. I might try to fly without those air coolers because with them and the ballast to offset them I think it will be just too much.

Brenda... I think the tide has changed again... You Comet model you say is laser cut. How much does it weigh?
Mitch
 
Posts: 1347
Joined: Mon Aug 22, 2011 9:16 pm
Location: Kent, WA

Re: My P-38 for 2015, my "Wicked Woman"

Postby Brenda » Mon Feb 23, 2015 9:51 am

I have no way to find out the weight. It is lighter than the Spitfire I made. The Guillows Spitfire. Wingspan in 30in and I didn't have to add any weight to it yet. Might have to put a trim tab on it but not sure. Did a throw test from 4 feet AGL. It flew almost 10 feet straight as a arrow. It is a little wet here at the moment but when it drys out I will go down to soccer fields and try a few tests.
Brenda
 
Posts: 120
Joined: Wed Aug 20, 2014 1:02 pm

Re: My P-38 for 2015, my "Wicked Woman"

Postby Mitch » Mon Feb 23, 2015 11:43 am

To Brenda... et al.

Okay. I have time now to work on the models. I will have to balance the P-38 Left/Right to fix that heavy left side. I think now I will go without aircoolers for flights.

I plan to cover with silver paper as I believe that will be lighter than silkspan, dope, paint.

When I test glide I will do underhand toss first, when I believe model is straight and balanced I will do overhand toss. That would be over six feet. A 400 series model will glide about 50 feet. I have had a model glide about 70 feet before. We will see about the P-38?

Mitch
Mitch
 
Posts: 1347
Joined: Mon Aug 22, 2011 9:16 pm
Location: Kent, WA

Re: My P-38 for 2015, my "Wicked Woman"

Postby Mitch » Tue Feb 24, 2015 3:07 am

UPDATE:

Found this video and just had to share... What a beautiful Lady:

https://www.youtube.com/watch?v=p26NYiRXm2s

I can't wait for the laser cut version as some of my wood in this kit was heavy. This would be acceptable for gas or electric or static, but I like rubber power! I used the wood in the kit as this model is for the Guillow Challenge 2015. I will be interested to see how light I can build this model in laser cut!

Mitch

PS: Can I put in a pre order for the laser cut version? This is really a fantastic kit, and I am only using half the parts!
Mitch
 
Posts: 1347
Joined: Mon Aug 22, 2011 9:16 pm
Location: Kent, WA

Re: My P-38 for 2015, my "Wicked Woman"

Postby davidchoate » Sat Feb 28, 2015 8:35 am

Mitch. I noticed a lot of biplanes. I am doing a PT-17, and have a thomas Morse and am looking for ways to attach the top wing perfectly alignen, and also ways of doing the wire rigging. Any help would be appreciated. Thanks. And about wing area. I have a javelin, and all the others like it built, and was wondering if the tail being airfoiled acts like a wing, and in free flight, how does this affect My trim settings. Like CG, and thrust, etc..
davidchoate
 
Posts: 1263
Joined: Wed Aug 14, 2013 6:41 am
Location: PHiladelphia PA

Re: My P-38 for 2015, my "Wicked Woman"

Postby Mitch » Mon Mar 02, 2015 2:14 pm

I like to answer all questions, but would like to keep this thread on the P-38 and my 'challenge' with Brenda. That being said here are my answers.

I just align biplane wings my 'sight' and make sure the top wing is seated into the fuselage cabine struts properly. Some models have a jig. Or you can make one, copy the profile picture and cut out the side view of both wings, keeping the paper in one piece, make 2 or more and use them as a jig to get proper angle.

In a real airplane, Yes the tail also provides lift. I am not so sure in models. My dad was a Flight Engineer for TWA, I believe he told me when the 747 was first developed the tail is so large, they made the airfoil shape to produce negative lift as if convectional it would have been too much lift and offset the flight characteristics.

I want as much lift as possible for my models.

A reminder to all. I may know more than newbies, but I am learning things with every build and there are people here who know much more than I do.

Mitch

PS Now that my dance competition is over and the FW is getting flight tests, I will be working on the P-38! :D
Mitch
 
Posts: 1347
Joined: Mon Aug 22, 2011 9:16 pm
Location: Kent, WA

Re: My P-38 for 2015, my "Wicked Woman"

Postby Mitch » Thu Mar 05, 2015 5:19 pm

Okay, I ordered a real winding stooge for flight tests for my FW. I will still use my 'tailgate' stooge for the P-38 as that has 2 positions so I can wind both motors. I will need to adjust the brackets to fit the P-38...more on that latter.

Working on the nose blocks.
Image
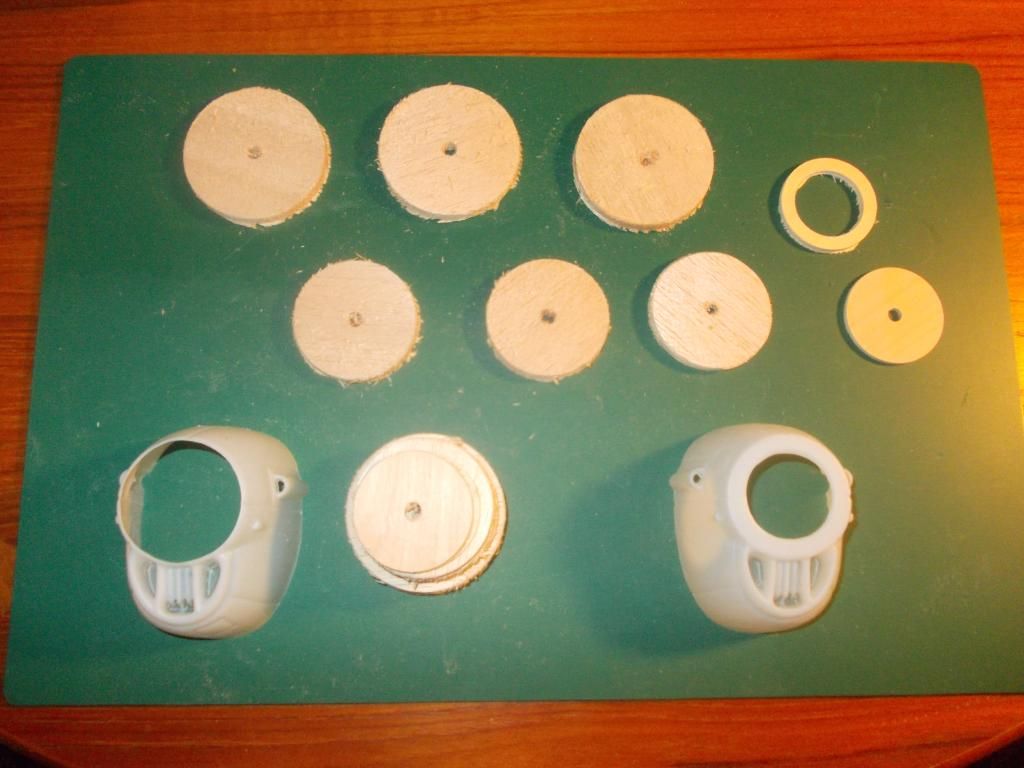
I decided to remove the 'lip' on the plastic cowling. So the cowling will just be a pretty finish and not an integral part of the front nose block. Except that they will house the tubes for the prop stops.

So the nose blocks will consist of 6 pieces of 1/4" balsa topped off with one 1/8" piece of plywood. Then the next 1/8" piece of plywood is the faceplate for the prop assembly. When all stacked together they will be glued to the front of the fuselage and the cowling will slip over them.

I will glue up all the discs, rotating the grain 90 degrees with each layer. When dry I will cut out the centers.

I will start covering the P-38, I have ample supply of aluminum paper. I will be using the domestic tissue from easybuilt.

Mitch

PS: I added another rear peg position right at where the air coolers are and for rubber powered flights I plan to leave the air coolers off. They will be added for photo shoots and display.
Mitch
 
Posts: 1347
Joined: Mon Aug 22, 2011 9:16 pm
Location: Kent, WA

Re: My P-38 for 2015, my "Wicked Woman"

Postby Mitch » Fri Mar 06, 2015 9:38 pm

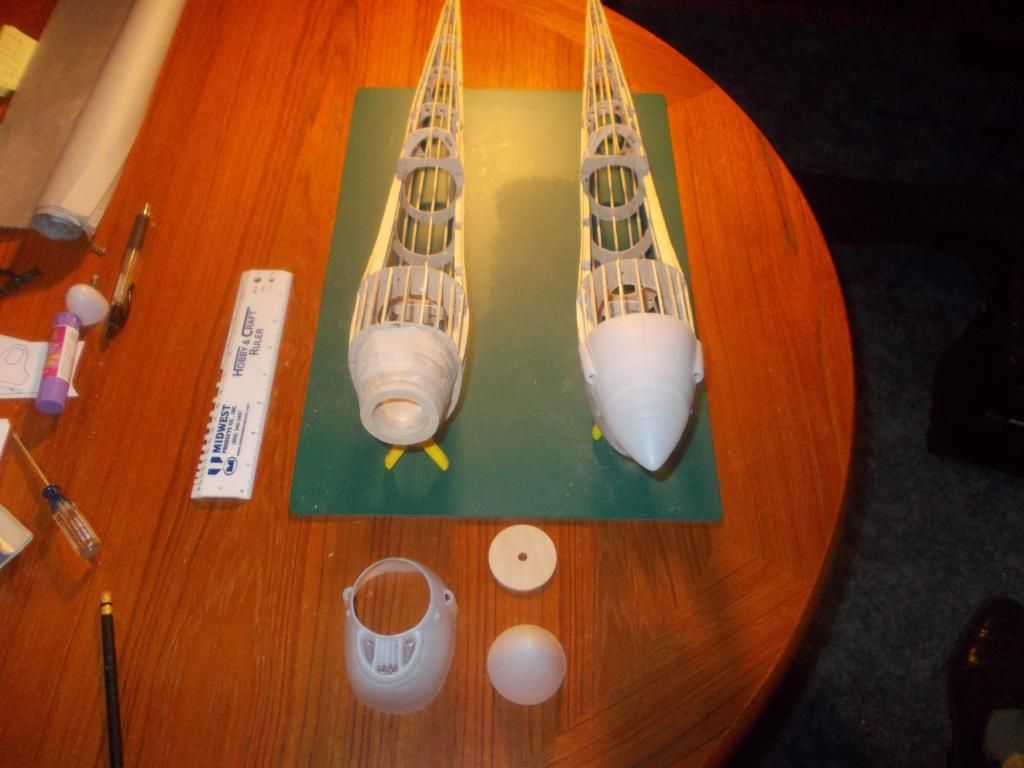
The stack of balsa for the nose block was a bit short so I added one more ring of the 1/8 inch plywood.

I cut out the center cores and sanded down the rings. They are now mounted on the fuselages and now I can proceed with covering the plane.

Image

I plan to have this model ready for glide and trim tests next week.

Mitch
Mitch
 
Posts: 1347
Joined: Mon Aug 22, 2011 9:16 pm
Location: Kent, WA

Re: My P-38 for 2015, my "Wicked Woman"

Postby Mitch » Sun Mar 08, 2015 2:07 pm

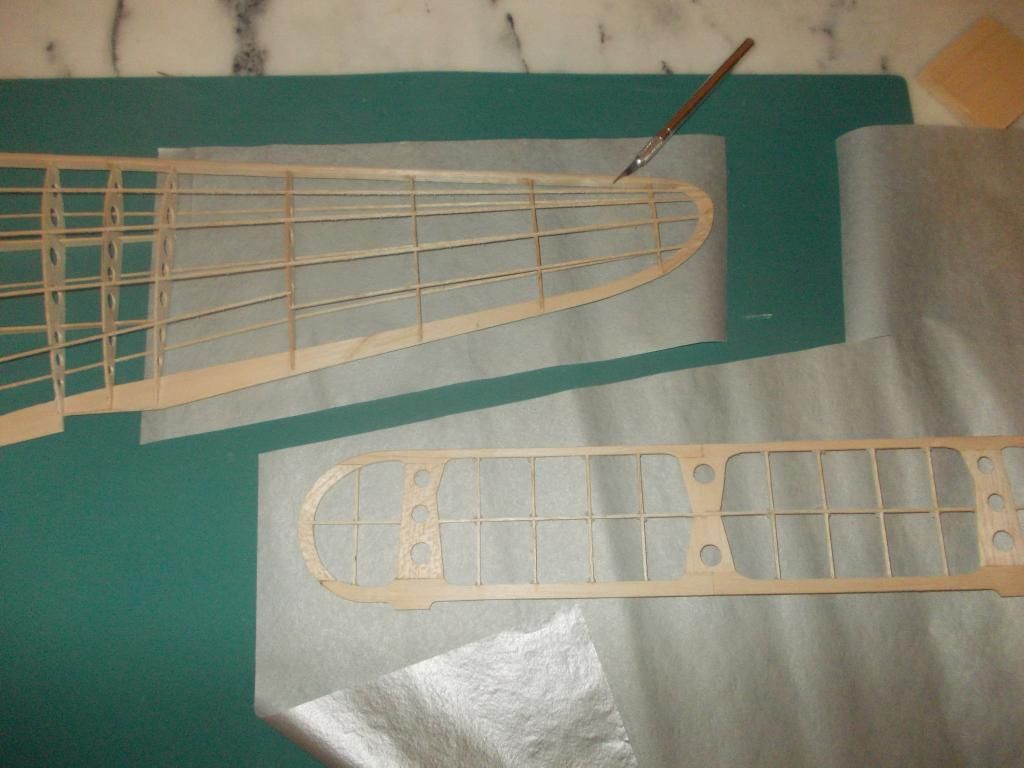
Okay, today I am on to covering. I will be using easybuilt silver tissue. I plan to have the model covered today. I need to buy more Top Flite LustreKote, so I hope to have the model assembled and doped in a few days, she will be getting glide tests this week.

Image

I removed the trim tabs that were part of the TE. It will be easier to cover the wing smoothly without them. They can be added latter. Also I will not cover sections that are enclosed in fuselages and cockpit nacelle. This will make my wing pieces smaller and easier to manage.

One more thing, I will leave open the starboard wing tip as I will need to add a little ballast to that to get the model in balance, port to starboard. With a ws of 40 inches I should not need much 20 inches at the wingtip to balance the model. When the plane is satisfactory I will cover the top of that starboard wingtip.

Mitch
Mitch
 
Posts: 1347
Joined: Mon Aug 22, 2011 9:16 pm
Location: Kent, WA

Re: My P-38 for 2015, my "Wicked Woman"

Postby Mitch » Sun Mar 08, 2015 8:23 pm

Well its only 6:15 but I think I am done for the day.

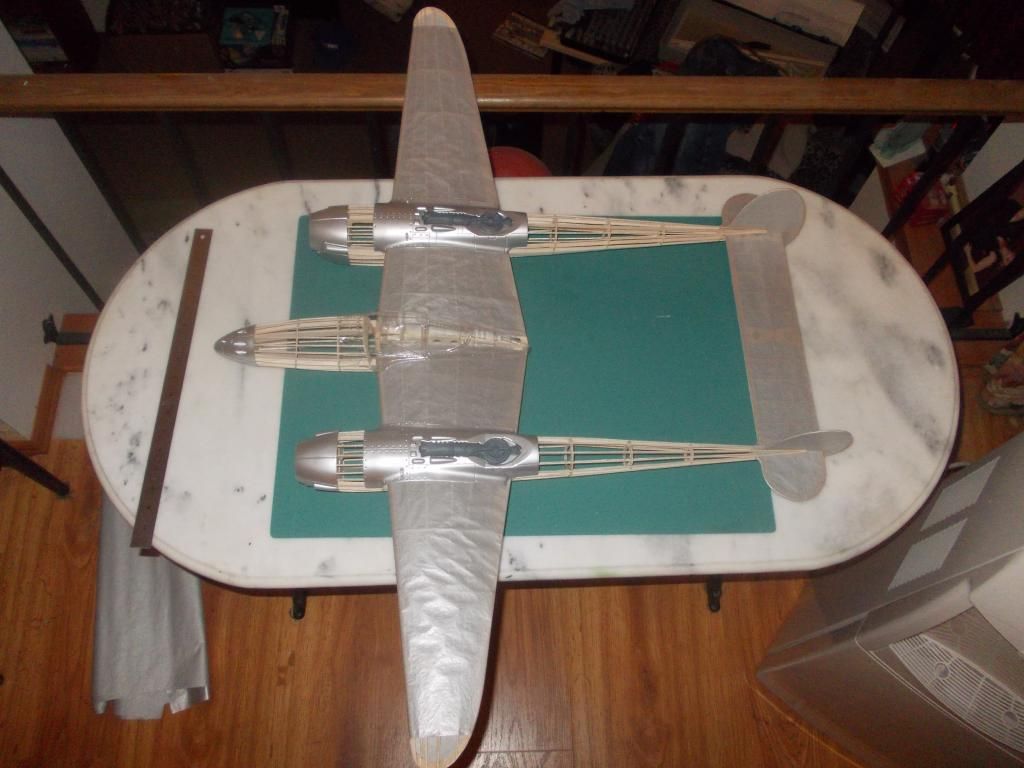
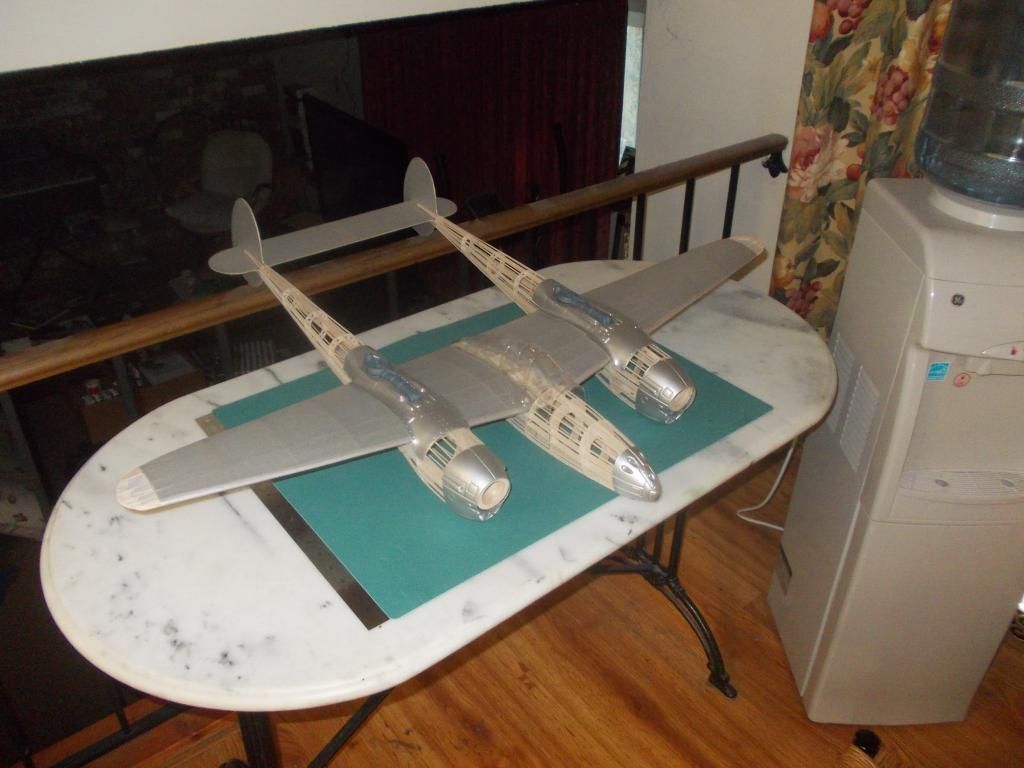
I got the wing and tail covered. I sprayed the plastic parts with Testors Spray enamel 1246 Metallic Silver. I think it is a good match for the Silver paper.

Image

The turbo chargers are just painted gunship grey for now, that will just be the base coat. I will study pictures and can paint them with my water colors.

I might work on masking and spraying the canopy tonight. I will cover the 2 fuselages and cockpit nacelle over the next couple of days.

I plan to hang the model from a ceiling hook and get it balanced from side to side. I expect to add a gram of clay inside the stbd wingtip, then I will cover the wingtips. I always cover the wingtips with a seperate piece anyway as all the compound curves are easier to manage with a small piece. I cover dry, the paper needs to be wet and shrunk. For this silver paper I really get it wet because it does not shrink up as much as normal paper.

Mitch
Mitch
 
Posts: 1347
Joined: Mon Aug 22, 2011 9:16 pm
Location: Kent, WA

Re: My P-38 for 2015, my "Wicked Woman"

Postby Mitch » Mon Mar 09, 2015 11:44 am

UPDATE:

I wet and shrunk the paper last night:
Image

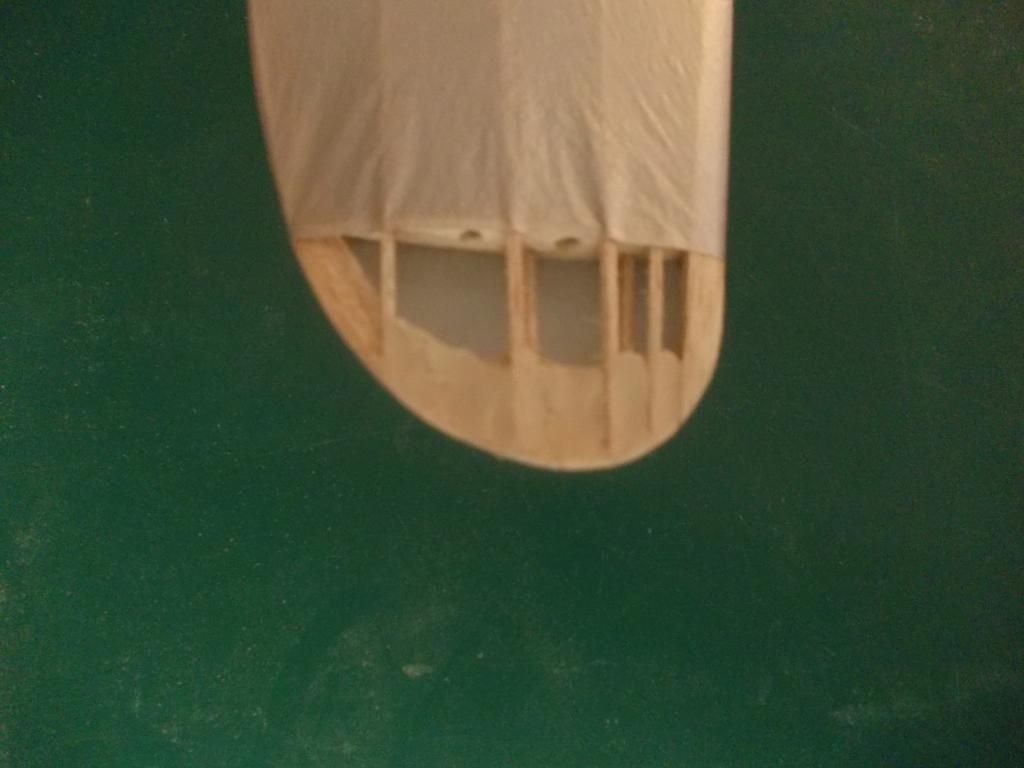
Also I clamped the fuselages to the wing, and lifted the model without the cockpit. I easily tell she was heavy to port, so I packed a little (1 gram) of clay into the stbd wingtip:
Image
The clay is in between the spars on the E parts.

I will cover the wingtips and try to get the wrinkles out of the paper at that last F rib. That did the trick, for balance.

It may take me a few days to finish the covering as there are 2 fuselages plus the cockpit. But after that it's assembly and head to the test field!

Mitch
Mitch
 
Posts: 1347
Joined: Mon Aug 22, 2011 9:16 pm
Location: Kent, WA

Re: My P-38 for 2015, my "Wicked Woman"

Postby twospruces » Mon Mar 09, 2015 3:47 pm

interesting;
looks awesome;
have you considered just using a bit of trim on the wings to counter the weight mismatch rather than adding clay?
twospruces
 
Posts: 96
Joined: Tue Nov 20, 2012 9:27 pm

PreviousNext

Return to General Building Questions

Who is online

Users browsing this forum: No registered users and 3 guests