Phugoid wrote:Nice work Paddy. Following my complaints on my latest build thread....... what are the laser cut parts like? Are they Micron precise?
On the point of wooden props I want to try and carve one for a flying model at some point, is it something you have experience of?
Andrew
Hi Andrew,
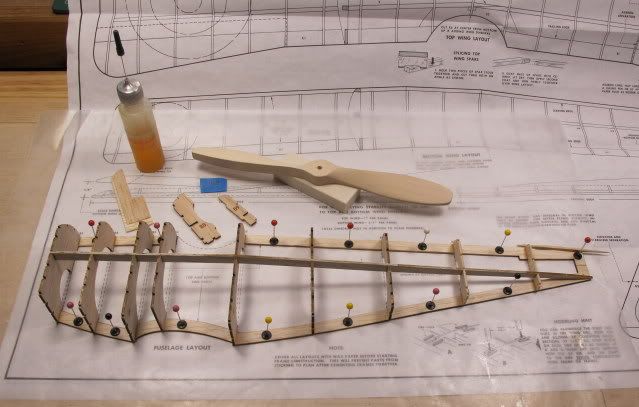
As to the first question, and I hesitate a bit in answering since I’ve had little experience with laser cut parts, but I’ll try to give you what I feel is an accurate answer at least from my prospective.
If I use a scale of 1 to 10, and being somewhat of a conservative bloke, I’d rate these parts at around 8.5. If you use an Optivisor and look closely some of the cuts, though tiny, seem to be almost like an out of true fence on a circular saw cut. Now, having said that I would purchase the Nieuport 11 kit again with out blinking an eye. In fact somewhere down the road the DR.1 tri-plane is on my list also.
Another thing is the laser is setup to make tiny nubs periodically to help retain the part to the part boards (I think) and need some careful sanding IMO. How do I know about careful sanding…… well, I now need to cut my own fuselage formers B8 and B9 because of being over enthusiastic about clean up.

On the prop carving I have done a total of three carved props for an outdoor flyer called the Cloud Tramp. They were my first attempts and it was a fun experience and those little kites flew well. I would take a picture and show you but the shop attack cats managed to imprint them with teeth marks through my own carelessness.

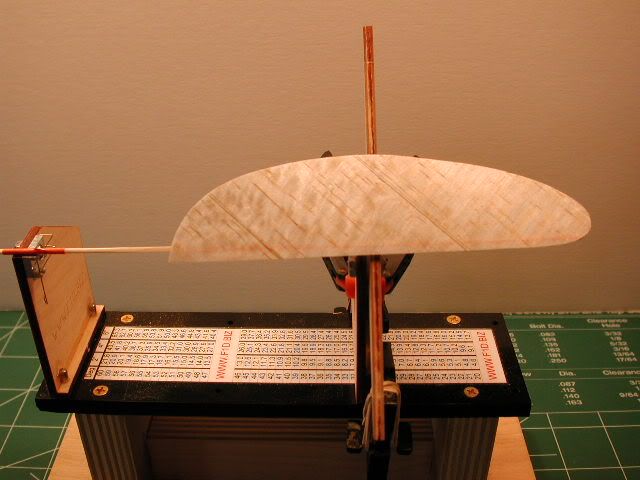
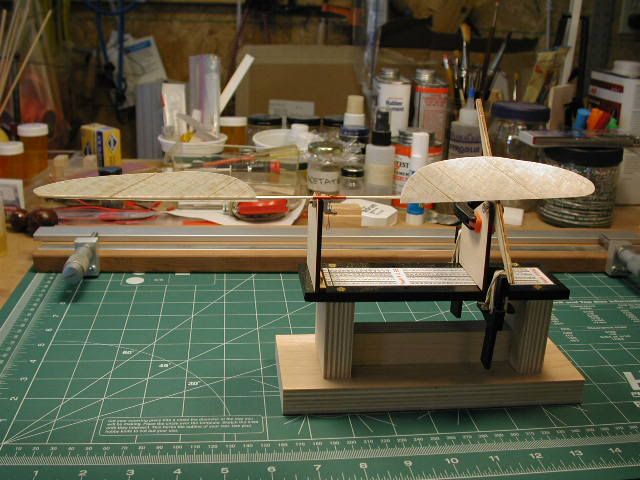
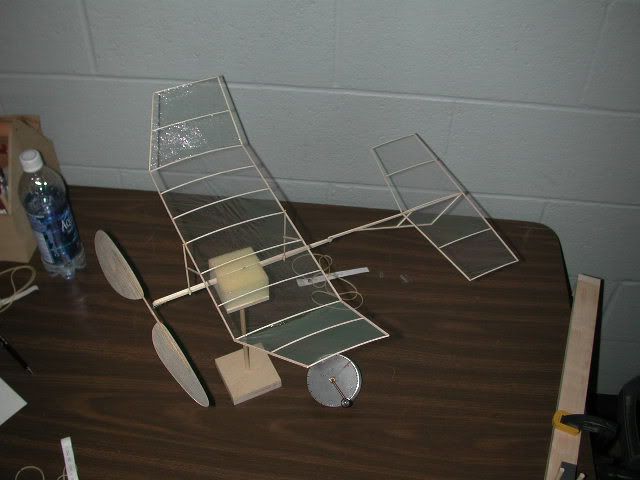
Now my best prop making occurred when I made a prop for my indoor Penny Plane using the prop forming block technique. Please see page 75 of the Don Ross book Rubber Power Model Airplanes. I think this approach can also be successfully used for small outdoor flyers and allows you to build a replacement blade or blades much quicker than carving a prop blank. In effect you carve one forming block and then you can make multiple blades that are formed exactly the same. It’s not that difficult to do and is well worth the time. My first attempt at this was for my indoor Penny Plane that gave me a best time of 6 minutes and 31 seconds in a National Guard Armor with only a 22 foot ceiling. That was a grand experience. The following are some photos of the formed block prop blades being setup and glued using a pitch gauge and then mounted on that grand little Penny Plane where it went to work.


So, a very good place to start if you want to build you own working props, and I hope you do for its fun and rewarding, is study Chapter 8 and 9 of Don’s book. If I can make a few props then anyone can do it. Just follow the cookbook.
Didn’t mean to take up so much band width and drop a tome on your Andrew.

Regards,
Paddy


