2 Mustangs in 2 Weeks

Ask other modelers for a little help / knowledge ?

Re: 2 Mustangs in 2 Weeks

Postby Mitch » Sun Aug 18, 2013 9:28 am

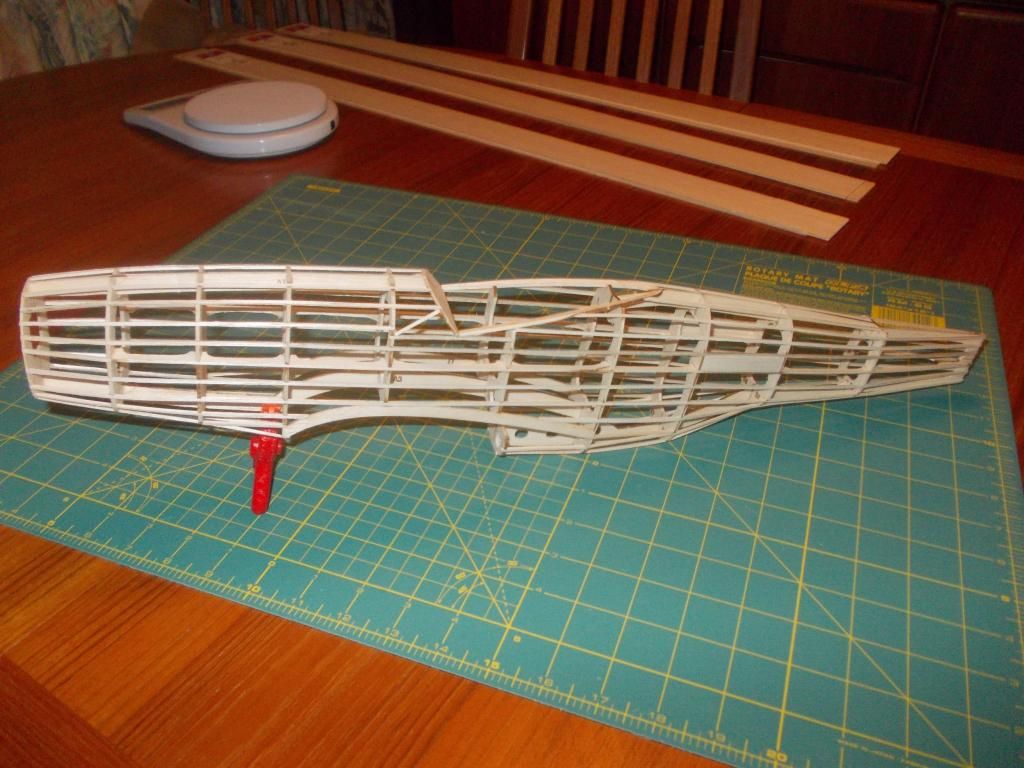
Good Morning, today I will finish the fuselage, start making the nose block, and start fabricating the wing ribs:
Image
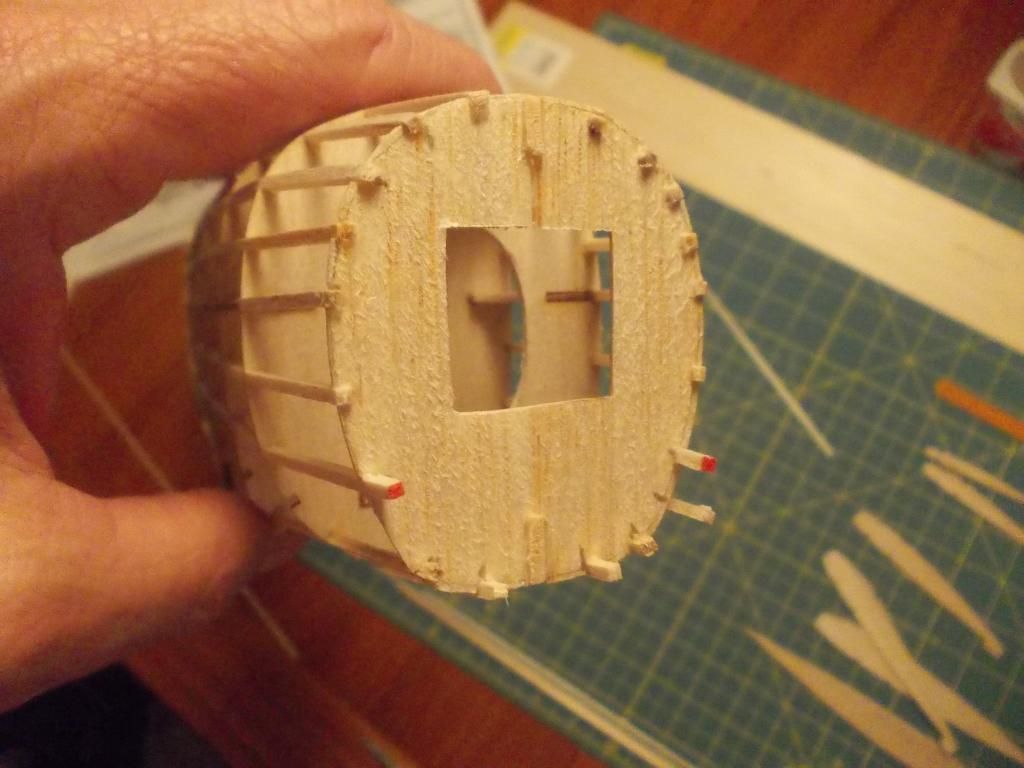
Putting in the last few stringers. On B-0, I mark and cut notches as I need them.
Here you can see the color code on the stringers. Those are RED. Those stringers run the length back to the peg. After that, I used YELLOW.

I have 3 colors ORANGE, RED, YELLOW. I do not have PINK. PINK is the lightest wood and ONLY used for non structural add-ons.
I ONLY have 7 stringers left. I order a pack of 50 assorted from Easy Built.

Stay Happy, Keep Building, Mitch :D
Mitch
 
Posts: 1347
Joined: Mon Aug 22, 2011 9:16 pm
Location: Kent, WA

Re: 2 Mustangs in 2 Weeks

Postby David Lewis » Sun Aug 18, 2013 1:23 pm

Mitch wrote: "I am disappointed with the SCALE looks of the EASY BUILT. The Fuselage is about 7/8 scale to the rest of the plane, the tail does not look right, BUT I like the airfoil shape to the wing!"

I've noticed that on many kits, including some of the Guillow's I examined. Not a criticism. Many of these designs were developed half century ago when documentation was poor or scarce, and fidelity not as important to modellers as it is today. I suppose standards and expectations have risen because the market shifted from children to adults and technology advanced.

Sometimes the wing span, wing chord and fuselage are to three different scales(!) For this reason I always measure the fuselage to determine the official scale of the model.
David Lewis
 
Posts: 289
Joined: Thu Jun 13, 2013 11:47 am
Location: Orlando FL

Re: 2 Mustangs in 2 Weeks

Postby Mitch » Sun Aug 18, 2013 3:24 pm

I realize that now, seeing them side by side, one sees the difference. The Easy Built kit is definitely built specifically for RUBBER POWER.

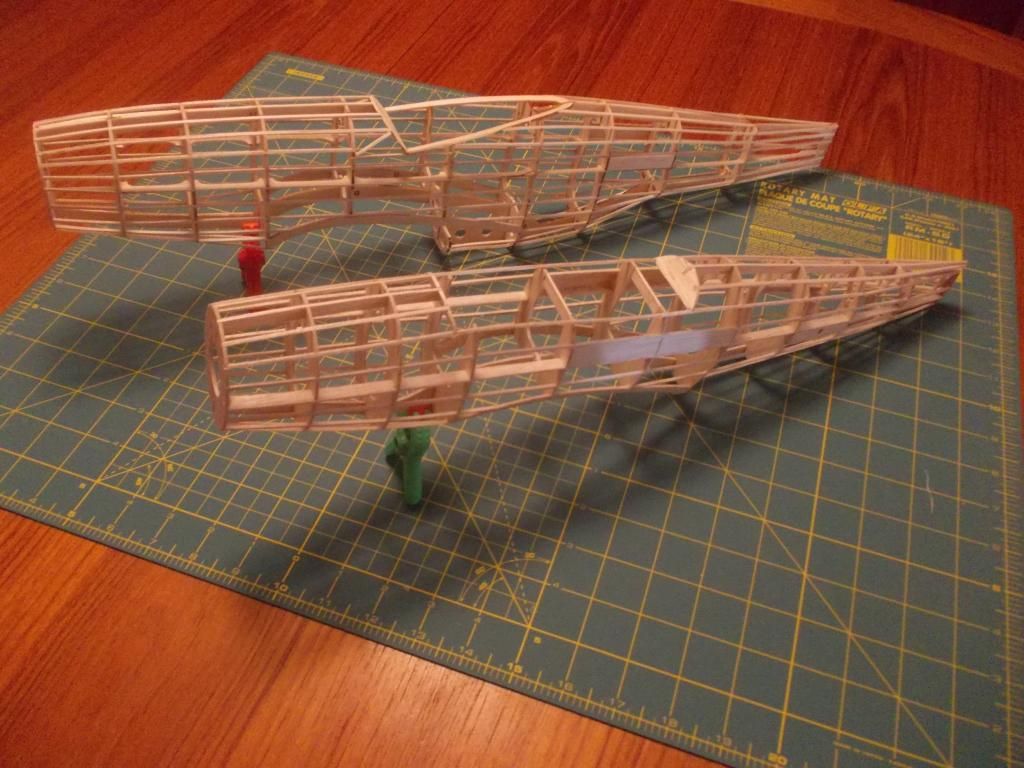
Here are a few pics of progress today:
Image
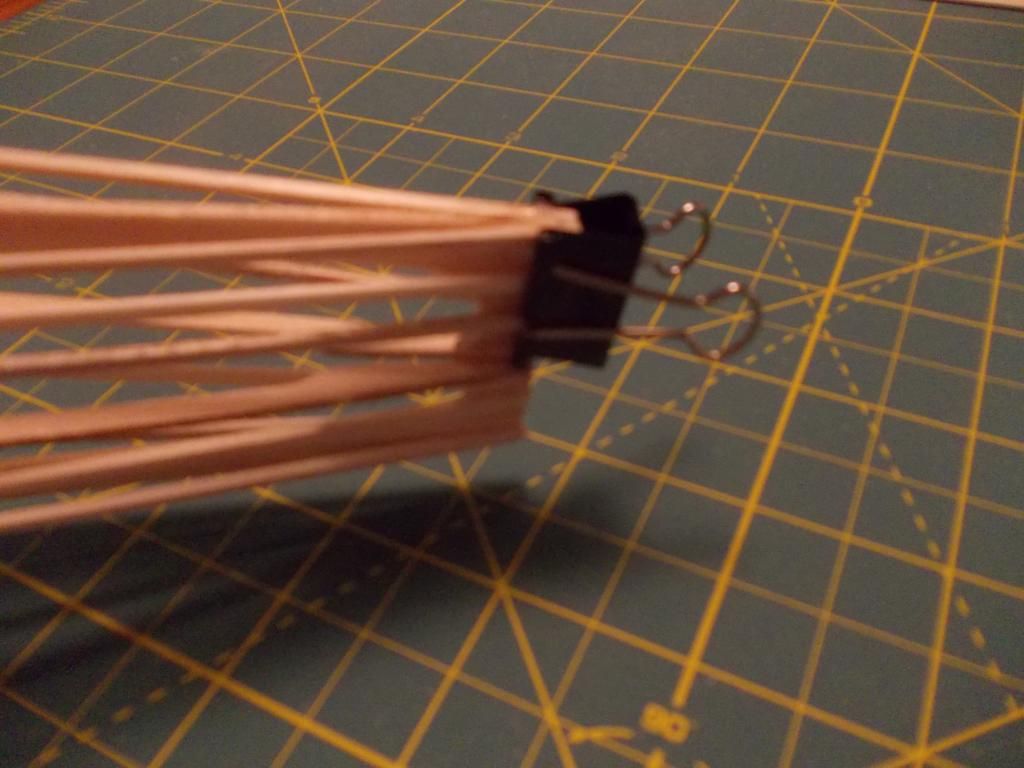
I use one of these office clips for tail clamp. The clip was bent "open" so it has very little force on the balsa, but enough to hold.

Image
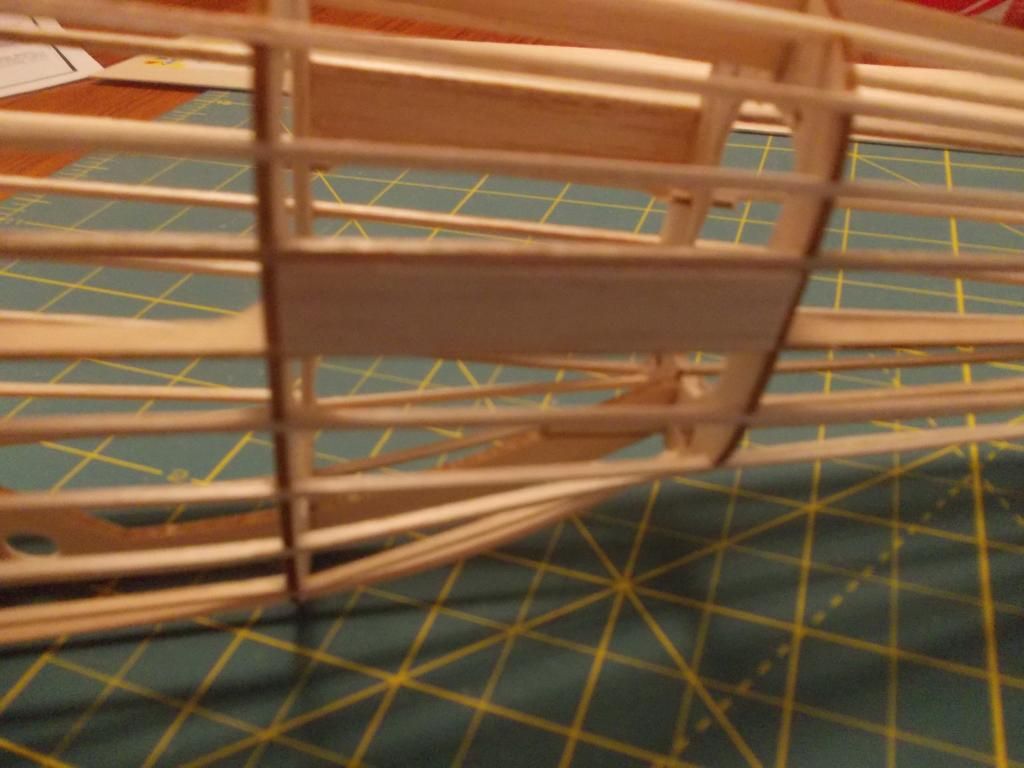
I make my own L2, I like to have the peg between the frames, not up against one. I will cut a hole in the middle latter.

Image
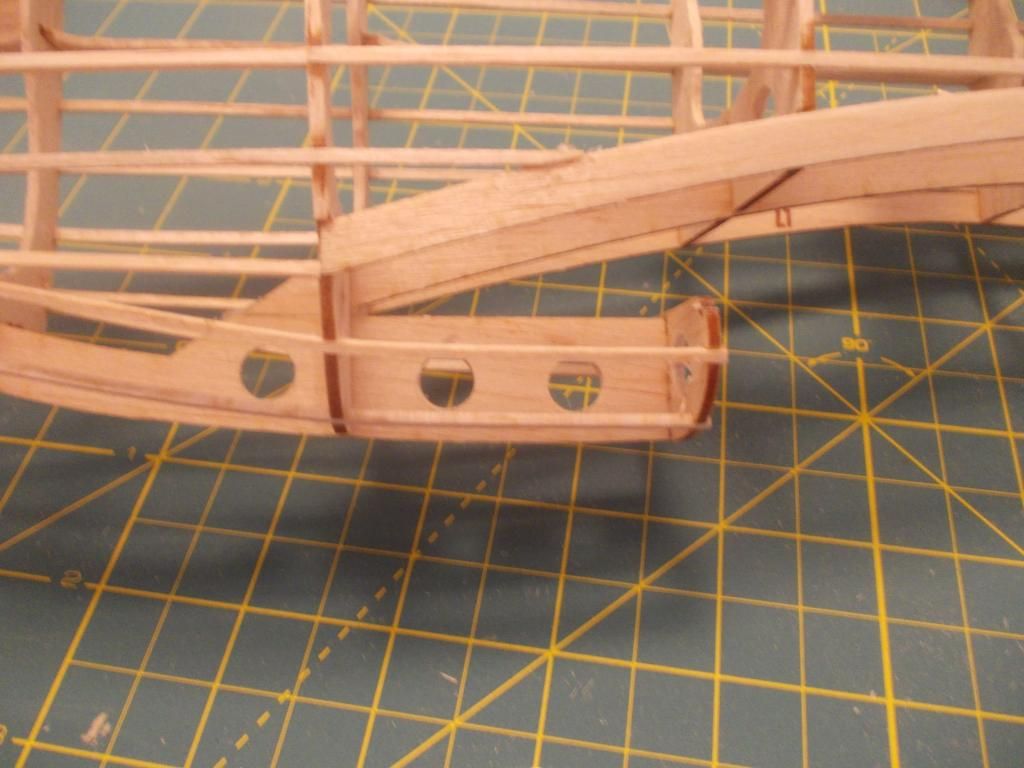
Some more "lightening holes"

Image
The fuselage is almost complete... Need to "Fill In" between B-1 and B-0 with balsa scrape for strength...

I bought some balsa sheets at the LHS. If you do not order "Contest Balsa". AT LEAST bring your scale to the LHS there 1/16 sheets varied from 7 to 15 Grams. I bought 6 sheets... 2=7g, 2=8g, 2=9g All the rest at the hobby shop were double digits!

Plan to start cutting NEW ribs! Mitch :D

:!: NOTE :!: Balsa is referred to by weight, ie. 4lb, 7lb etc. This refers to 1 cubic foot of balsa. In Don Ross' book he has a chart to convert specific size sheets of balsa to that datum. When I find his book (my house is... shall we say "comfortably cluttered") I will figure out what I have. For now I marked on the sticker on each sheet what they weighed. I start cutting the sheets from the clear end.
Mitch
 
Posts: 1347
Joined: Mon Aug 22, 2011 9:16 pm
Location: Kent, WA

Re: 2 Mustangs in 2 Weeks

Postby Mitch » Sun Aug 18, 2013 6:05 pm

Just thought I would check up on my own improvements in building...
Airacobra Frame weighs 17g, Mustang is 16g. Not much lighter but there is a lot more wood in the Mustang's Frame!
Image
I will get back to the Airacobra but do NOT want to fly her to destruction as she is OOP! :( The 'Stang I can replace for 10 bucks worth of parts! :D

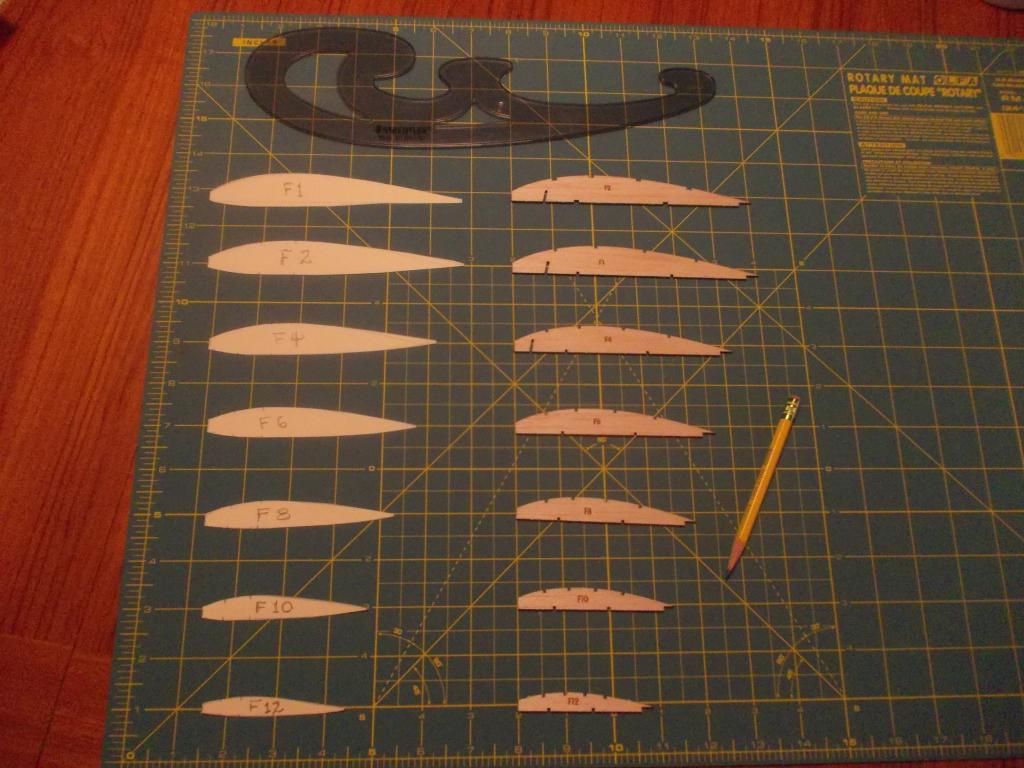
So I sent in a request to the Drafting team to come up with a new wing Airfoil...
Image
I have the first set of templates on card stock. I will cut out ONE set on HEAVY balsa and DRY assemble with Guillow stingers (HEY... they gotta be good for something!) Do some final adjustments and sanding, then cut out 2 sets on LIGHT balsa.

I plan to make my wing removable as that is what I expect may break first. (Hope NOT) Better yet I can build different wings and use my P-51 (NO NAME YET) as a test bed for new wing designs! :D

Mitch

PS: Any suggestions on a name for my new "girl"... "Miss B. Haven" is already taken...
Mitch
 
Posts: 1347
Joined: Mon Aug 22, 2011 9:16 pm
Location: Kent, WA

Re: 2 Mustangs in 2 Weeks

Postby Wildpig » Sun Aug 18, 2013 8:52 pm

I am really intrigued by your airfoil selection for the Guillow P-51, especially since you have built and flown a stock version of the same model. I have read airfoil theory for model airplanes but, actual flight test is the "proof in the pudding".

Name the P-51, hhmmm.....
Wildpig
 
Posts: 529
Joined: Thu Jan 26, 2012 9:41 am

Re: 2 Mustangs in 2 Weeks

Postby Mitch » Sun Aug 18, 2013 10:15 pm

Thanks for the question PIG,

It goes back to my building of the Me109 thread. There was some discussion on Airfoil Shape. I knew then I wanted my next Me109 to have a new airfoil... ugh hum...That Me109 got 3rd place in a National Flight Contest...

Fast Forward... "Miss B. Haven" flew great (I thought) at my school yard... In the contest not so good. I believe these Guillow kits are made to be EASY to build for new comers to the hobby. I have built a few other model (YES there are other companies out there) and am discovering different airfoil shapes.

Looking at the Easy Built Plans and wing ribs... I thought "This is what I NEED to do!"

So I used the idea of the Easy Built Airfoil. I used the Guillow ribs as templates (they need to fit my frame) and made adjustments to the shape to simulate the Easy Built Kit.

I hope that answers your question. Mitch :D

UPDATE: I had to help my daughter... I'm back... Here are some pics of other wing I have built...
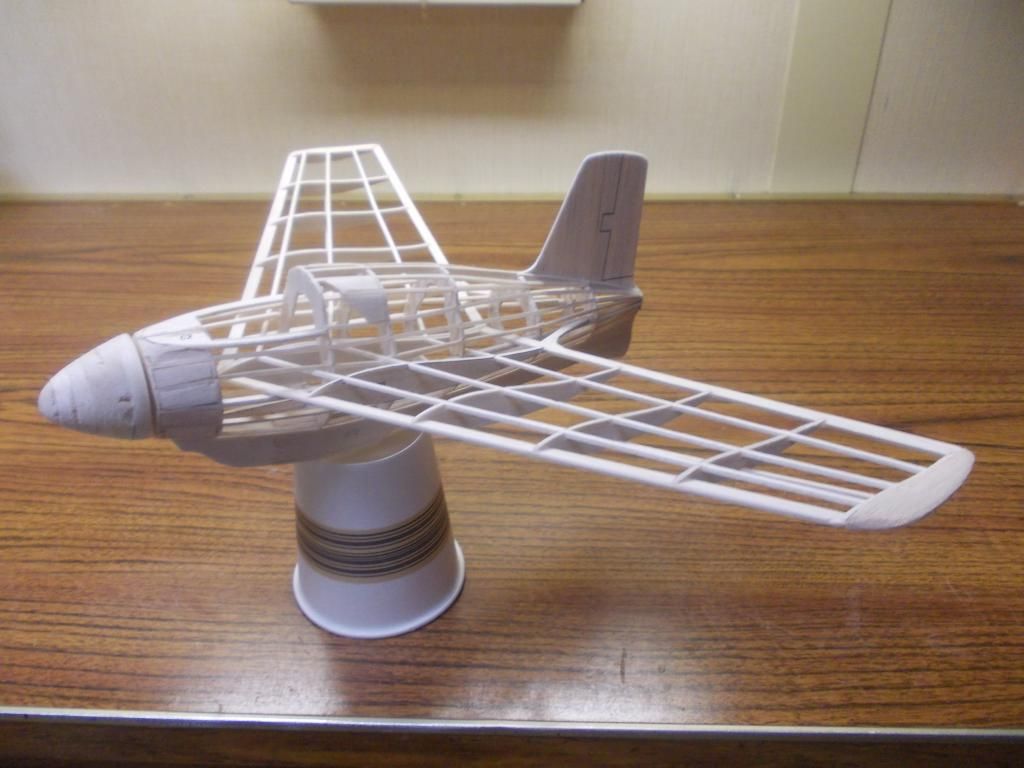
:!: WARNING :!: The following picture is not a Guillows model:
Image
On this model the LE is inserted in the ribs. The TE is added on to the rib.
Here is a pic of the complete skeleton:
Image
For those of you who may not know... This is an Me 163 Komet, Rocket powered interceptor that flew in combat in WWII
The model is not finished, but will accept a rocket engine OR be catapult launched as a glider.

The point of these pictures is to study the Airfoil Shape...

Back to Guillows P-51. My plan is for the LE to be as Guillows. The TE, I plan to insert the TE as per the LE of the Komet. I plan to build the wing with some washout built into the wing. That way I do not have to force it latter.

As for... 2 Mustangs in 2 weeks... well I have to work ALL next week AND I used up ALL the contest balsa from my Easy Built kit and put it in Guillows...AND I DID NOT PLAN TO DESIGN AND BUILD A NEW CUSTOM WING... SOOOO... I hope you do not mind I plan to shelve the Easy Built and KEEP GOING on Guillows as I have a WWII combat event to enter and I need only 1 PLANE!

Mitch :D

PS... I am NOT building these Guillow Kits to FLY... I am building them to WIN contests!!! :mrgreen: Mitch
Mitch
 
Posts: 1347
Joined: Mon Aug 22, 2011 9:16 pm
Location: Kent, WA

Re: 2 Mustangs in 2 Weeks

Postby Mitch » Mon Aug 19, 2013 10:07 am

Hey Guys... Building a NEW wing design is not as easy as I thought... I have come up with Plan B

Plan B:

1. Build the Guillow wing (even number ribs only)
2. Drop 1 stinger on top (the after most one)
3. Drop both stringers on bottom
4. ADD the bottom shape of the airfoil I want to the completed wing

This wing should be flexible enough to set in the washout.
It will be much easier to build a wing with FLAT bottom ribs.

I am starting to feel the time crunch... I have to work this week in the office...

Mitch
Mitch
 
Posts: 1347
Joined: Mon Aug 22, 2011 9:16 pm
Location: Kent, WA

Re: 2 Mustangs in 2 Weeks

Postby Wildpig » Mon Aug 19, 2013 11:33 am

Mitch wrote:4. ADD the bottom shape of the airfoil I want to the completed wing

Mitch


Interesting approach to the problem. I think that will work out o.k.
Wildpig
 
Posts: 529
Joined: Thu Jan 26, 2012 9:41 am

Re: 2 Mustangs in 2 Weeks

Postby Mitch » Mon Aug 19, 2013 10:25 pm

Okay, here is the center section of the NEW wing: (to be built at a latter date)
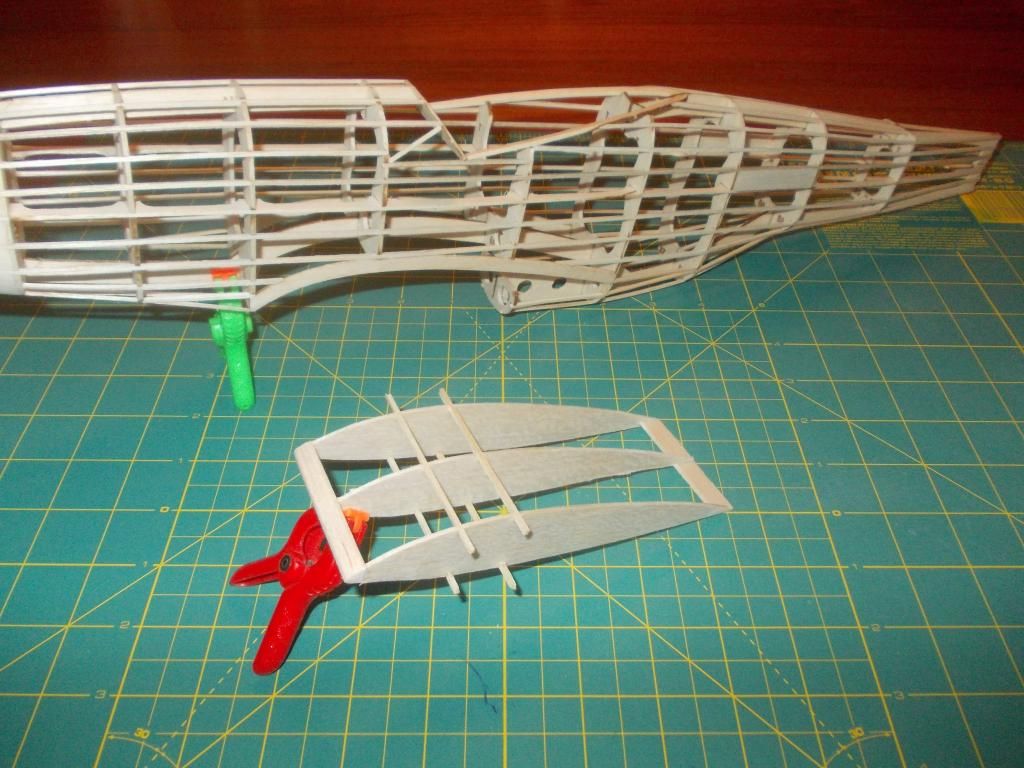
Image
The F1 has a bit of a different shape to fit in above the air scoop.
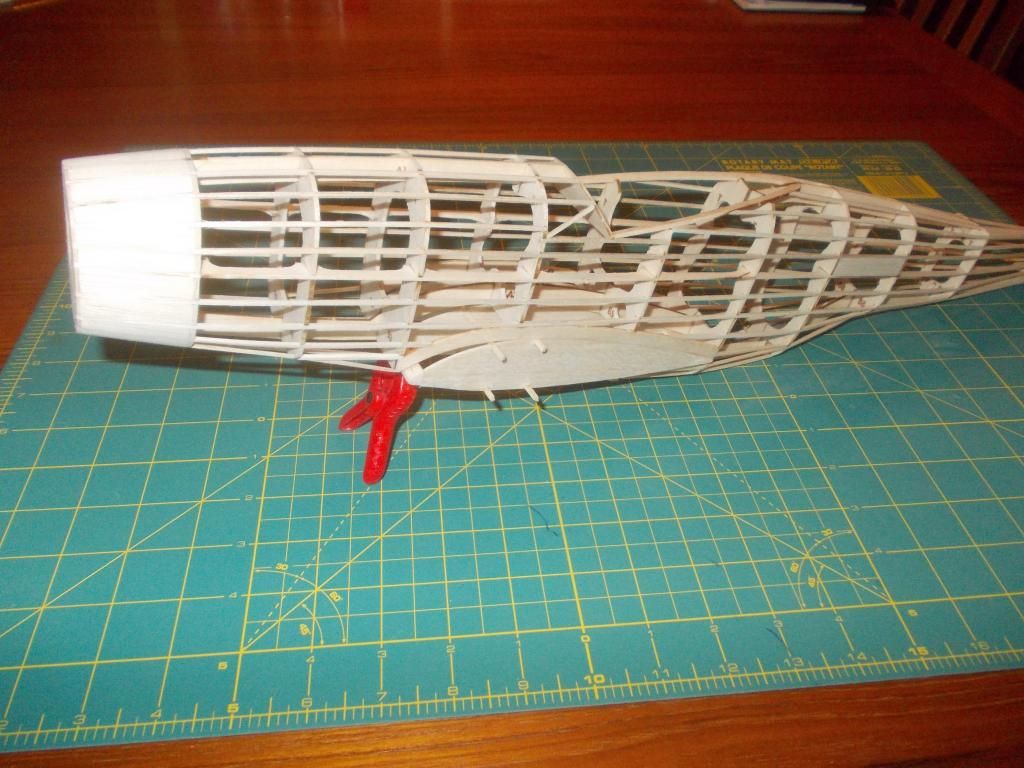
Image
Took a bit of trimming to make fit. The fuselage gained 2 grams with the balsa front end... now 18 grams.

It is NOT so easy to set up ribs without a flat bottom. The ones in the kits have a little tabs at the back that gets trimmed off afterwards. I was not looking forward to making the new wing. So this idea will be on hold... Soooo...

I decided to go the GUILLOWS way with some modifications.
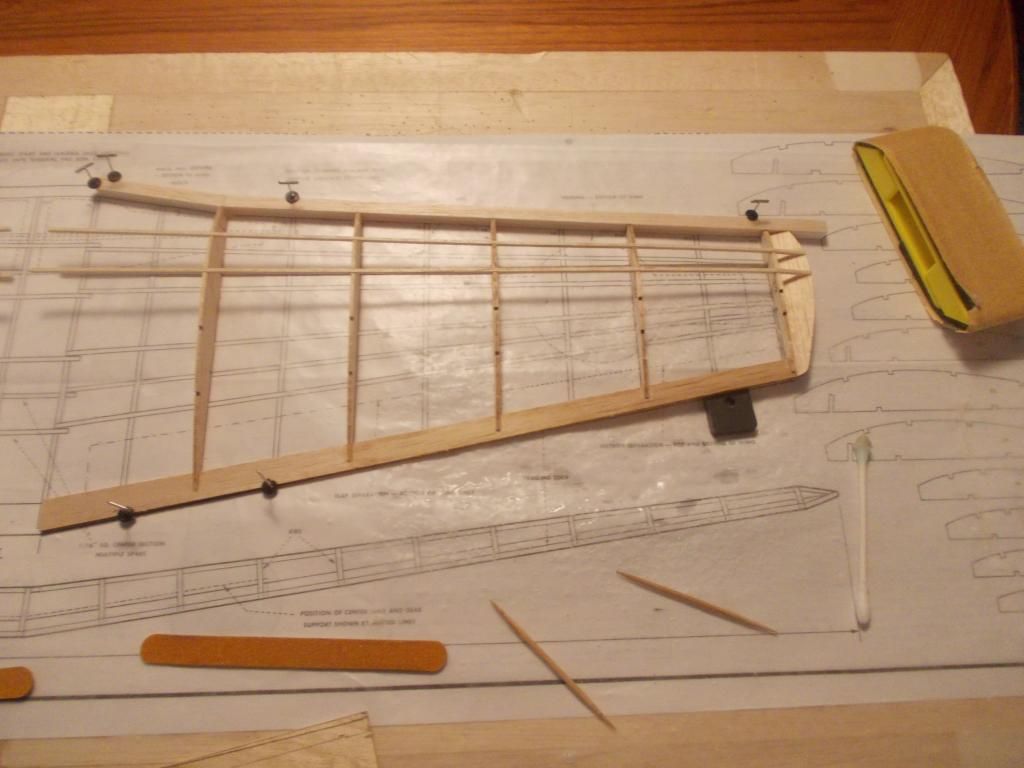
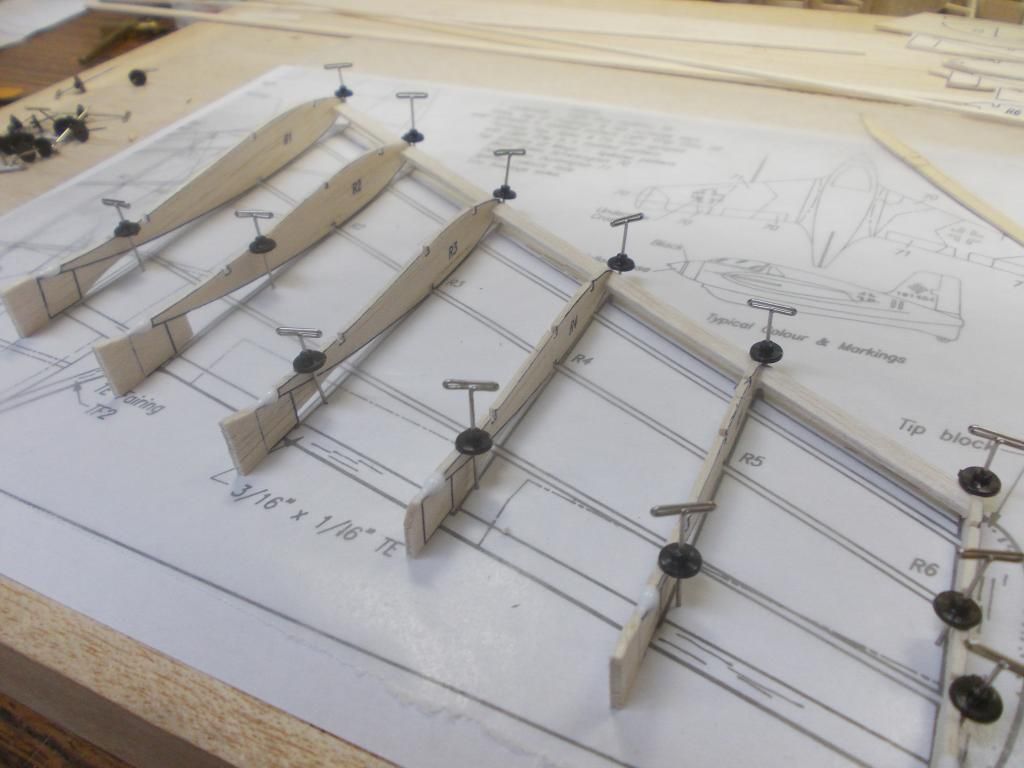
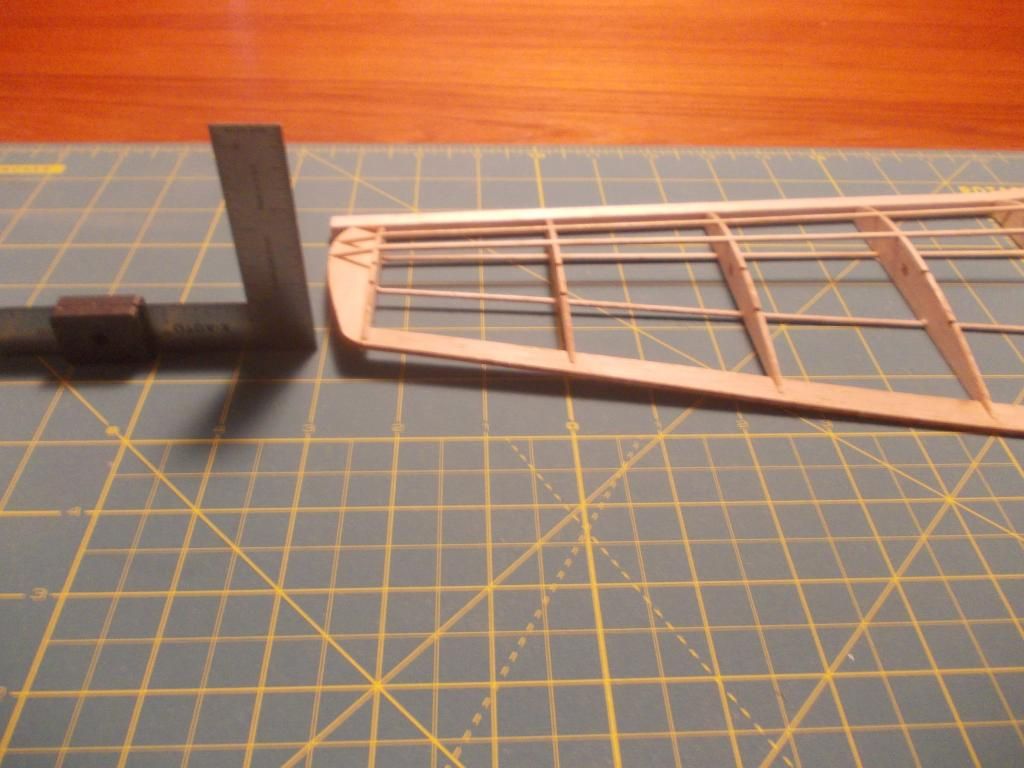
Image
The wings were built flat on the table I decided to leave off only the top back two spars. I built the wing on the fwd bottom spar.
Image
After wing was dry I removed. wet the TE with Ammonia / water, and set in the washout. After that was dry I installed the AFT bottom spar.
My thinking is the wing has the washout set in and now the spar will flow with that to help preserve that washout.

:idea: CHANGE From plans I will NOT be installing the after 2 spars on the top of the wing. My idea is that the wing is strong enough (for rubber power). Moreover, I want a smooth surface on the top of that wing.

So with the port and stbd wing off the plans, now I build the center section.
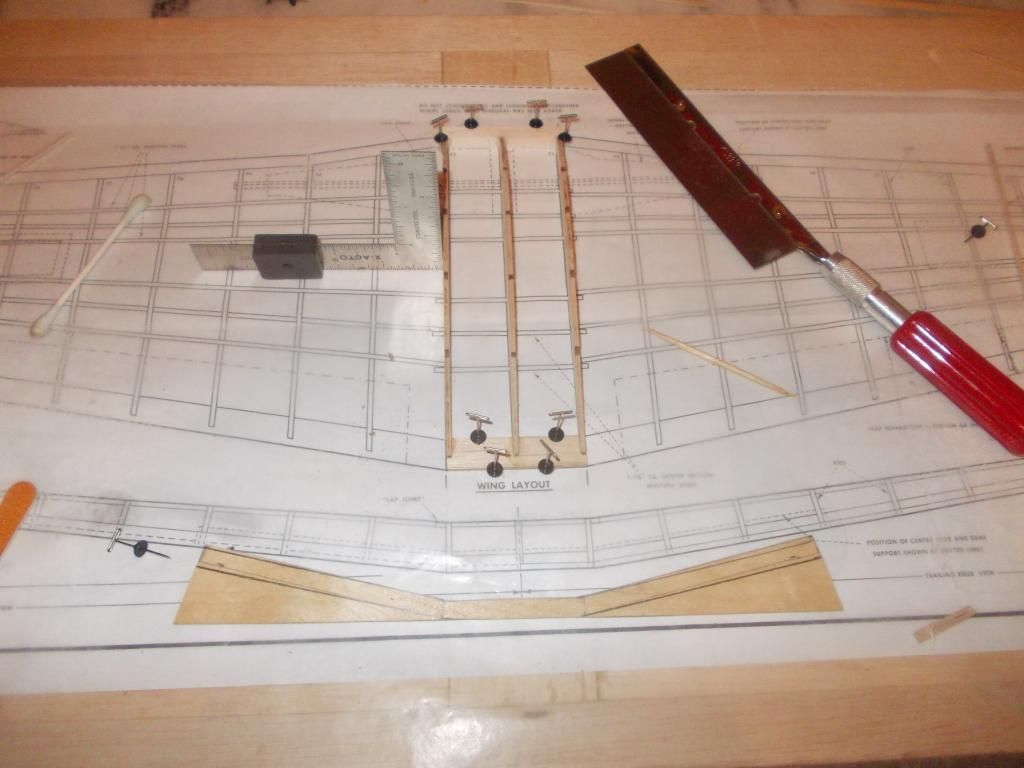
Image
Making sure everything is square. There are NO spars in yet I will add all of those when the two sides are joined.
:!: IMPORTANT The LE is a bit oversized to allow me to trim to get the proper fit to the dihedral I want. The plans show just under 2 inches.
:idea: Change FAC rules allow to the bottom of the canopy. I will have about 3 inches of dihedral!
I made a brace out of plywood. I will use this as a jig when gluing the wing, then trim and install.

:idea: Change When all that is done I will add the rib bottoms to get the airfoil shape I want. This will cause those bottom spars to be internal and give me a smooth undersurface also!


So I will trim and sand the wing tonight. In the morning I should assemble the wing and glue up... After work it will be dry and ready for finishing!

Phew! All in a day's work... I hope to have this model flight ready by the end of the week so I can do some glide tests and trim flights! :D Mitch
Mitch
 
Posts: 1347
Joined: Mon Aug 22, 2011 9:16 pm
Location: Kent, WA

Re: 2 Mustangs in 2 Weeks

Postby birdbuster » Tue Aug 20, 2013 1:09 pm

Nice 8)
birdbuster
 
Posts: 21
Joined: Fri Nov 30, 2012 11:57 am

Re: 2 Mustangs in 2 Weeks

Postby Mitch » Tue Aug 20, 2013 7:44 pm

I set the wing this morning... After work I pulled off the board, sanded the LE, and set in the connecting spars...

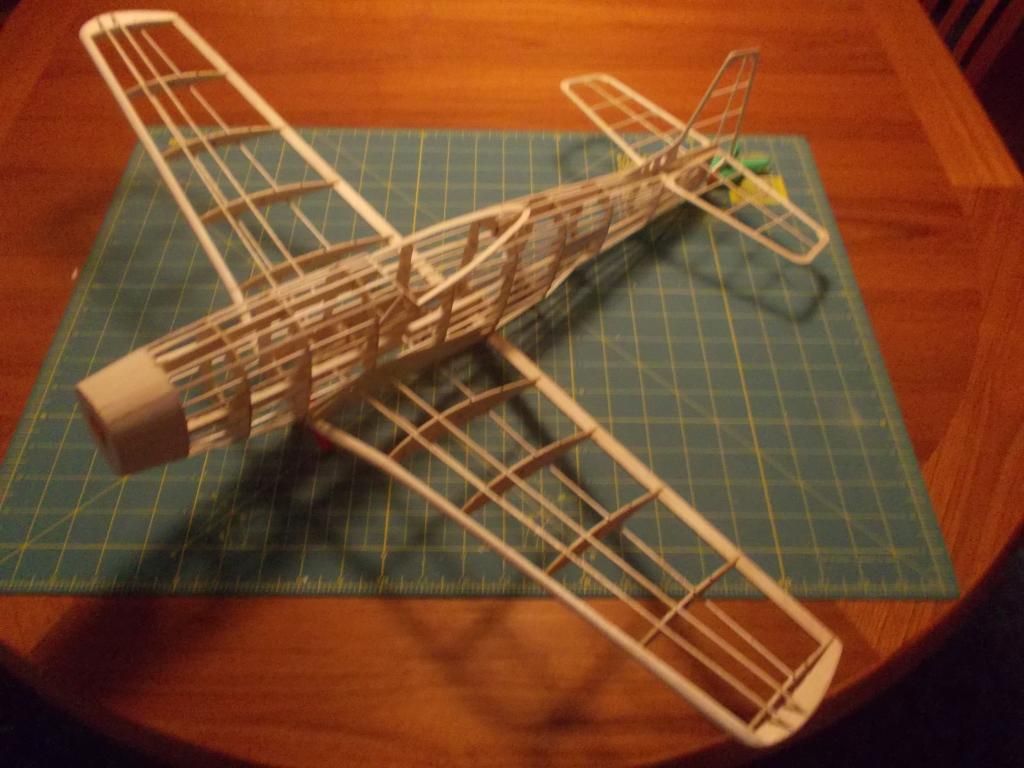
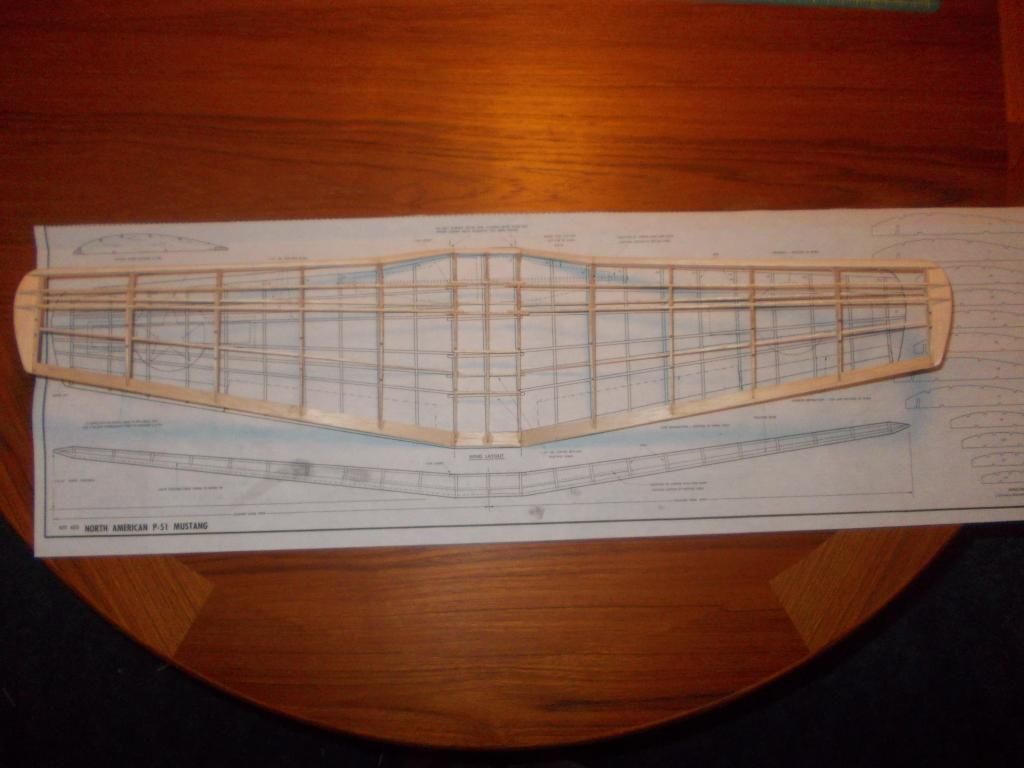
Here is the finished Skeleton:
Image
She weighs in at 32 grams at this point. Fuselage = 18, wing = 12, tail = 2.

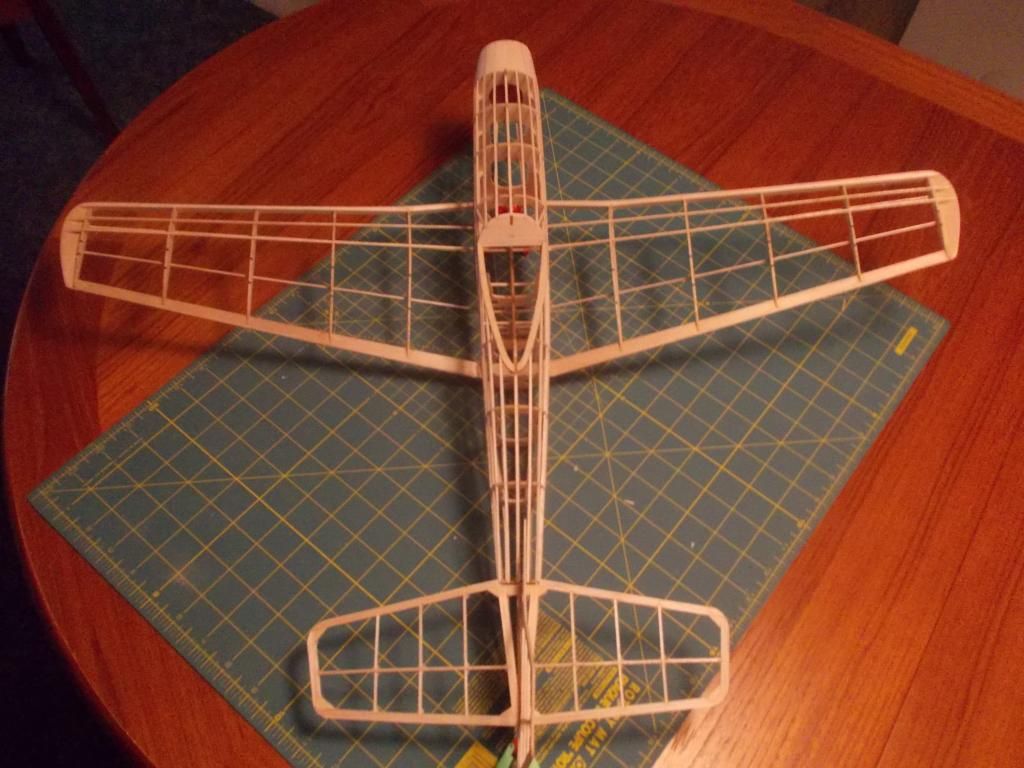
Here is a top view:
Image
The stabilizer is oversized...

What do you think? Too much? My stock Mustang flew okay. I may rebuild the tail again standard size with lighter wood than Guillows.
When I cover the tail, if it ends up like a potato chip I will make a new one. I might make another one anyway to have a few spares with me if they get damaged. I'll just tack on with a dot of glue so I can remove it without much problem.

One more problem... The wing has a bit too much dihedral. I will try to pull some of it out with the brace when installed.

Still waiting on a shipment of Silver paper from Easy Built. Mitch
Mitch
 
Posts: 1347
Joined: Mon Aug 22, 2011 9:16 pm
Location: Kent, WA

Re: 2 Mustangs in 2 Weeks

Postby SpiceMan » Tue Aug 20, 2013 8:37 pm

WOW Mitch ... you really COOK when it comes to building these birds :!:
Looking SUPURB :!: :!: :!:
SpiceMan
 
Posts: 110
Joined: Wed Jul 31, 2013 8:52 am
Location: Phoenix, AZ

Re: 2 Mustangs in 2 Weeks

Postby Mitch » Tue Aug 20, 2013 11:05 pm

Thanks... Just got back home and built up another tail. (Stabilizer) I'll make another Rudder in the morning.

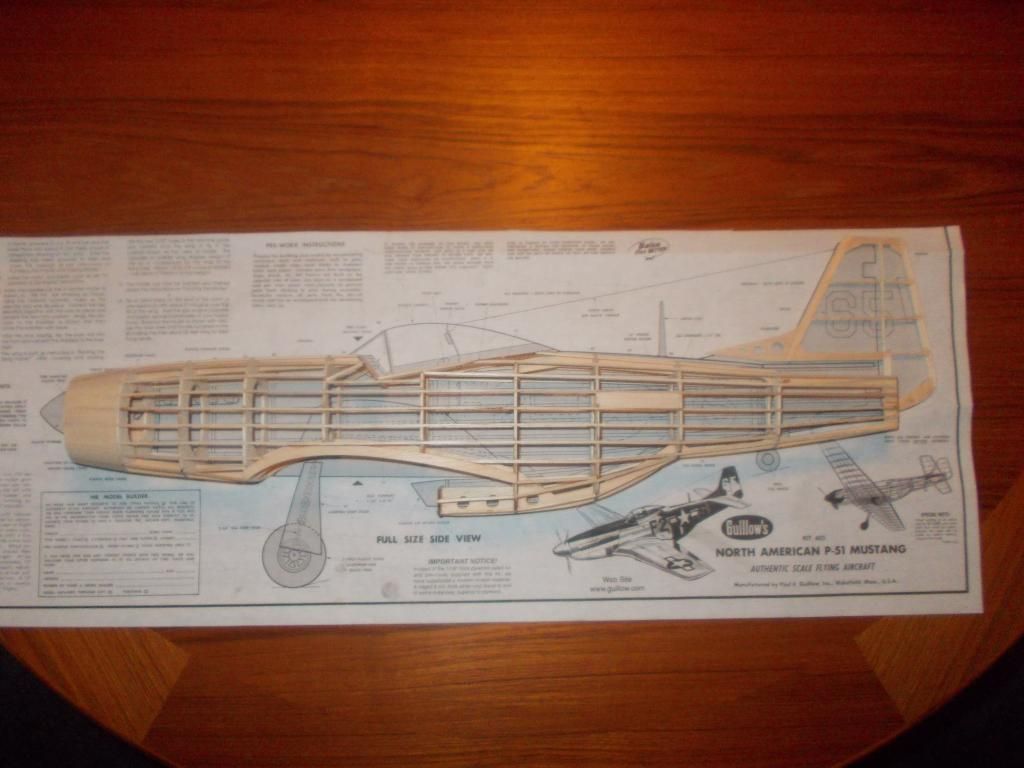
Here are a few pic on how things size up to the Guillows "Blueprints"
Image
No plastic cowl. I will just make a nose block that comes on / off easy.
Image
Wing with MORE dihedral and less spars, and a built-in washout.
Image
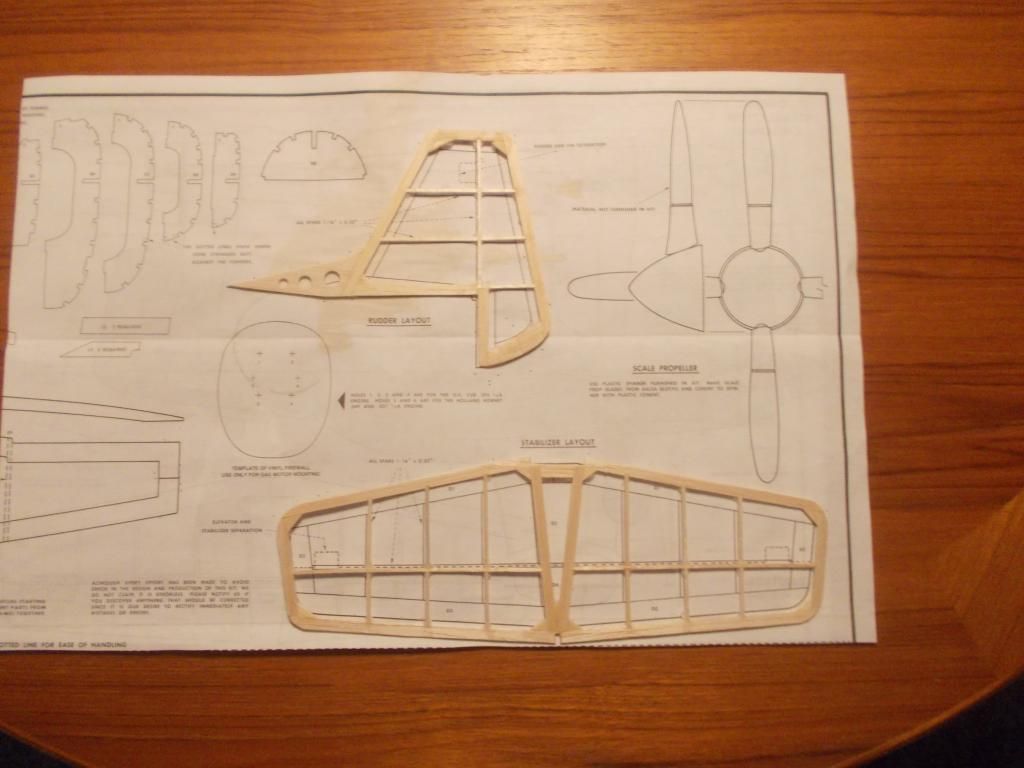
Tails built lighter and Stabilizer LARGER.

I am not so sure I like the larger tail, and it is thin, 1/16. It may end up like a potato chip so I cut some 3/32 strips and built another
Image
This time I followed the outline on the plans...

I will have 3 sets of tails, I chose what I like best and bring the other two as spares! Getting ready for a WWII COMBAT Mission!

Mitch
Mitch
 
Posts: 1347
Joined: Mon Aug 22, 2011 9:16 pm
Location: Kent, WA

Re: 2 Mustangs in 2 Weeks

Postby Mitch » Wed Aug 21, 2013 7:20 pm

Okay Guys... One week to go... It's getting into CRUNCH time...

I have 3 tails built up. I will cover those tomorrow... in RED! Still waiting for the shipment of "SILVER" paper! :x

I plan to "build up" the wing ribs to come up with a "CLARK Y" airfoil. I think is the closest to what is there now. I will add the lightest 1/16 balsa I just bought at the hobby shop. When those dry, I will sand to shape.

There is one more challenge... make the wing "removable". The TE will "lock" into the rear fuselage / air scoop. I was planning on installing 2 rare earth magnets into the LE and 2 into the fuselage. So the wing will just "POP" in and out. I hate to add more weight, but it will be low and fwd of the CG.

:!: If anyone has a better idea, let me know.

ONE more thing... I "pulled down" the dihedral with the plywood wing brace... I think I will pass inspection. :?

I am also planning on a new finish for "Miss Scarlet" I just thought of that... from the game of "CLUE" I have a spray finish that should be lighter than dope. Also the Silver paper seems to be already "sealed".

Mitch :D

PS: There are other website forums, but I am staying with you guys because... we are "TEAM GUILLOW'S" !

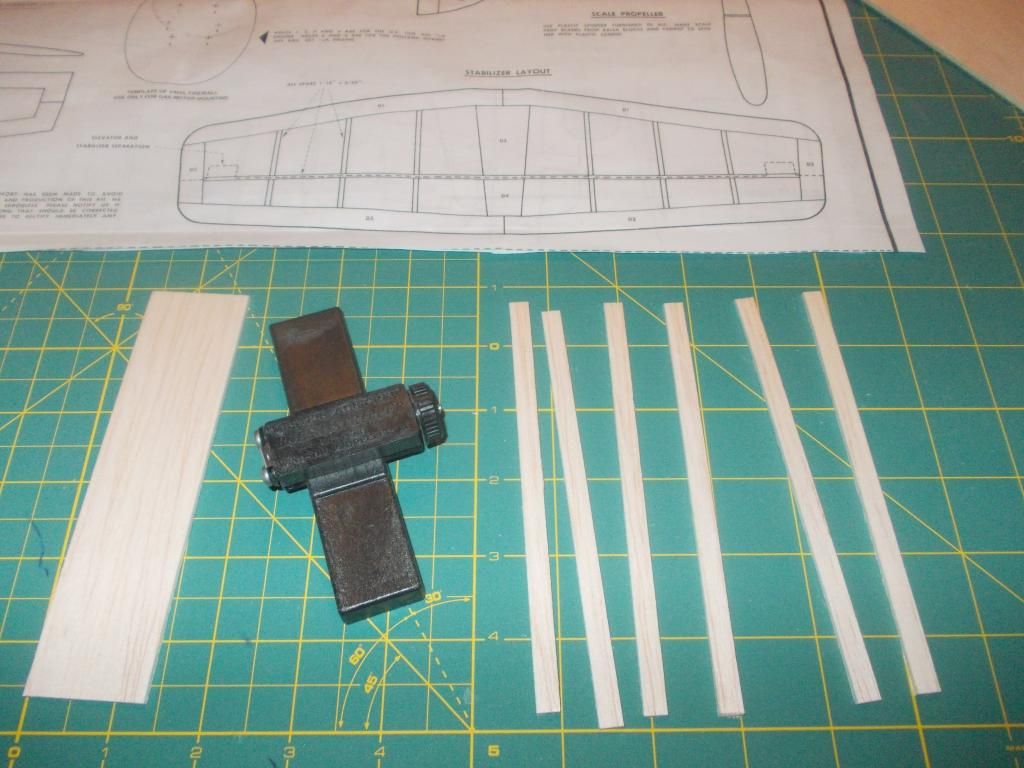
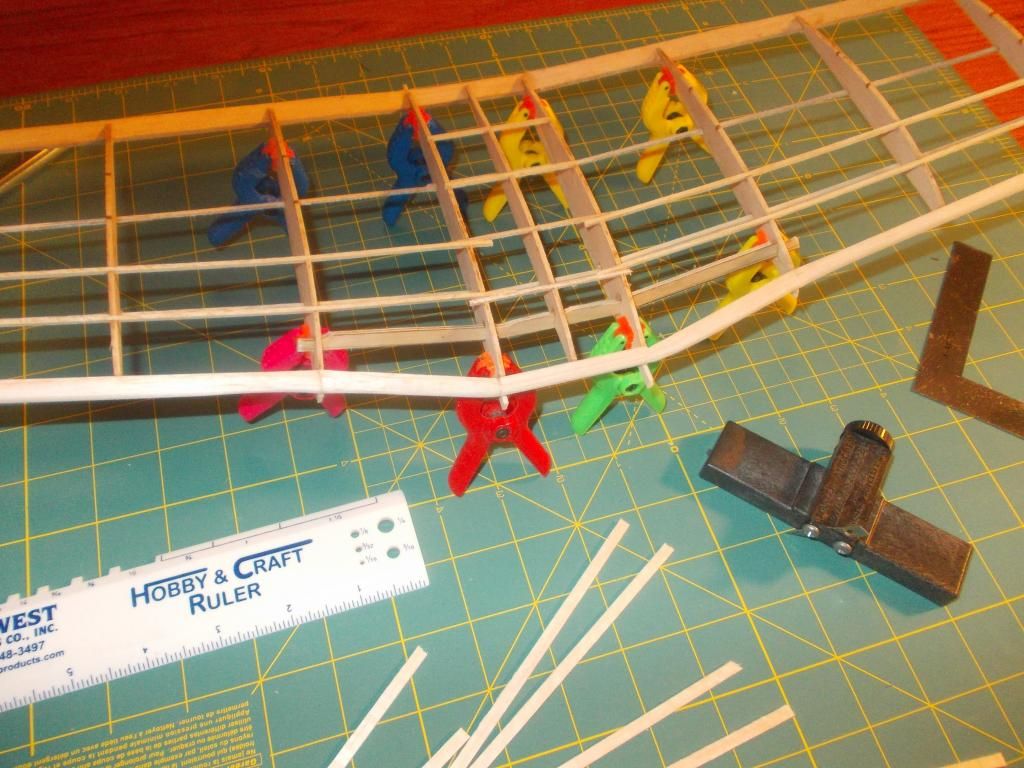
UPDATE:
Slicing the bottoms with my balsa stripper... $4.95 ordered at my LHS.
Image

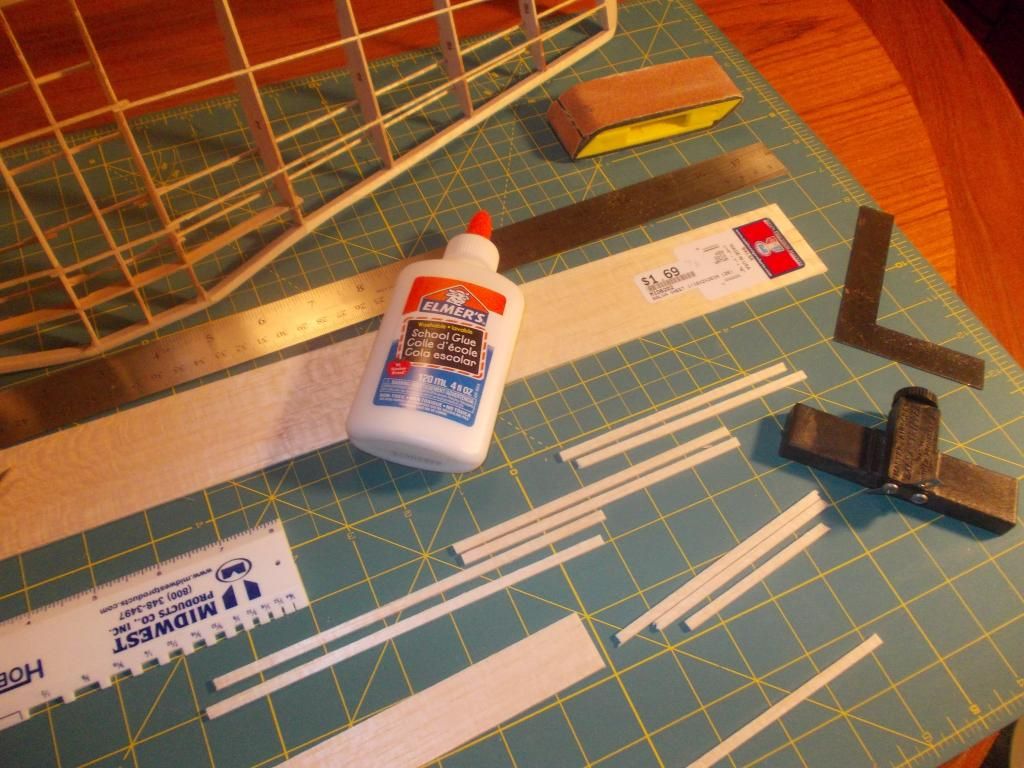
Adding to bottom of wing:
Image
The glue will stick a little bit to the plastic clamps, but you can "wiggle" them carefully and set them free!

I am liking this idea... I am seeing all the little imperfection on the bottom of the wing. Hopefully this will make her bottom as "Smooth as a Baby"! :D
Mitch
 
Posts: 1347
Joined: Mon Aug 22, 2011 9:16 pm
Location: Kent, WA

Re: 2 Mustangs in 2 Weeks

Postby SpiceMan » Thu Aug 22, 2013 12:57 am

Hi Mitch ... I'm thinking that your Rare Earth Magnet idea is on the right track.
I've used these in the RC world. They're small, and have a CRAZY STRONG grip :!:
I got them at Harbor Freight. They're real cheap too. :lol:

Harbor Freight
KENT, WA #00190
18128 EAST VALLEY HWY
KENT,WA 98032
425-251-3107

IMG_0798.JPG
You do not have the required permissions to view the files attached to this post.
SpiceMan
 
Posts: 110
Joined: Wed Jul 31, 2013 8:52 am
Location: Phoenix, AZ

PreviousNext

Return to General Building Questions

Who is online

Users browsing this forum: No registered users and 20 guests

cron